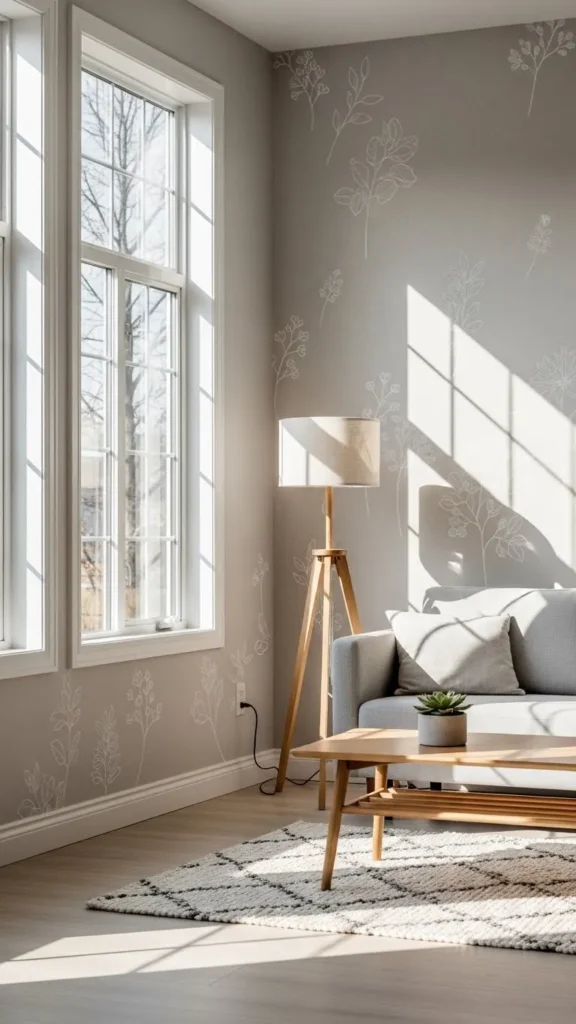
Wall decals have become a simple way to update a space without tools, paint, or long-term commitment. Renters love them. Busy homeowners appreciate how fast they work. From playful designs to calm, modern patterns, wall decals help shape mood and style using simple peel-and-stick steps. This guide shares stylish wall decal ideas that work in bedrooms, living rooms, nurseries, offices, and small spaces. Each option focuses on easy placement, affordable materials, and realistic DIY tips that fit everyday homes.
1. Minimal Line Art Faces
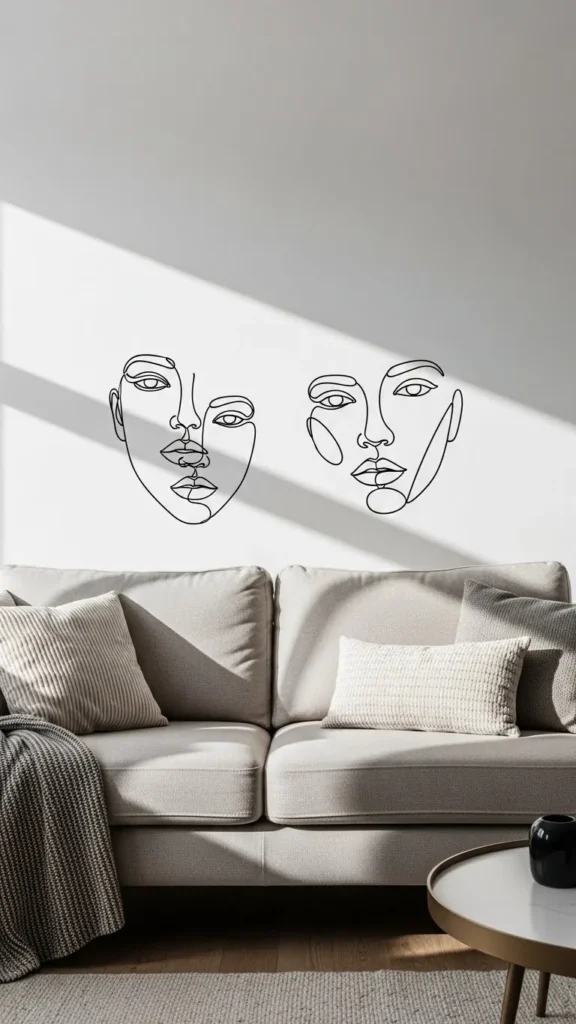
Minimal line art faces bring personality without crowding a wall. These decals use thin strokes and open space, making them ideal for small rooms or quiet corners. They work well above sofas, beds, or desks. Choose matte finishes for a painted-on feel.
Budget tip: Print line designs on removable vinyl sheets using a home printer and cut them carefully. This keeps costs low.
DIY idea: Arrange two or three faces in a loose cluster instead of a straight line. It feels more relaxed and less staged. Keep spacing uneven for a casual look.
Stick to simple colors like black, charcoal, or soft beige. Bold shades may feel heavy in tight areas. Smooth walls work best, but lightly textured walls can still hold decals if pressed firmly with a soft cloth.
2. Botanical Leaf Silhouettes
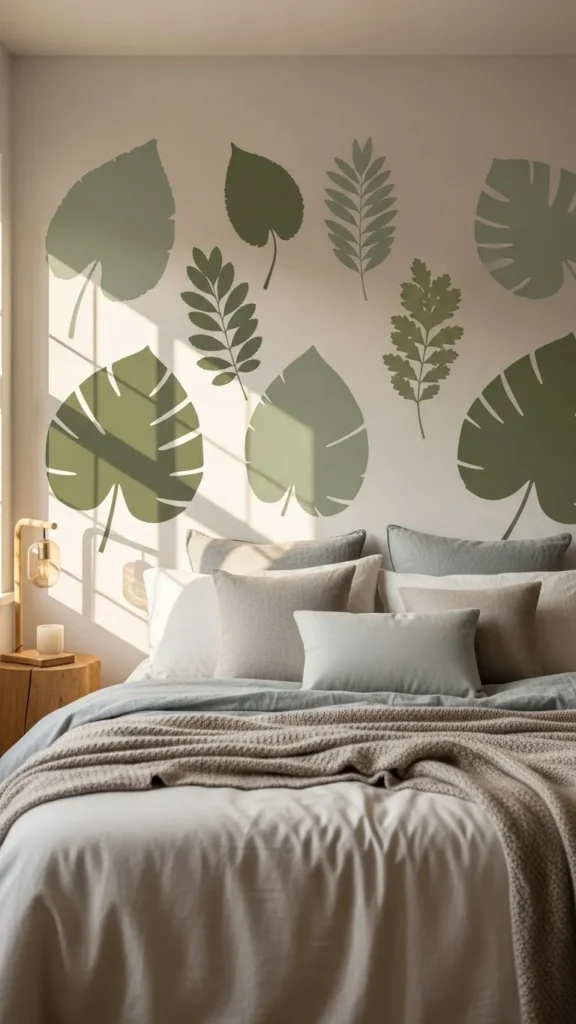
Botanical leaf decals bring nature indoors without plants to maintain. Large leaf shapes add movement and warmth to blank walls. They suit bedrooms, reading nooks, and calm living spaces.
Budget tip: Choose single-color decals rather than layered prints. They cost less and still look polished.
DIY idea: Place leaves climbing upward from floor level or spreading gently behind a headboard. This creates a natural flow without strict symmetry.
Muted greens, clay tones, or soft gray work well with neutral furniture. Avoid overly shiny finishes since they reflect light unevenly.
Before sticking, lay decals on the floor to test spacing. This prevents awkward gaps later. Peel slowly and smooth outward with your hand to avoid air bubbles.
3. Abstract Arch Shapes
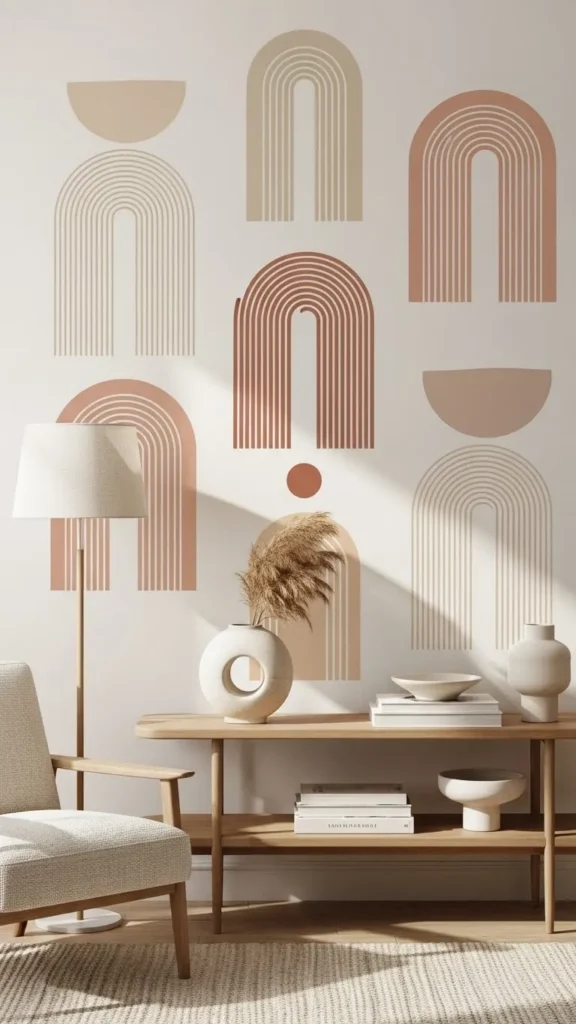
Abstract arch decals add structure while staying soft. Rounded shapes feel relaxed and modern at the same time. They work well behind sofas, sideboards, or beds.
Budget tip: Use simple arch outlines instead of filled shapes. They use less material and cost less.
DIY idea: Layer two arches slightly offset to create depth. Stick with similar tones to keep the look calm.
Warm neutrals like sand, terracotta, or soft taupe blend well with wood furniture. Avoid placing arches too high; eye-level placement feels more balanced.
Use a level or painter’s tape as a guide before sticking. This helps keep curves aligned and prevents uneven spacing.
4. Scattered Polka Dots
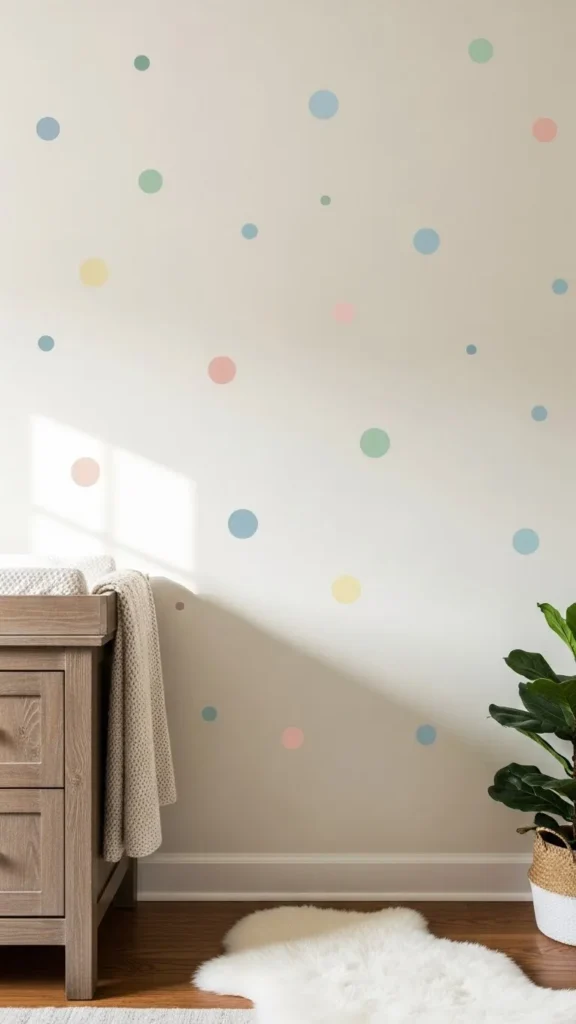
Polka dot decals are playful and flexible. They suit nurseries, kids’ rooms, and creative spaces. Small dots add texture without overpowering the room.
Budget tip: Buy dot decals in bulk packs. Leftovers can be used on furniture or storage bins.
DIY idea: Scatter dots more densely in one area and fade them out toward the edges. This adds movement.
Stick to soft colors like blush, sage, or warm gray for a calmer feel. Bright shades work better in small doses.
Apply dots randomly rather than in rows. This avoids a wallpaper look and keeps the wall relaxed. Press firmly around edges to help them stick longer.
5. World Map Silhouettes
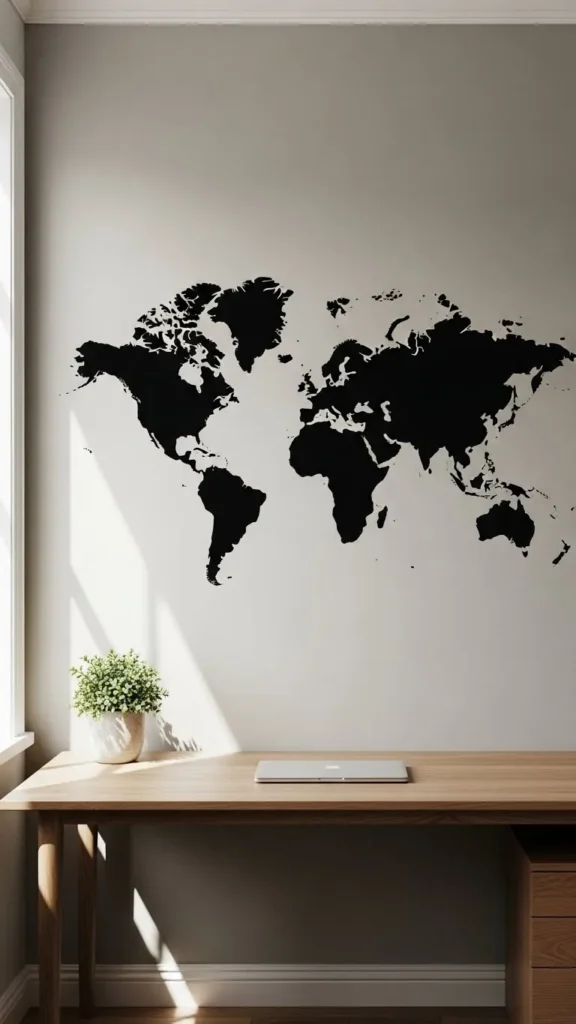
World map decals add interest without heavy detail. Simple silhouettes suit offices, study areas, or teen rooms. They spark curiosity without clutter.
Budget tip: Choose outline-style maps rather than filled versions. They cost less and feel lighter.
DIY idea: Add small removable dots to mark favorite places. This personal touch costs very little.
Keep colors neutral so the map blends into the wall. Matte finishes reduce glare from lighting.
Measure wall width before buying. Oversized maps can overwhelm small rooms. Start sticking from the center and move outward to keep proportions balanced.
6. Floral Corner Accents
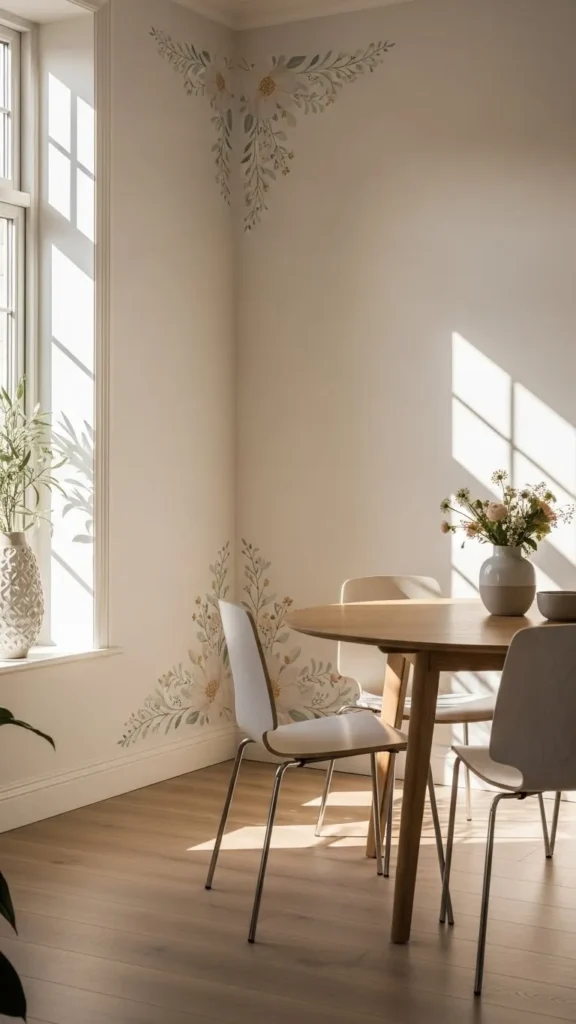
Floral corner decals frame spaces gently. They soften sharp edges and guide the eye upward. These work well in dining areas, entryways, or bedrooms.
Budget tip: Use corner sets instead of full-wall florals. They cost less and still make an impact.
DIY idea: Place decals only in two corners rather than all four. This keeps the look open.
Stick with simple floral outlines or small clusters. Dense patterns may feel heavy.
Clean the wall before applying. Corners collect dust, which can weaken adhesion. Smooth decals slowly to match the angle of the wall.
7. Inspirational Symbol Icons
Symbol decals like suns, moons, or stars add meaning without words. They work well in offices, yoga spaces, or quiet bedrooms.
Budget tip: Small symbol packs are affordable and often reusable.
DIY idea: Arrange symbols in a loose vertical line to guide the eye upward.
Choose simple shapes with clean edges. Overly detailed designs may peel faster.
Space symbols evenly but not perfectly. Slight variation feels more natural. Use a soft cloth to smooth edges after placement.
8. Geometric Triangle Patterns
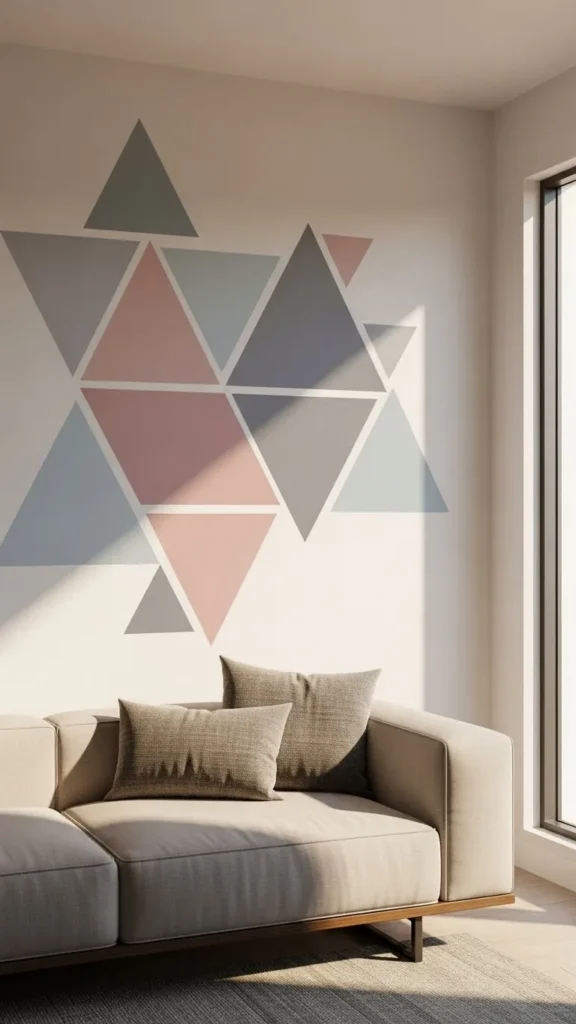
Triangle decals add energy while staying structured. They suit modern homes and creative spaces.
Budget tip: Stick to two colors only. This keeps costs down and avoids visual clutter.
DIY idea: Build a pattern that grows outward from a corner.
Use painter’s tape as a guide for straight lines. Remove tape once decals are set.
Matte finishes work best. Glossy shapes can look uneven under lighting.
9. Soft Rainbow Arches
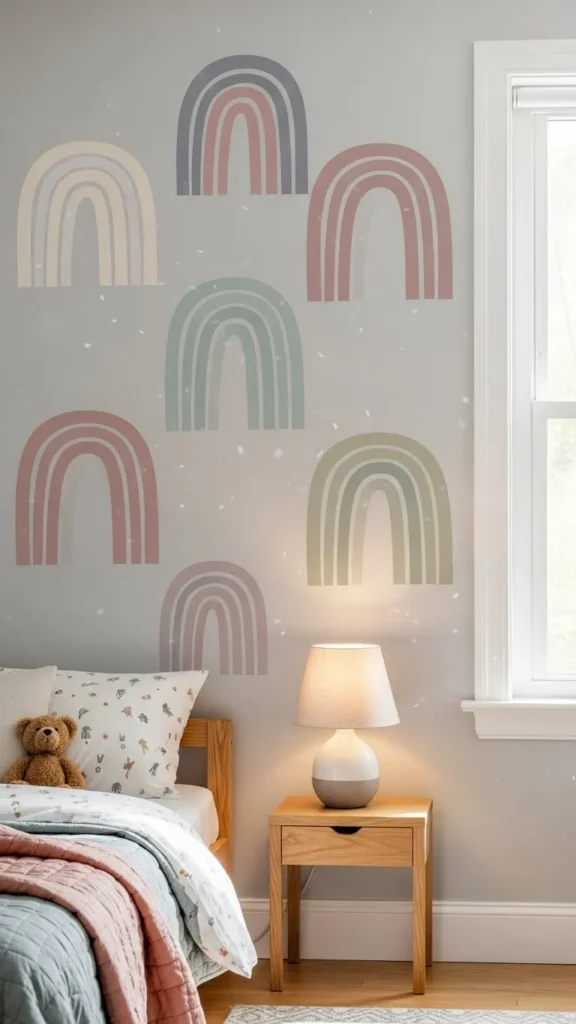
Rainbow arches feel warm and gentle when done in muted tones. Perfect for kids’ rooms or play areas.
Budget tip: Choose half-rainbows instead of full ones. They use less space and material.
DIY idea: Place arches low on the wall near beds or shelves.
Stick to earthy pastels rather than bright shades. This keeps the room calm.
Apply each arch slowly to avoid stretching vinyl.
10. Textured Brushstroke Decals
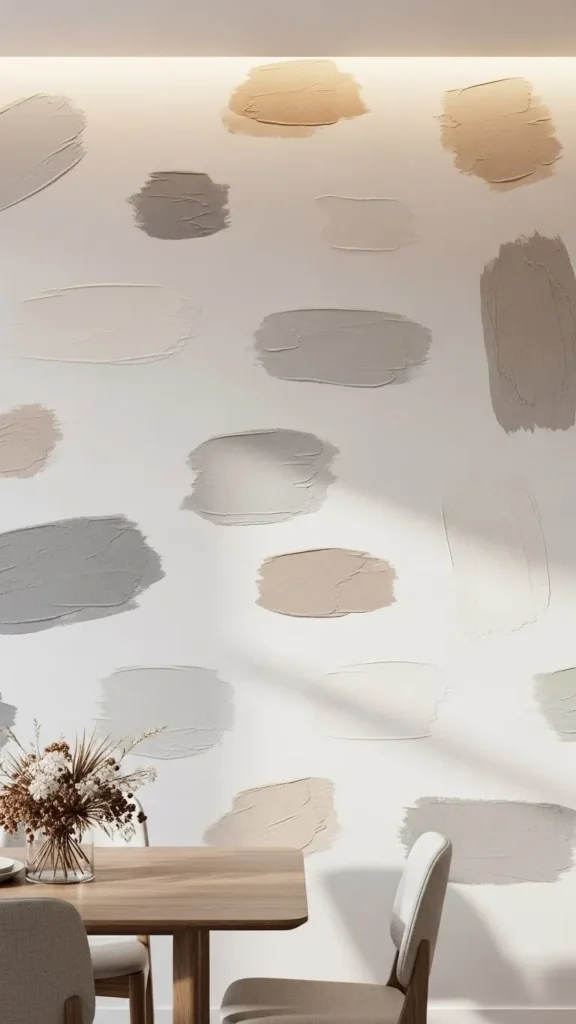
Brushstroke decals mimic painted art without mess. They suit dining rooms and hallways.
Budget tip: Single large strokes cost less than full murals.
DIY idea: Layer strokes slightly for depth.
Neutral tones blend easily with decor.
Press edges firmly since brush shapes often have uneven outlines.
11. Mountain Line Landscapes
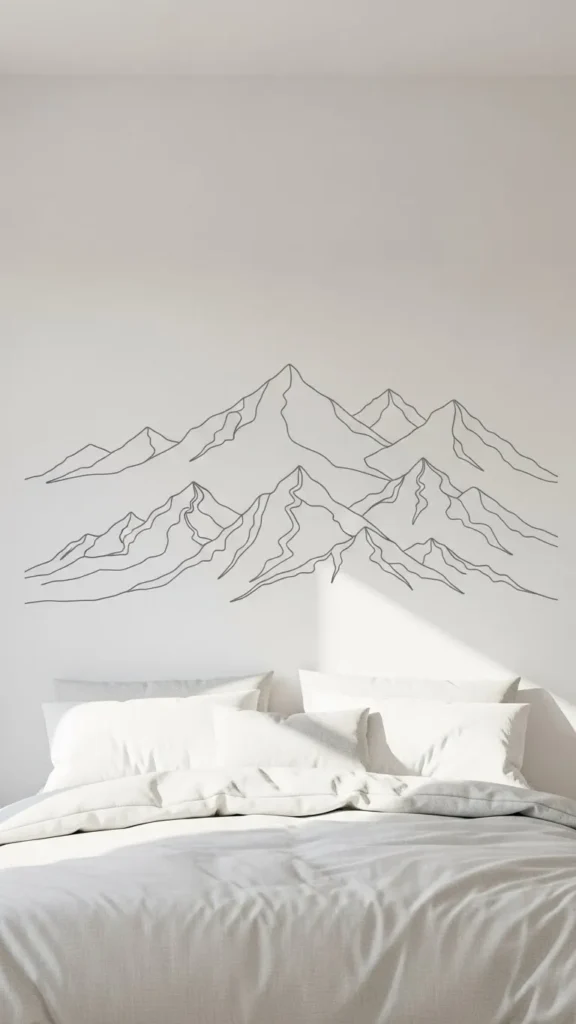
Mountain line decals create calm scenes with simple lines. Ideal for bedrooms.
Budget tip: Outline-only designs reduce cost.
DIY idea: Extend the line across furniture edges for a custom feel.
Keep lines thin and colors soft.
Measure height carefully so the design sits comfortably above furniture.
12. Sunburst Wall Accents
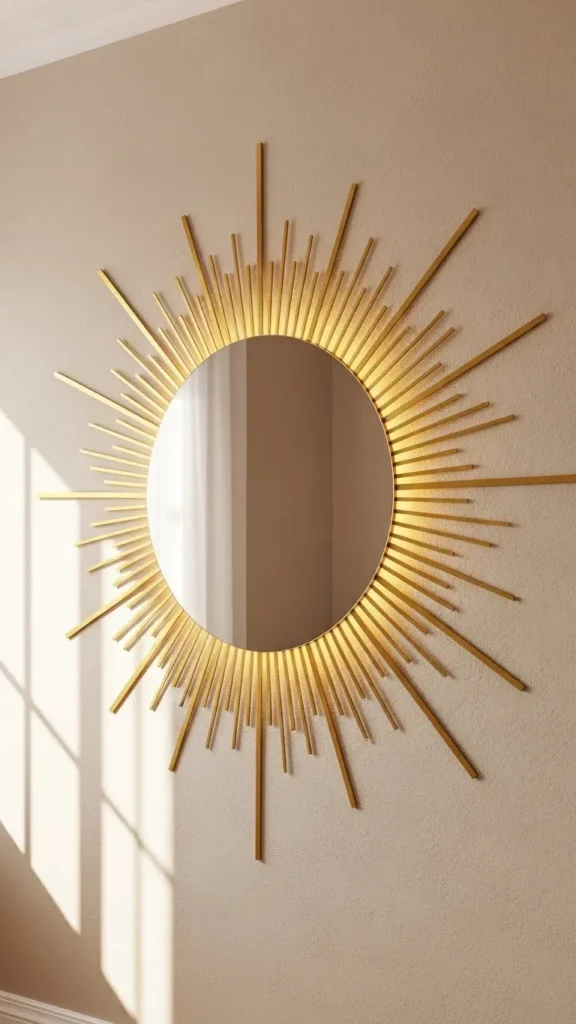
Sunburst decals add warmth and focus. They frame mirrors or art well.
Budget tip: Choose partial sunbursts instead of full circles.
DIY idea: Center behind a round mirror for balance.
Neutral or muted gold tones work best.
Align rays evenly using light pencil marks first.
13. Faux Window Frames
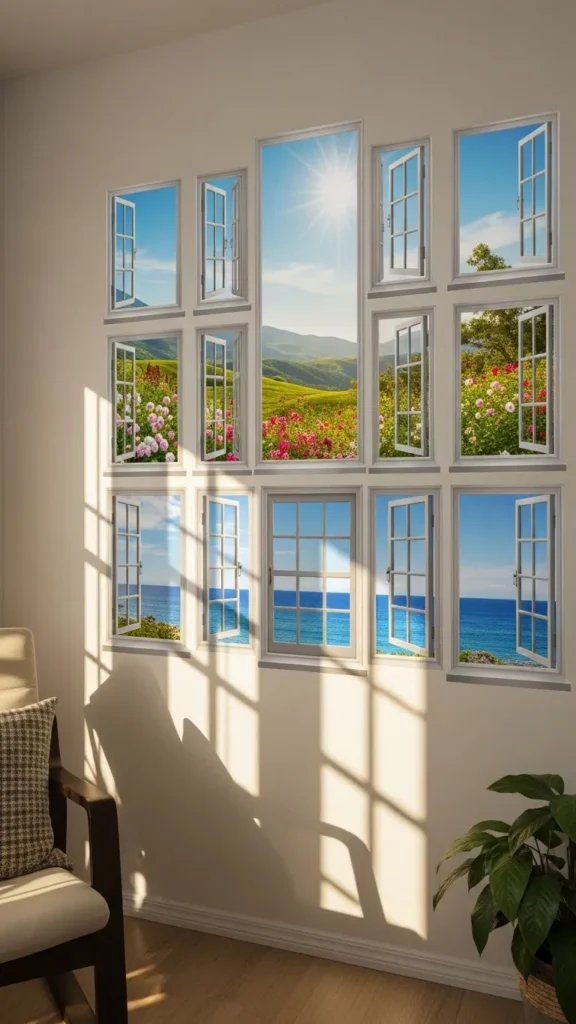
Faux window decals make small rooms feel open.
Budget tip: Simple frame outlines cost less than scenic designs.
DIY idea: Place above desks or sofas.
Stick to thin lines to keep it light.
Clean walls well for strong adhesion.
14. Scandi Tree Branches
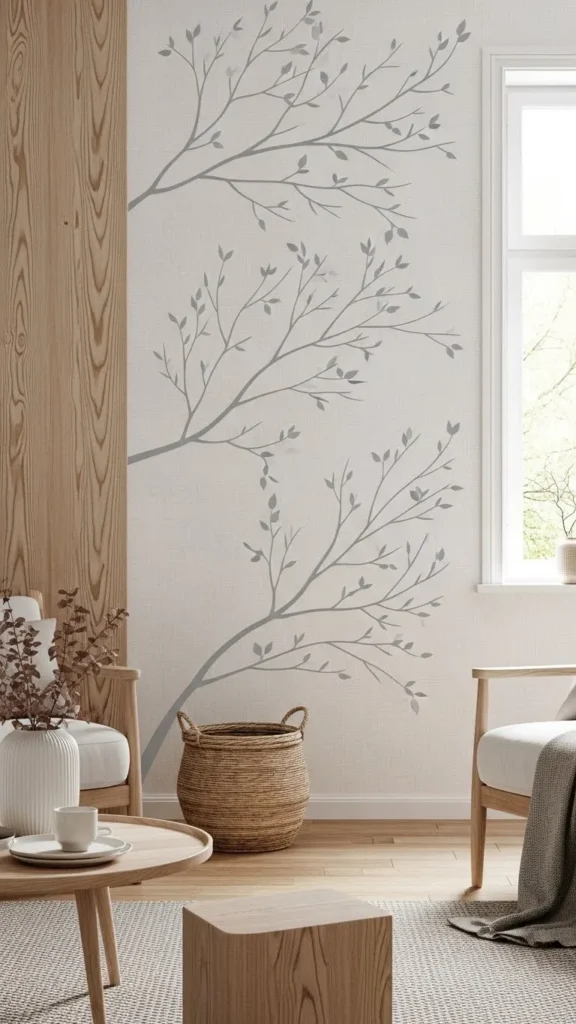
Branch decals feel airy and calm.
Budget tip: Use single-branch sets.
DIY idea: Extend branches diagonally for movement.
Soft gray works in most spaces.
Apply from bottom up to control flow.
15. Playful Animal Outlines
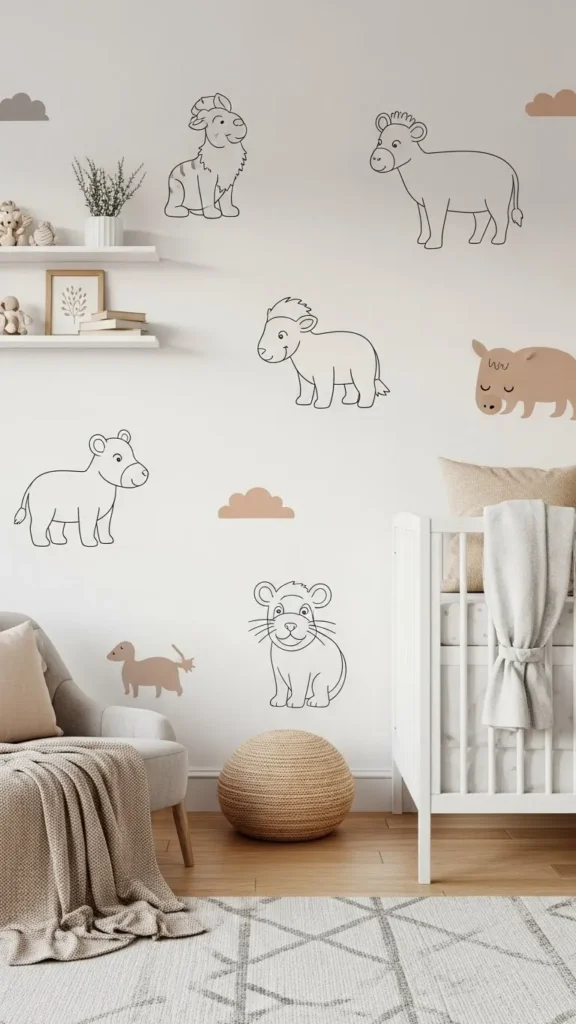
Animal outlines suit nurseries without feeling busy.
Budget tip: Outline designs cost less than filled ones.
DIY idea: Group animals at floor level.
Stick to one color for cohesion.
Press edges well around curves.
16. Modern Grid Lines
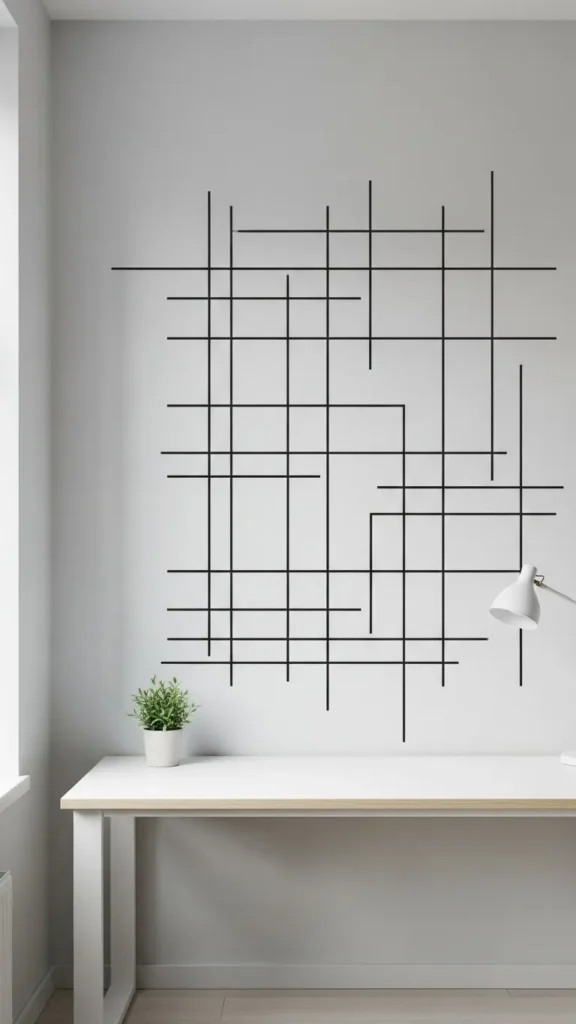
Grid lines add structure.
Budget tip: Thin line decals use less material.
DIY idea: Stop grids halfway up the wall.
Use a level for straight placement.
Matte finishes reduce glare.
17. Soft Cloud Shapes
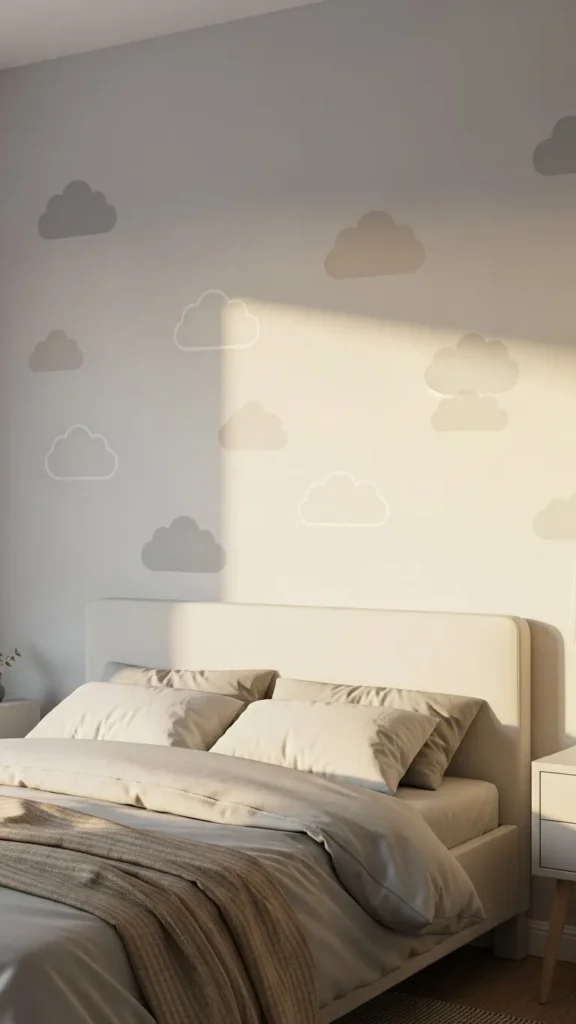
Cloud decals feel light and soothing.
Budget tip: Smaller cloud packs stretch farther.
DIY idea: Cluster clouds loosely.
Stick to soft tones.
Smooth edges carefully.
18. Arched Doorway Frames
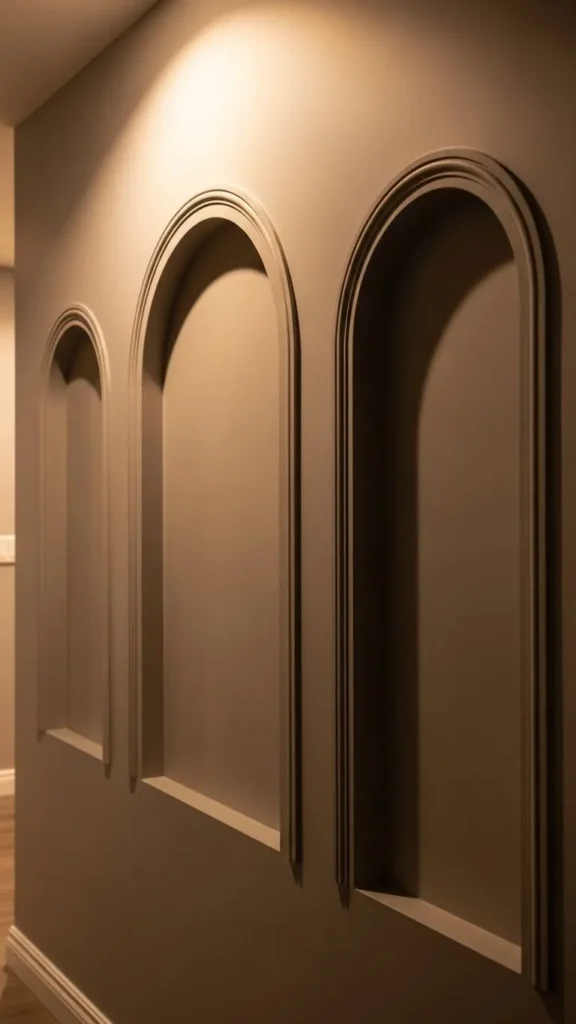
Arched frames add shape without construction.
Budget tip: Outline-only arches save money.
DIY idea: Frame mirrors or doors.
Neutral shades work best.
Measure carefully before sticking.
19. Minimal Starbursts
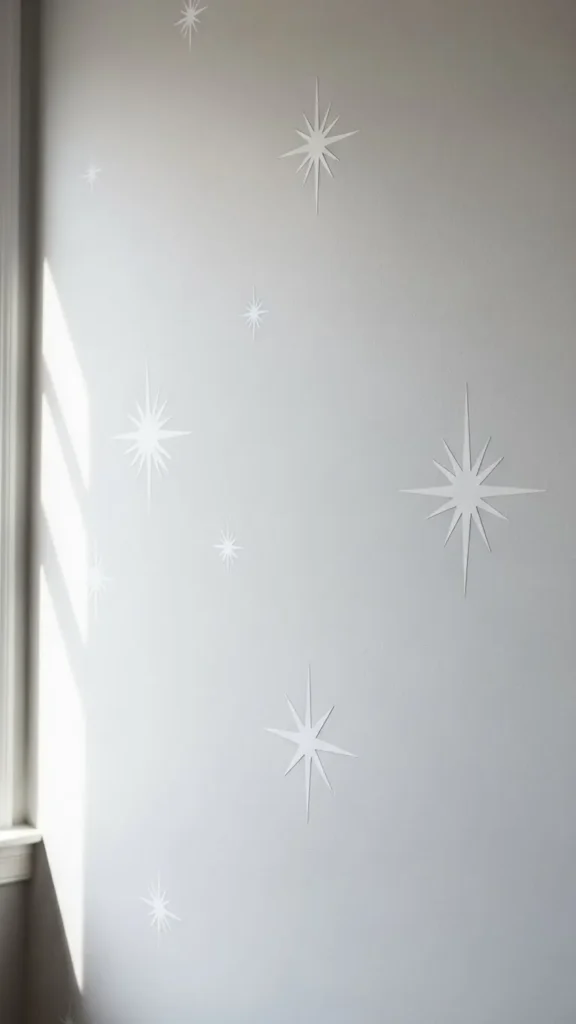
Starbursts add energy in small doses.
Budget tip: Use small packs.
DIY idea: Scatter unevenly.
Keep colors subtle.
Press firmly for long wear.
20. Framed Quote Placeholders
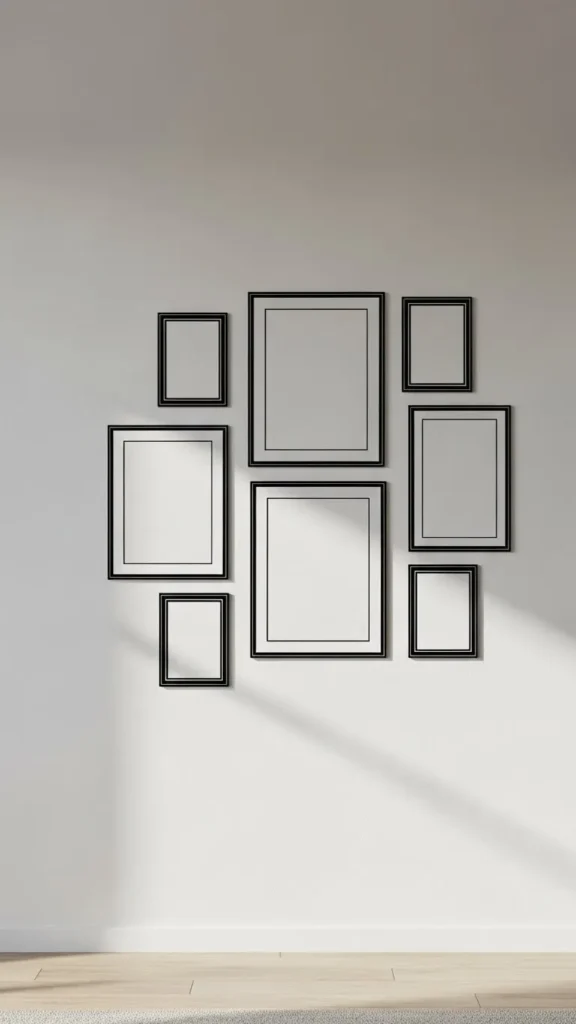
Frame decals allow changing decor without nails.
Budget tip: Outline frames cost less.
DIY idea: Place around photos or mirrors.
Keep spacing even.
Smooth edges well.
21. Checkerboard Blocks
Checkerboard decals add rhythm.
Budget tip: Two-color sets save money.
DIY idea: Stop pattern mid-wall.
Soft tones prevent heaviness.
Use guides for alignment.
22. Mid-Century Shapes
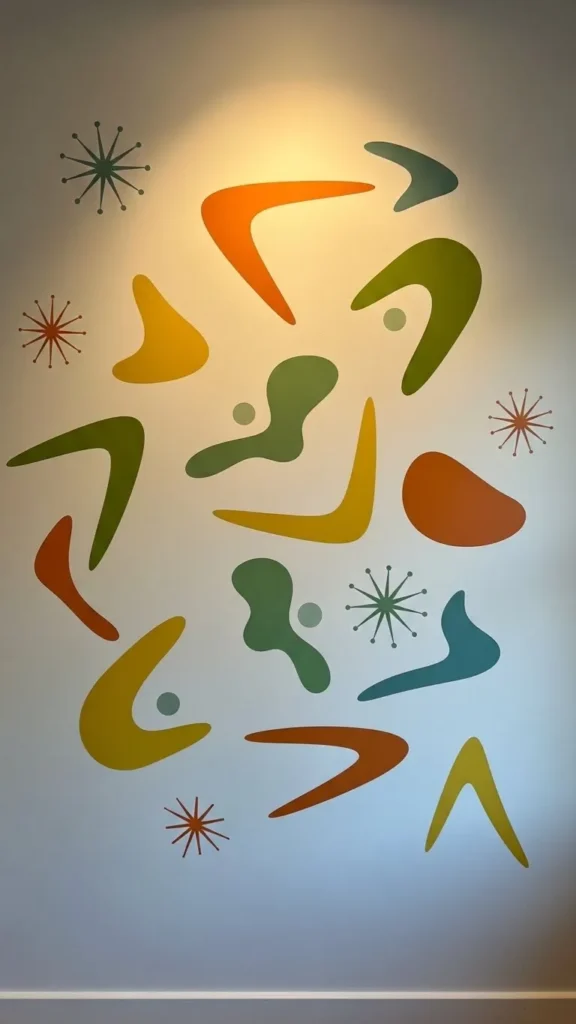
Mid-century shapes feel playful yet calm.
Budget tip: Simple shapes cost less.
DIY idea: Group shapes loosely.
Earth tones blend easily.
Press edges carefully.
23. Vertical Stripe Accents
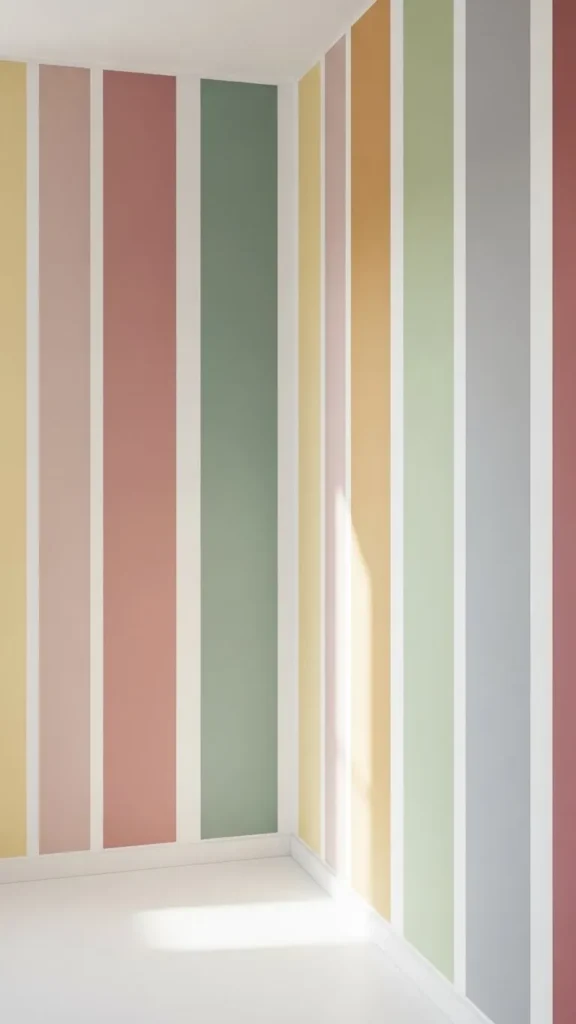
Vertical stripes draw the eye upward.
Budget tip: Thin stripes use less vinyl.
DIY idea: Place behind shelves.
Soft colors avoid harsh contrast.
Use level guides.
24. Layered Circle Sets
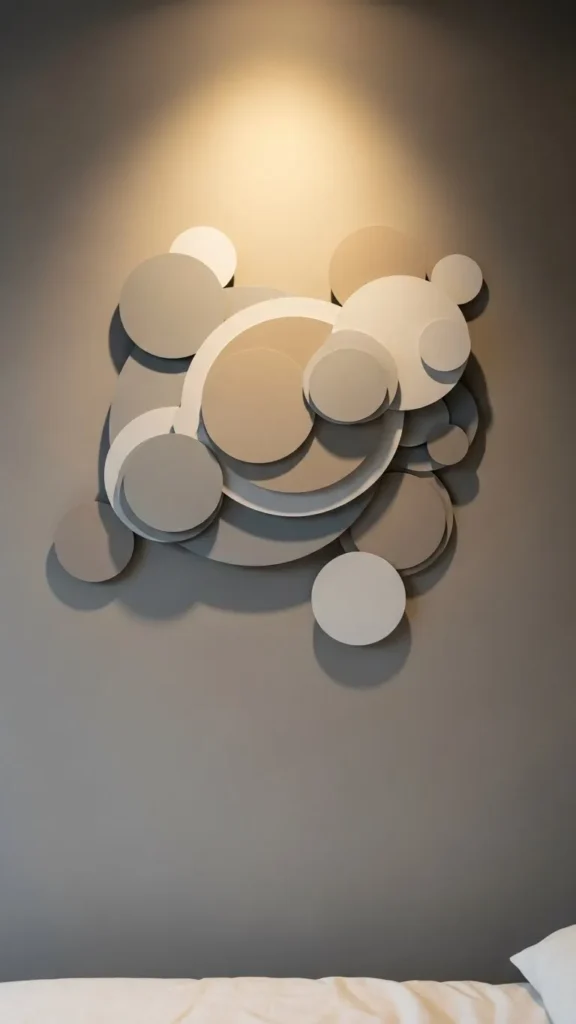
Circles soften sharp spaces.
Budget tip: Mixed-size packs stretch farther.
DIY idea: Overlap lightly.
Neutral tones suit most rooms.
Smooth from center outward.
25. Minimal City Skylines
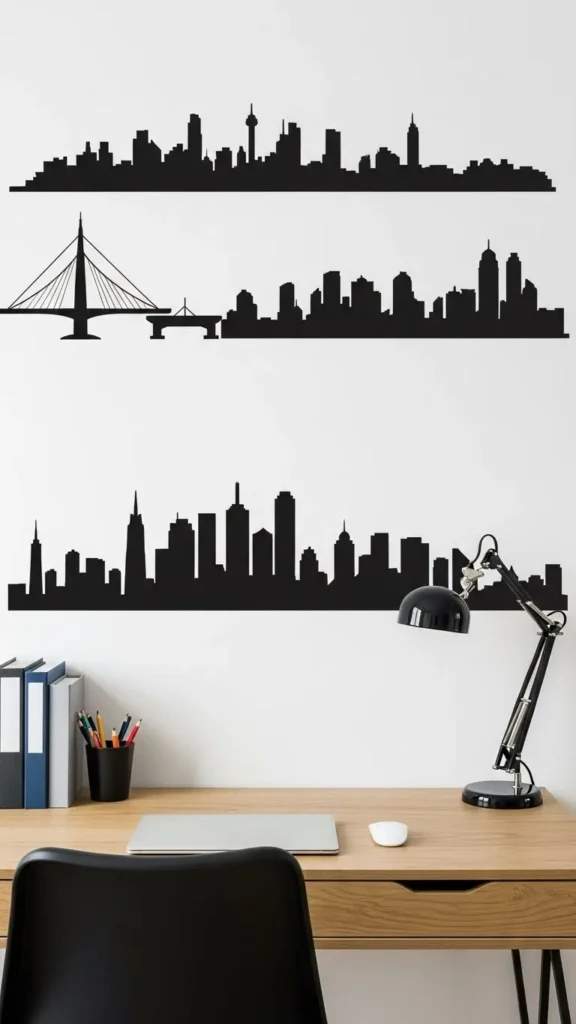
Skyline decals add interest without detail.
Budget tip: Outline skylines cost less.
DIY idea: Place just above furniture.
Stick to simple silhouettes.
Measure for balance.
26. Organic Pebble Shapes
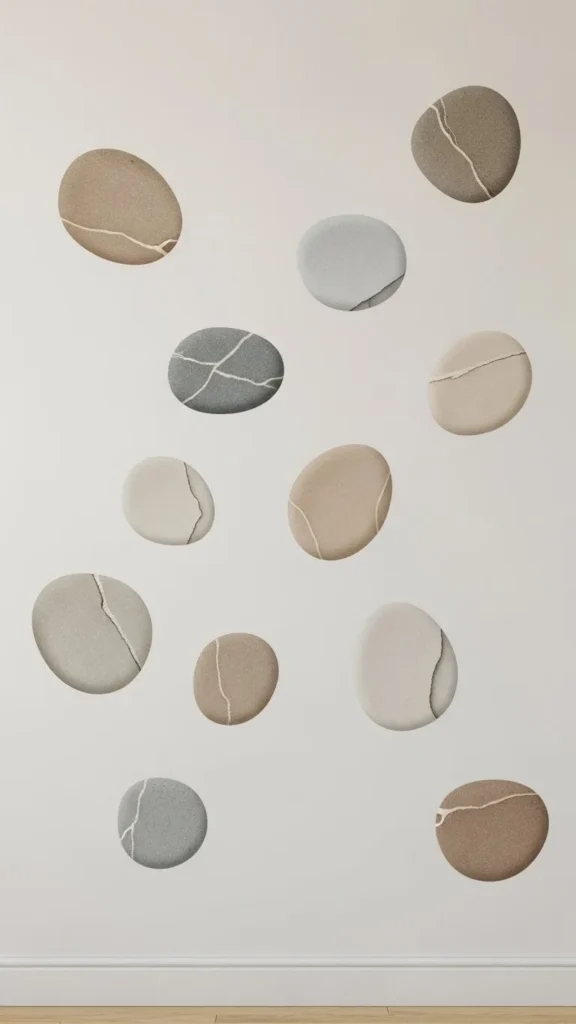
Pebble shapes feel natural and soft.
Budget tip: Single-color packs save money.
DIY idea: Cluster near corners.
Warm tones blend well.
Press edges gently.
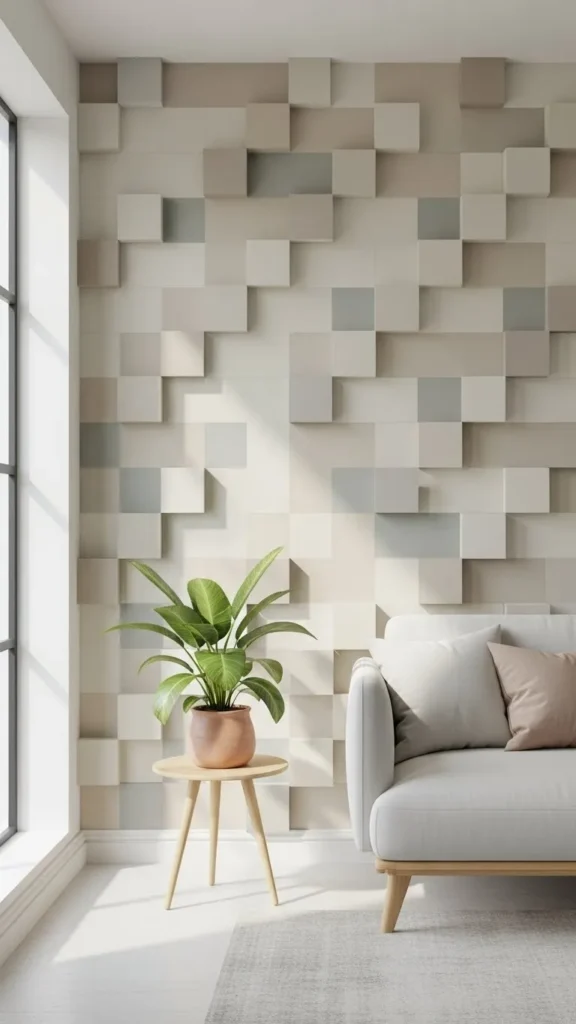
27. Layered Wall Panel Illusions
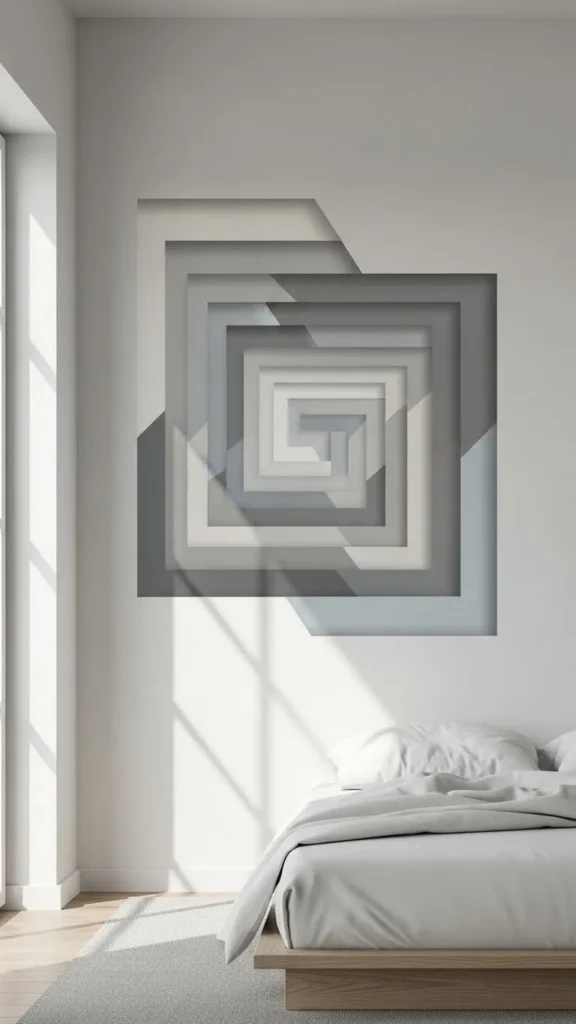
Panel illusion decals mimic architectural detail.
Budget tip: Partial panels cost less.
DIY idea: Focus on one wall section.
Neutral shades keep it subtle.
Align edges carefully.
Conclusion
Wall decals offer an easy way to shape a room using simple steps and affordable materials. From soft botanical forms to clean geometric lines, the right design can refresh walls without tools or long-term changes. With thoughtful placement and simple DIY planning, any space can feel more personal and inviting. Save ideas that match your style, start with one wall, and enjoy how small updates can shift the feel of an entire room.