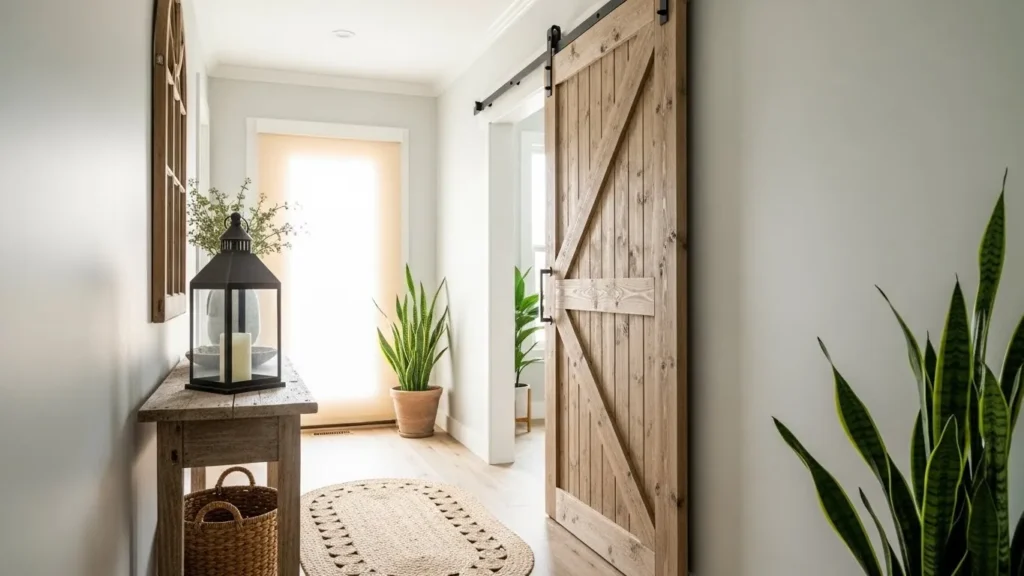
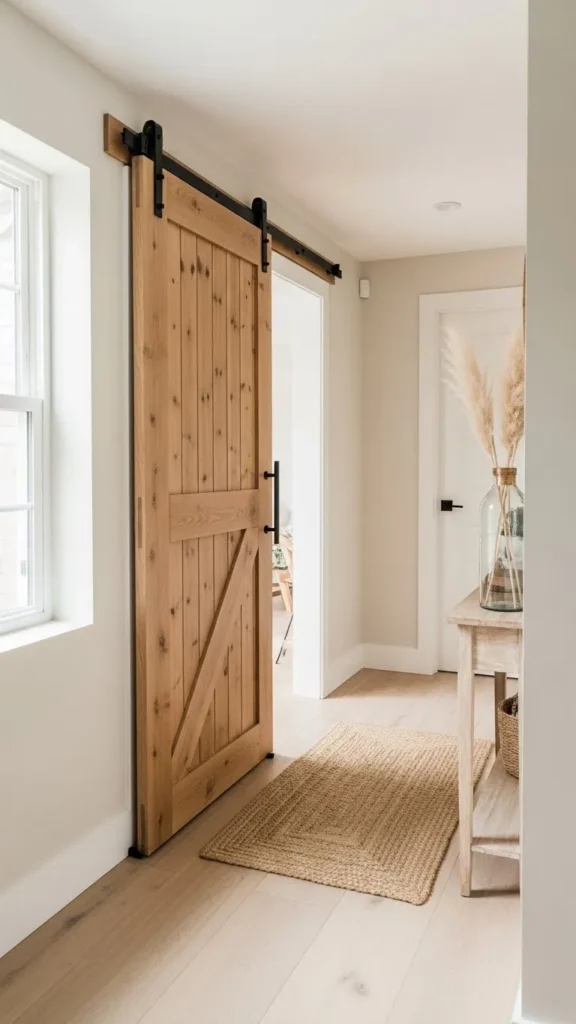
Farmhouse style has a way of making a space feel warm, relaxed, and intentional—and barn doors are one of the fastest ways to get there. Whether you’re updating a hallway, hiding a pantry, or adding character to a bedroom, a sliding barn door can completely change the feel of your home in a single afternoon. The best part? You don’t need to be a professional builder to pull it off.
Below is a simple, step-by-step guide that walks you through attaching barn doors with confidence. No stress. No complicated jargon. Just practical tips that work.
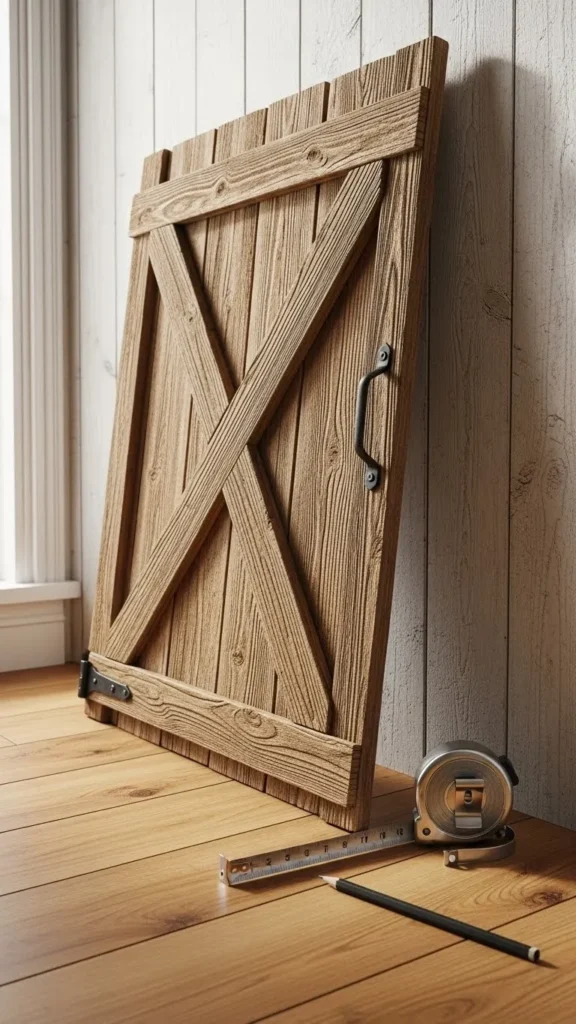
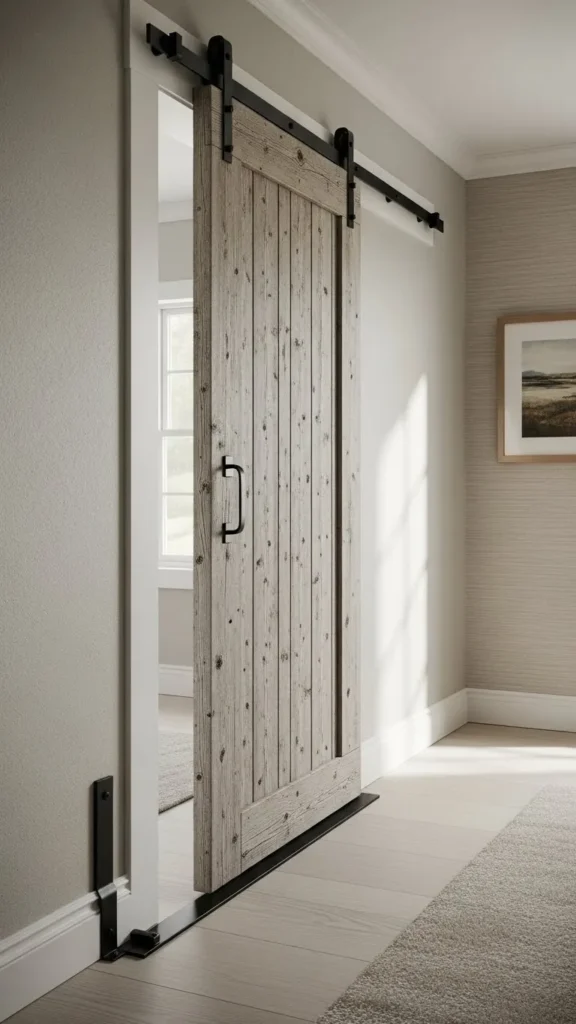
Choose the Right Barn Door for Your Space
Before grabbing tools, take a moment to choose the right door. This decision affects both looks and function.
Start by measuring your doorway.
Your barn door should be:
- At least 2 inches wider on each side than the opening
- Tall enough to cover the doorway with a little extra at the top
When it comes to style, think about the vibe you want:
- Solid wood doors feel classic and cozy
- Paneled designs add depth and texture
- Light-stained or whitewashed doors keep things airy
Also consider weight. Heavier doors feel sturdy but need solid mounting support. Lighter doors are easier to install and slide smoothly.
Gather Tools and Hardware Before You Start
Having everything ready saves time and frustration. Most barn door kits come with the main hardware, but double-check before starting.
You’ll usually need:
- Barn door track and rollers
- Lag bolts or mounting screws
- Drill and drill bits
- Stud finder
- Level
- Measuring tape
- Pencil
Quick tip:
Always mount into studs or a solid header board. Drywall alone won’t hold the weight of a barn door.
If your studs don’t line up with the track holes, install a header board first. This is a simple wood plank mounted into studs that gives you flexibility and extra strength.
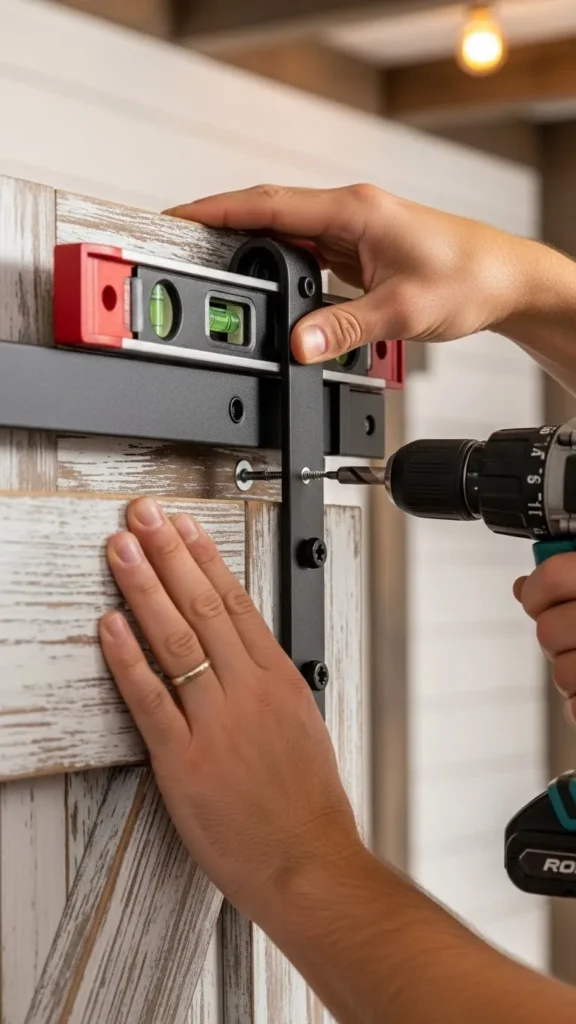
Install the Track Securely and Level
This step sets the foundation for everything else. Take your time here.
Start by marking where the track will go. Typically, the track sits a few inches above the doorway trim. Use a level to draw a straight guideline across the wall.
Next:
- Locate wall studs with a stud finder
- Pre-drill holes to prevent splitting
- Mount the track using lag bolts
- Check level again before fully tightening
A perfectly level track ensures the door slides smoothly and doesn’t drift open or closed on its own.
Attach Rollers and Hang the Door
Once the track is up, it’s time for the fun part—hanging the door.
Attach the rollers to the top of the door according to the kit instructions.
Make sure:
- Bolts are tight
- Rollers are aligned evenly
- Hardware faces the correct direction
With help from another person, lift the door and hook the rollers onto the track. This step is much easier with two people, especially for solid wood doors.
Slowly slide the door back and forth to test movement. It should glide easily without resistance.
Add Door Stops, Guides, and Finishing Touches
These small details make a big difference in how the door functions day-to-day.
Install:
- Door stops at each end of the track to prevent slamming
- Floor guide to keep the door from swinging out
- Optional soft-close system for quieter movement
Then step back and check alignment. Make small adjustments if needed.
Style Around Your New Barn Door
Once installed, your barn door becomes a statement piece. Style the surrounding space to enhance the farmhouse feel.
Easy ideas:
- Add wall hooks or baskets nearby
- Use neutral rugs or textured runners
- Keep decor simple so the door stands out
Barn doors pair beautifully with warm wood tones, soft linens, and natural light. Even modern homes benefit from the contrast.
Final Thoughts
Attaching a barn door might look intimidating, but when broken into steps, it’s completely doable. With the right prep, solid mounting, and a little patience, you can add instant farmhouse charm without a full renovation.
If you’ve been waiting for a sign to try this project—this is it.
Save this guide for later, grab your tools, and give your space that cozy farmhouse upgrade it deserves.