

There’s something deeply grounding about natural textures underfoot. A jute rug instantly warms a space, adds earthy character, and gives your home that relaxed, handcrafted feel. The best part? You don’t need professional tools or advanced skills to make one yourself. With a little patience and creativity, you can craft a beautiful jute rug that looks high-end but feels personal.
This guide walks you through the entire process in a simple, Pinterest-friendly way—perfect for a weekend project that delivers big visual impact.
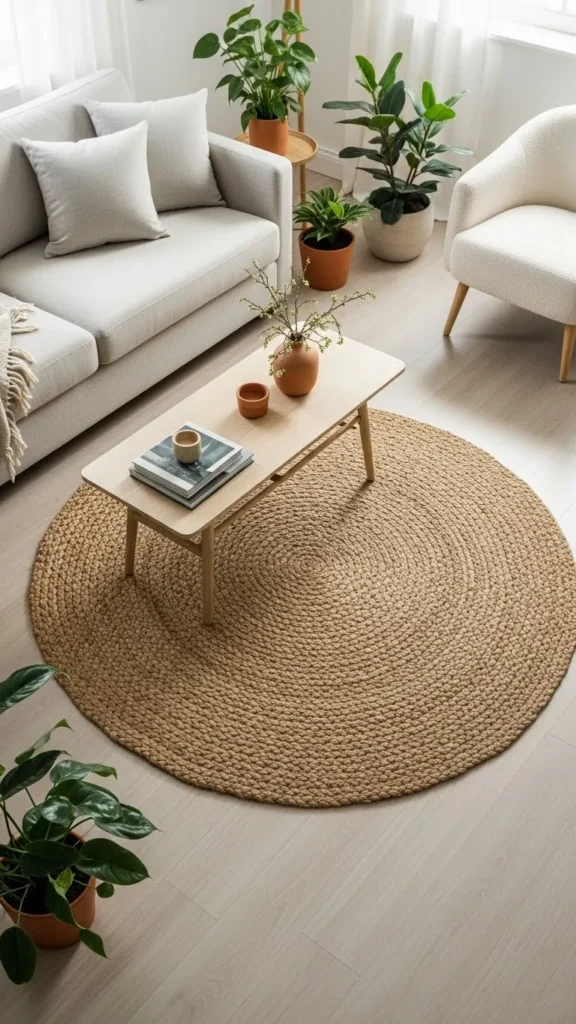
Why Jute Rugs Are Perfect for DIY Decor
Jute is a natural fiber known for its durability, warmth, and organic charm. It works beautifully in many interiors, from modern farmhouse to coastal and minimalist homes.
Here’s why jute is ideal for a DIY rug:
- It’s strong and long-lasting, even in busy areas
- The neutral tone blends with almost any color palette
- It adds texture without overpowering a room
- Small imperfections actually enhance its handmade look
Making your own rug also lets you control the size, shape, and thickness—something store-bought rugs rarely offer.
What You’ll Need Before You Start
Before jumping in, gather everything in one place. This makes the process smoother and more enjoyable.
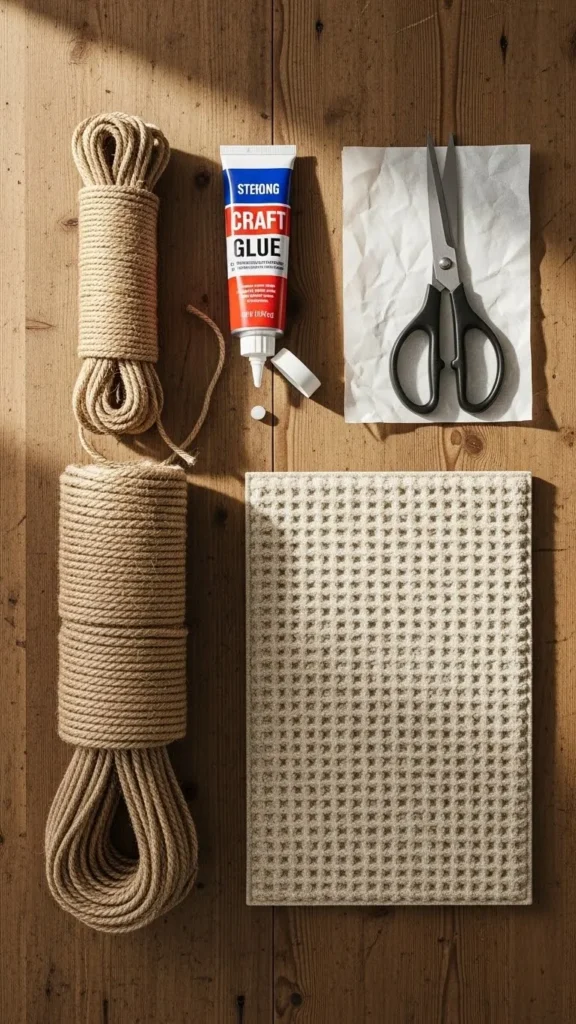
Supplies
- Natural jute rope or twine (¼–½ inch thick works best)
- Strong adhesive (heavy-duty craft or construction glue)
- Scissors or sharp utility shears
- Non-slip rug pad or felt backing
- Parchment paper or a silicone mat
- Measuring tape
- Optional: hot glue gun for faster setting
Tip: Buy more jute than you think you’ll need. Running out mid-project can disrupt the flow and color consistency.
Step 1: Plan Your Rug Shape and Size
Decide on the shape that best fits your space. The most beginner-friendly option is round, but oval or rectangular rugs are also possible.
Ask yourself:
- Where will the rug go?
- How much floor space should it cover?
- Do you want it bold or subtle?
Use painter’s tape or chalk on the floor to visualize the size. This step saves time and helps prevent over- or under-sizing.
Step 2: Start Coiling the Jute
This is where your rug begins to come alive.
- Place parchment paper on your work surface.
- Begin by tightly coiling the jute rope into a small spiral.
- Apply adhesive as you go, pressing each new loop firmly against the previous one.
- Work slowly and evenly to keep the shape balanced.
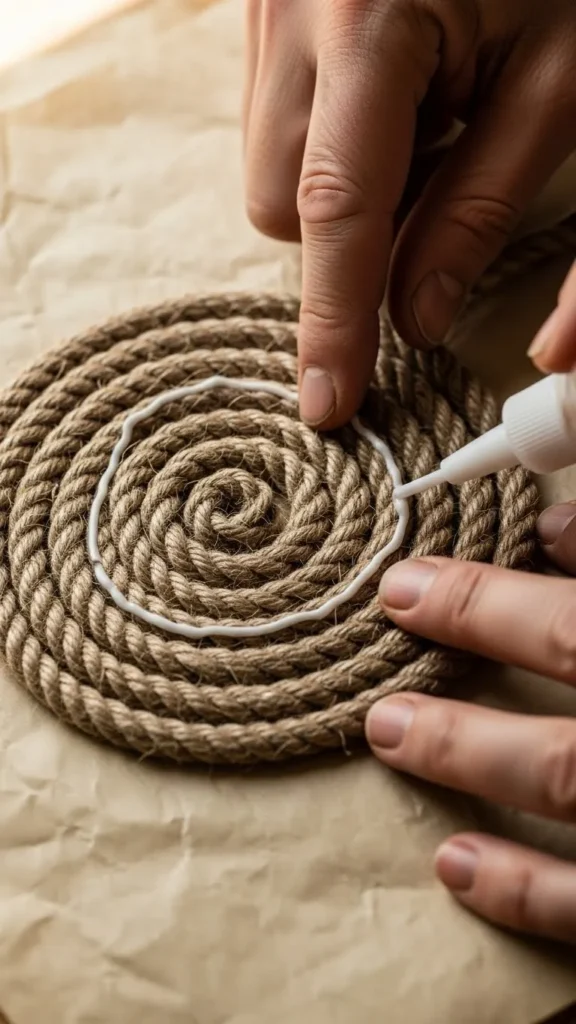
Take short breaks if needed. Keeping the tension consistent is more important than speed.
Step 3: Build Out the Rug Evenly
As the rug grows, it becomes heavier and more flexible. This is normal.
Helpful tips:
- Rotate the rug often to maintain symmetry
- Press down gently to keep the surface flat
- Add glue in small sections to avoid mess
If edges begin to lift, weigh them down briefly with a book or flat object while drying.
This stage is repetitive but calming—many people find it almost meditative.
Step 4: Secure the Backing for Stability
Once the rug reaches your desired size and the adhesive is fully dry, flip it over.
- Cut the non-slip pad to match the rug’s shape
- Glue it evenly across the back
- Press firmly and allow it to set completely
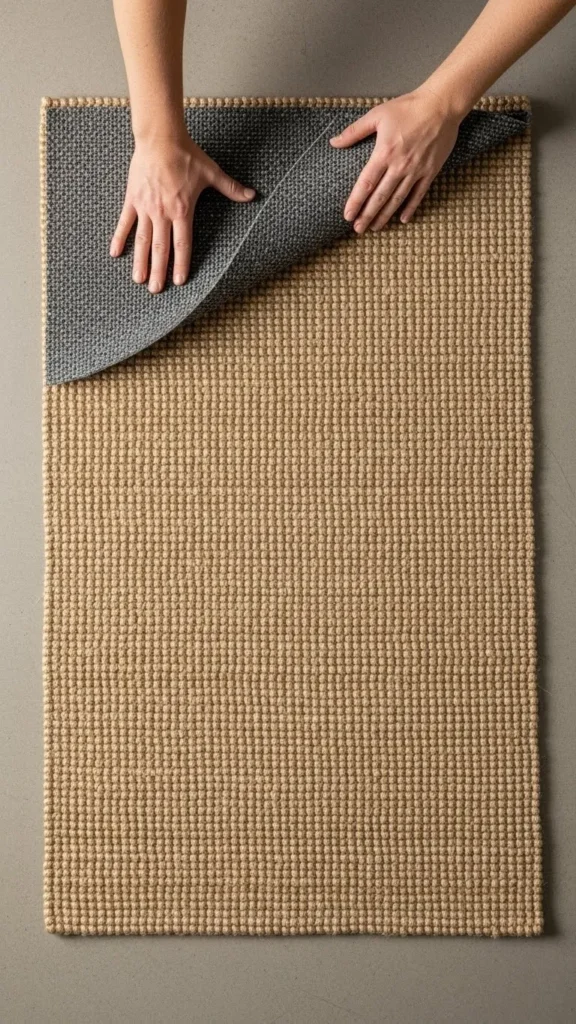
This backing helps the rug stay in place and extends its lifespan.
Step 5: Final Touches and Styling Ideas
Trim any loose fibers with scissors for a clean finish. Don’t worry about making it perfect—slight variations add charm.
Style your jute rug:
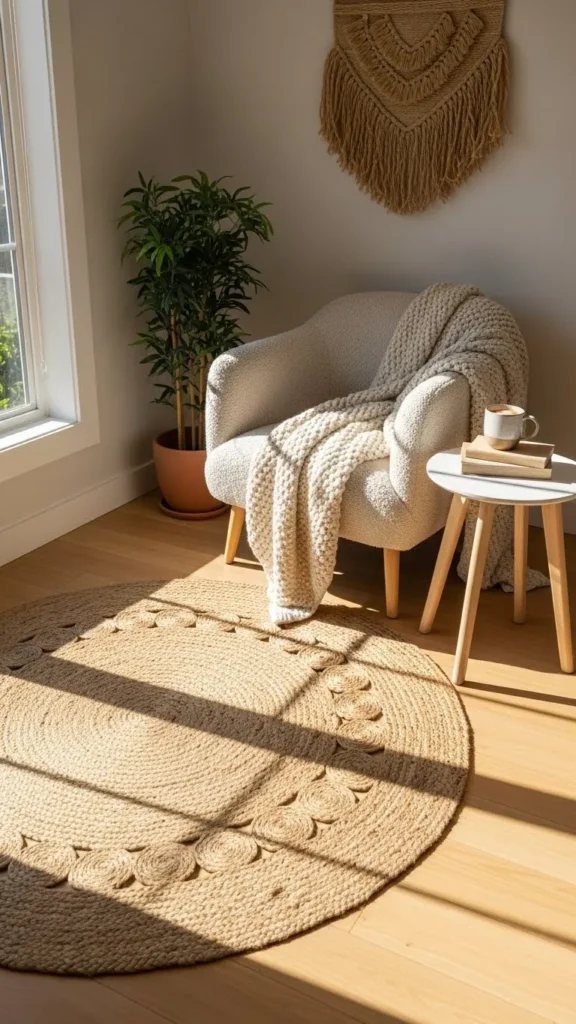
- Under a coffee table for texture contrast
- In an entryway layered with a smaller fabric rug
- Beside the bed for a soft, natural landing spot
Care and Maintenance Tips
Jute rugs are low-maintenance but appreciate gentle care.
- Shake or vacuum without a beater bar
- Spot clean with a lightly damp cloth
- Keep away from excess moisture
With proper care, your handmade rug will age beautifully.
Final Thoughts
Creating your own jute rug is more than a DIY project—it’s a way to bring warmth, texture, and intention into your home. Each coil tells a story, and the finished piece feels uniquely yours.
Save this guide for later, gather your supplies, and enjoy the process of making decor that truly feels handmade.

Leave a Reply