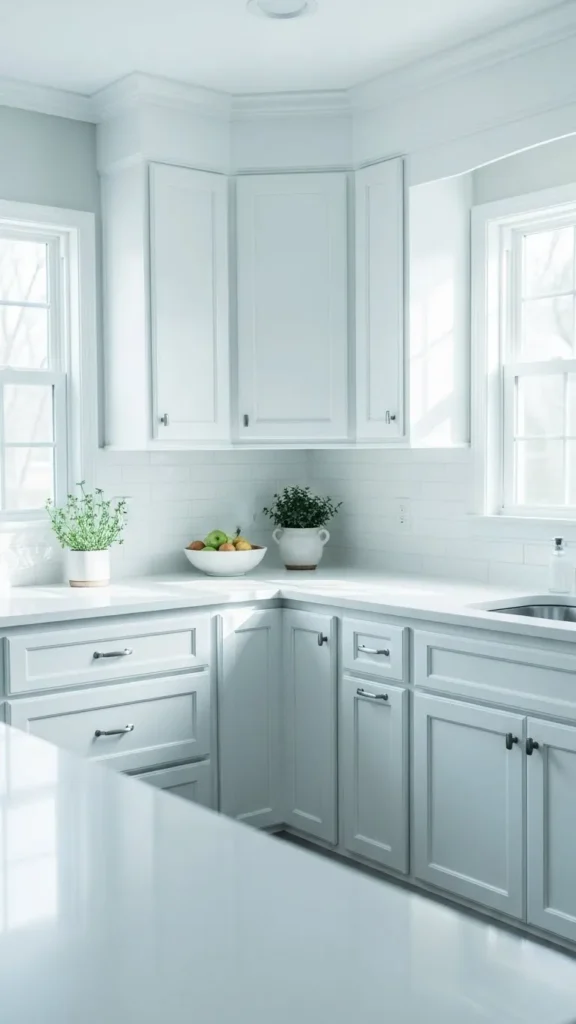
Repainting your kitchen cabinets can completely change how your space feels—without the cost or chaos of a full remodel. With the right approach, a little patience, and smart budget choices, you can give your kitchen a fresh, modern look for under $100. Yes, really.
This guide breaks the process into simple, doable steps. No special tools. No professional experience needed. Just a weekend and a plan.
Why Painting Cabinets Is the Best Budget Upgrade
Cabinets take up a huge amount of visual space in the kitchen. When they look worn or dated, the entire room feels tired. Painting them is one of the highest-impact, lowest-cost upgrades you can do.
Here’s why it works so well:
- Paint is far cheaper than replacement
- You control the color and finish
- Results feel custom and intentional
- Most kitchens need only one gallon of paint
And best of all? You don’t need to rush. This is a project you can take step by step.
What You’ll Need (And How to Stay Under $100)
Before you start, gather supplies with budget in mind. You can find most of these at hardware stores or even dollar stores.
Basic supply list:
- Cabinet paint (1 gallon or less)
- Angled brush + small foam roller
- Sandpaper or sanding sponge
- Degreasing cleaner
- Drop cloth or old sheets
- Painter’s tape
- Screwdriver
- Optional: primer (only if cabinets are very dark or glossy)
Budget tip:
Choose a paint labeled for cabinets or trim. It costs a little more per can, but you won’t need extras for touch-ups or repairs later.
Step 1: Prep Like a Pro (This Is Where Results Are Made)
Prep work isn’t exciting, but it’s the reason painted cabinets look smooth instead of streaky.
Start by:
- Removing cabinet doors and hardware
- Labeling doors with tape so they go back easily
- Cleaning all surfaces to remove grease and buildup
Then lightly sand everything. You’re not stripping paint—just scuffing the surface so the new paint sticks.
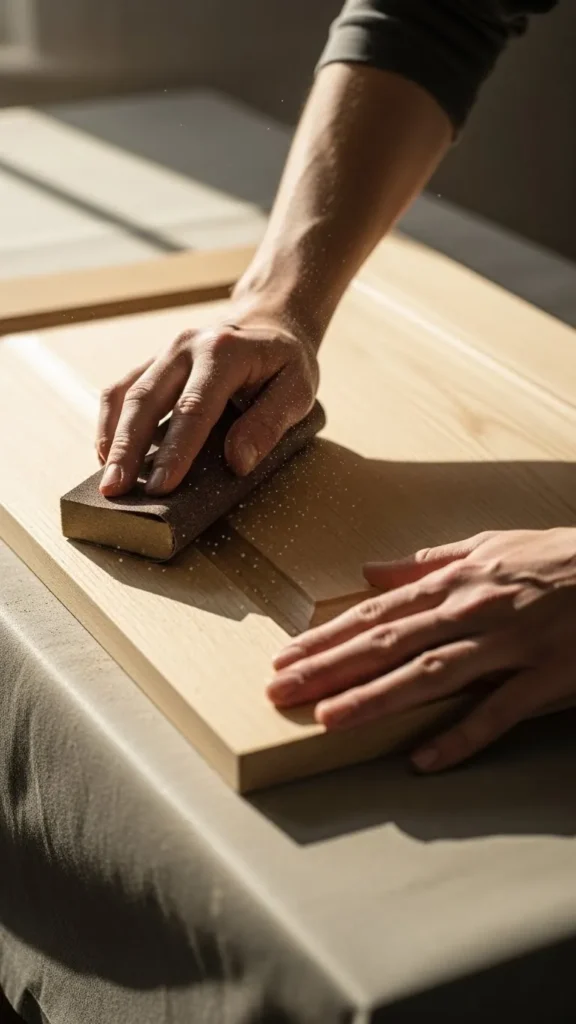
Quick prep shortcut:
If your cabinets are already smooth and matte, a sanding sponge and good cleaning may be enough.
Step 2: Decide If You Actually Need Primer
Primer helps paint stick and blocks dark colors—but you don’t always need it.
Use primer if:
- Cabinets are very dark
- The finish is glossy
- There are stains or uneven tones
Skip primer if:
- Cabinets are already light-colored
- Paint is in decent shape
- You’re using high-quality cabinet paint
Skipping primer can save both time and money, helping keep the project under budget.
Step 3: Paint Smart, Not Fast
This is where patience pays off. Thin, even coats will always look better than one thick layer.
Best technique:
- Use a brush for edges and corners
- Roll flat areas with a foam roller
- Paint in the direction of the wood grain
- Let each coat dry fully before the next
Most cabinets need two coats, sometimes three for lighter colors.
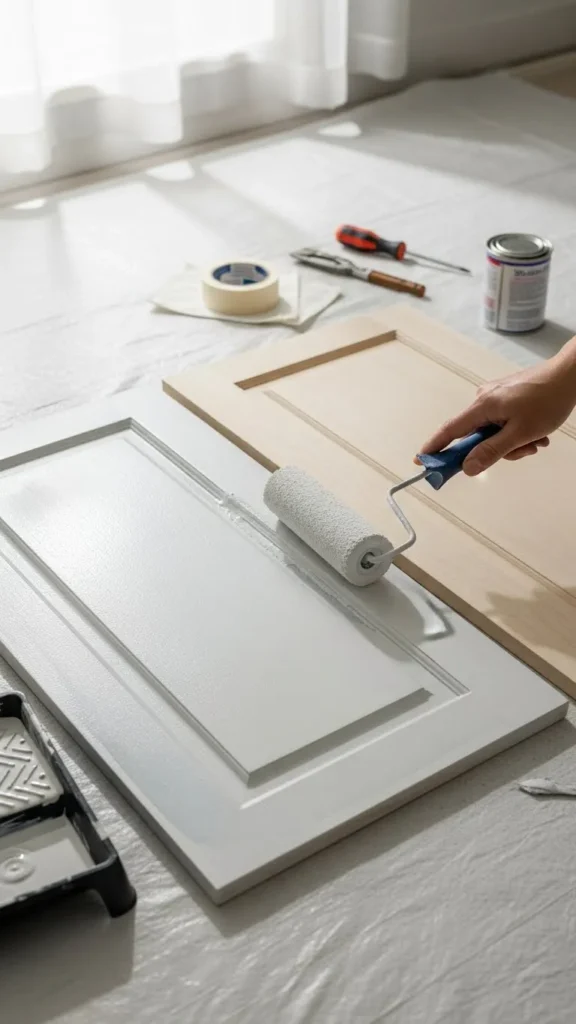
Helpful tip:
Paint doors flat whenever possible. It reduces drips and gives a smoother finish.
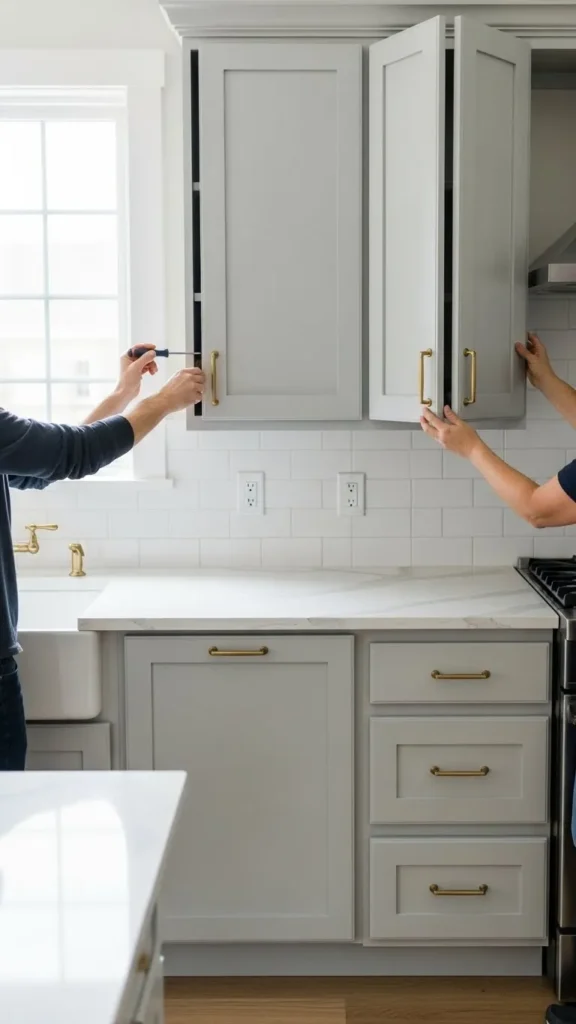
Step 4: Let Everything Cure Before Reassembling
Dry and cured are not the same thing. Paint may feel dry in hours, but it needs time to harden.
- Wait at least 24 hours before handling
- Wait 48–72 hours before reinstalling doors
- Be gentle for the first week
This step prevents fingerprints, dents, and chipped corners.
Small Upgrades That Make Cabinets Look Custom
If you still have room in the budget, these extras add big impact:
- New knobs or pulls
- Soft-close bumpers
- Fresh liner inside cabinets
Even changing hardware alone can make painted cabinets feel brand new.
Common Mistakes to Avoid
Save yourself frustration by skipping these:
- Painting without cleaning first
- Using thick coats
- Reinstalling doors too soon
- Skipping sanding entirely
None of these mistakes are permanent—but avoiding them saves time and money.
The Final Takeaway
Repainting kitchen cabinets doesn’t require a big budget or professional skills—just smart prep and steady effort. For under $100, you can transform your kitchen into a space that feels clean, modern, and intentional.
If you’ve been putting this project off, now’s the time.
Save this guide for later and come back when you’re ready to start. Your future kitchen will thank you.