

There’s something magical about giving a gift that’s homemade, thoughtful, and irresistibly delicious. DIY Christmas cookie mix jars check all the boxes—they’re cute, affordable, and perfect for teachers, neighbors, coworkers, or anyone who loves fresh cookies without the baking prep. Even better? They look gorgeous lined up on a holiday table or tucked inside a festive gift basket.
In this guide, you’ll learn how to assemble beautiful cookie mix jars, personalize them with simple décor, and make them extra giftable with tags and instructions. Let’s get started!
What You Need for Your Cookie Mix Jars
Creating these jars is simple, but the key is using ingredients that look visually appealing when layered.
Basic Supplies
- 1-quart (32 oz) mason jars with lids
- Measuring cups
- Funnel (optional but helpful)
- Ribbon or twine
- Printable or handwritten instruction tags
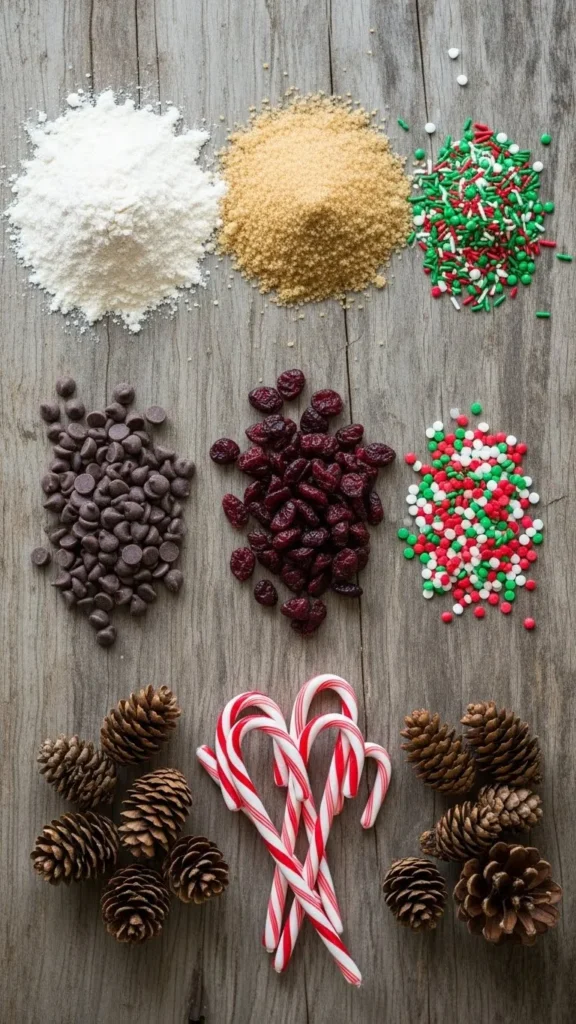
Dry Ingredients (per jar)
- Flour
- Brown sugar
- Granulated sugar
- Baking powder
- Baking soda
- Salt
- Chocolate chips, M&Ms, dried cranberries, nuts, or festive sprinkles
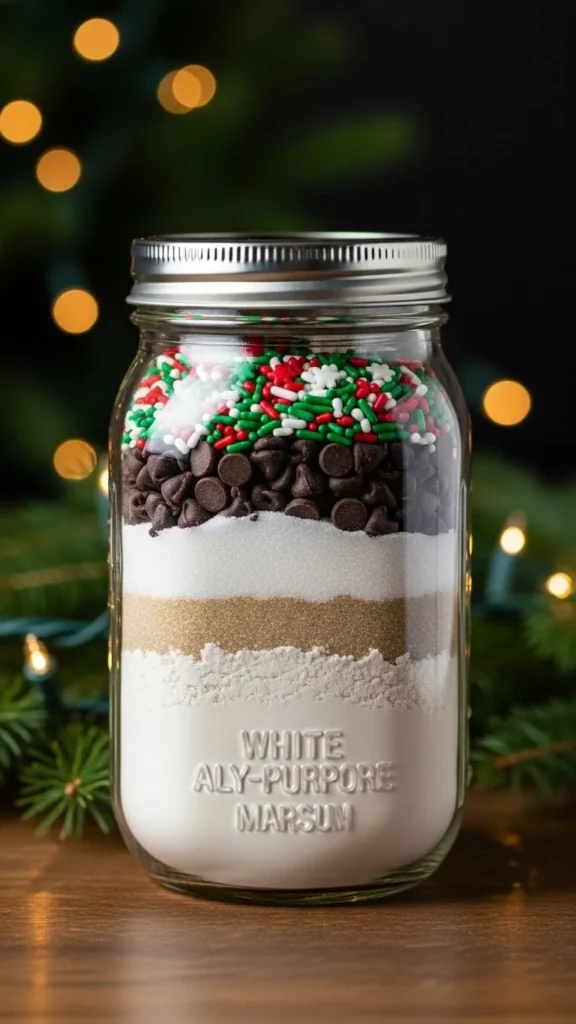
How to Layer the Ingredients Perfectly
Layering is what makes these cookie mix jars look so impressive. The goal is to build neat, colorful sections that stay separated until the jar is opened.
Step 1: Add the Flour Base
Start by adding the flour, baking powder, baking soda, and salt to the bottom of the jar. This forms the foundation for the cookie mix and prevents the sugars from sinking.
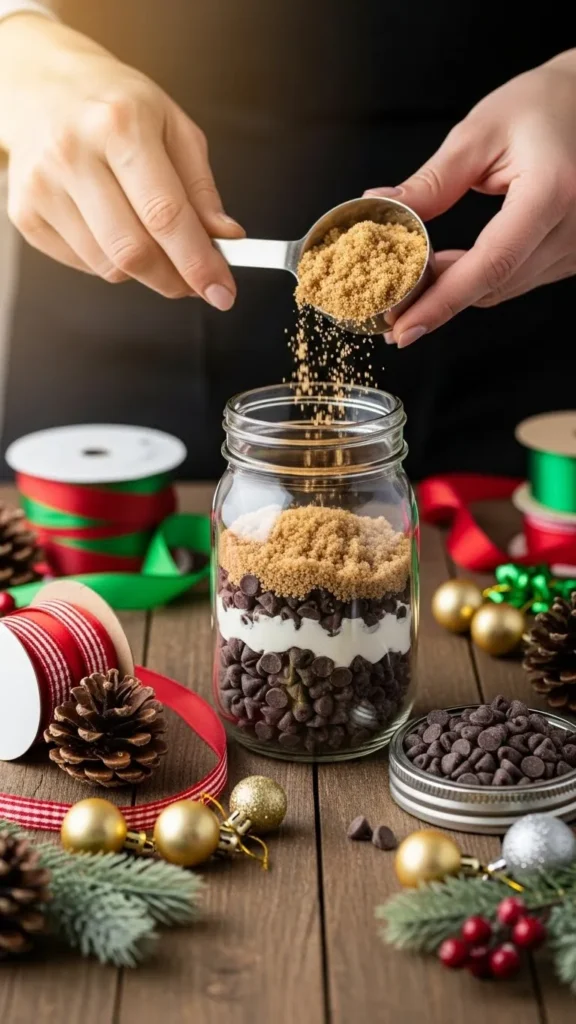
Step 2: Press the Ingredients
Use the back of a spoon to gently press down each layer. This keeps everything tightly packed and prevents shifting.
Step 3: Add Sugars
Next, add the brown sugar, followed by granulated sugar. The contrast creates a beautiful striped appearance.
Step 4: Finish With Mix-Ins
Top the jar with chocolate chips, M&Ms, or whatever mix-ins you choose. These colorful additions create the “wow” factor when the jar is first opened.
Helpful Tips
- If using brown sugar, pack it tightly to keep layers clean.
- Tilt the jar slightly as you pour mix-ins for cleaner lines.
- Use a funnel for keeping flour and sugars tidy.
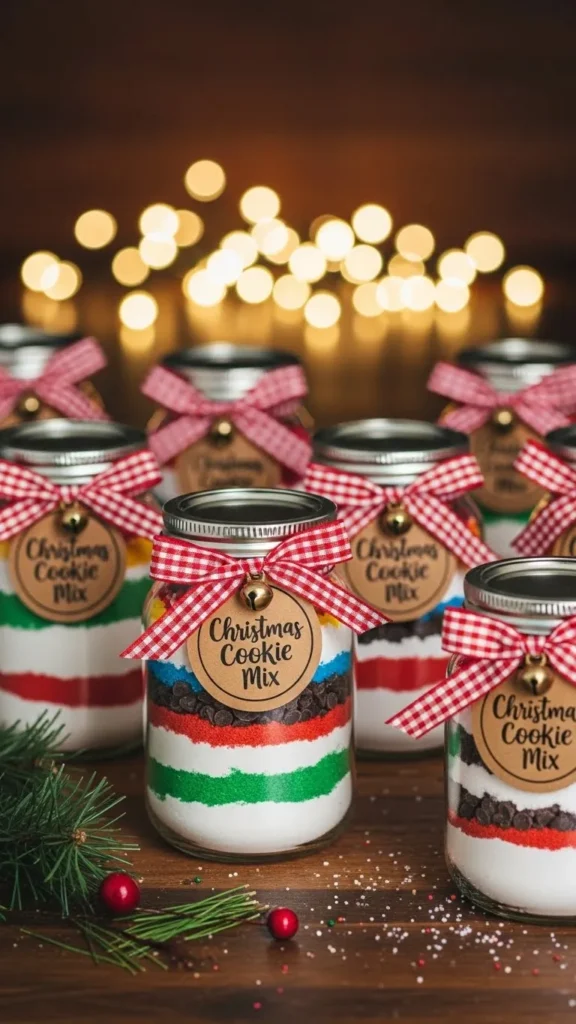
Creating the Baking Instructions Tag
Your gift isn’t complete without a simple tag telling the recipient how to bake their cookies.
What to Include
Write or print a small card that shares:
- Wet ingredients they need (typically butter, eggs, and vanilla)
- Oven temperature (usually 350°F)
- Baking time (8–10 minutes depending on cookie style)
Here’s a sample you can copy:
“Add ½ cup softened butter, 1 egg, and 1 tsp vanilla. Mix until combined. Scoop dough onto baking sheet. Bake at 350°F for 9–10 minutes.”
Punch a hole in the card and tie it onto the jar with twine or ribbon.
Decorating Your Cookie Mix Jars
This is where your creativity shines! You can keep them rustic or give them a full Christmas glow-up.
Easy Décor Ideas
- Twine + Kraft Paper: A farmhouse favorite.
- Red Gingham Ribbon: Classic Christmas charm.
- Mini Pinecones or Bells: Add to the jar top for a festive touch.
- Fabric Lid Covers: Cut a small square of holiday fabric and secure it under the jar ring.
Personalization Tips
- Add name tags for kids, coworkers, or neighbors.
- Include allergy notes if necessary.
- Create themed jars like “Christmas Eve Cookies” or “Reindeer Treat Mix.”
Fun Variations to Try
Cookie mix jars don’t have to be the same for everyone. Try mixing up the flavors to match your recipients.
Classic Chocolate Chip
Always a crowd-pleaser with chocolate chips layered on top.
Cranberry White Chocolate
Perfect for a festive twist—use dried cranberries and white chips.
Triple Chocolate
Add cocoa powder plus a mix of milk, dark, and white chocolate chips.
Oatmeal Cookie Mix
Layer oats, raisins, or mini chocolate chips, and a pinch of cinnamon.
Holiday Sprinkle Cookies
Bright and colorful with red, green, and white sprinkles.
How to Package and Gift Them
A well-presented cookie mix jar instantly feels premium even though it’s budget-friendly.
Gift Basket Ideas
Pair jars with:
- A wooden spoon
- Christmas-themed oven mitt
- Mini spatula
- Hot cocoa packets
- A small candle
For Teachers & Neighbors
Wrap the jar in cellophane and tie with a bright ribbon for a quick, polished gift.
For Party Favors
Line several jars on a table with a sign: “Take Home a Cookie Mix Jar!”
Final Thoughts
DIY Christmas cookie mix jars are the perfect blend of thoughtful, festive, and practical. They look beautiful, taste delicious, and show your loved ones you put time and heart into their gift. Whether you make one or twenty, these jars will bring smiles all season long.
Save this idea for later and share it with a friend who loves easy DIY gifts!

Leave a Reply