If you want to welcome your guests with instant holiday cheer, a DIY Christmas doormat is one of the easiest and most affordable décor projects you can try. With just a simple coir mat, a stencil, and a few festive paint colors, you can create a custom piece that feels warm, seasonal, and totally unique.
This tutorial walks you step-by-step through the entire process—prep, painting, sealing, and styling—so you can design a doormat that matches your holiday theme perfectly.
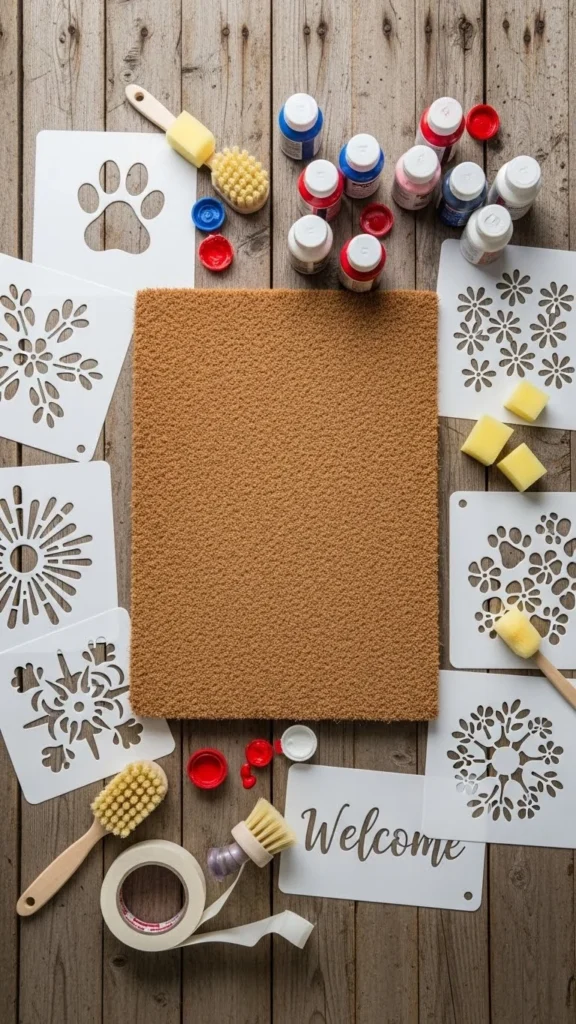
Gather Your Supplies
Before you start painting, make sure you have everything within reach. Working with a textured coir mat can be messy, so prepping ahead makes the process smoother.
You’ll need:
- A blank coir doormat
- Acrylic outdoor paint or weather-resistant craft paint
- Stencils (store-bought or DIY)
- Painter’s tape
- Sponge brushes or stencil brushes
- Paper plate or paint palette
- Clear outdoor sealant spray
Tip:
Choose colors that pop against the natural coir background—classic red, evergreen, gold, or crisp white all stand out beautifully.
Prepare the Doormat Surface
Coir mats can shed a little, so taking a few minutes to prepare the surface helps the paint stick better.
Here’s what to do:
- Shake the mat outside to remove loose fibers.
- Use a handheld vacuum to clean the surface thoroughly.
- Lay the mat on a flat, non-windy surface—preferably indoors or inside a garage.
Prepping properly ensures crisp paint lines later.
Secure and Position Your Stencil
This is the part that shapes the final look of your design. Whether you’re going for “Merry Christmas,” a row of trees, or a cute snowflake pattern, take your time lining things up.
Steps:
- Place your stencil exactly where you want the design centered.
- Use painter’s tape to secure all sides tightly.
- Test the edges of the stencil to ensure no flaps lift during painting.
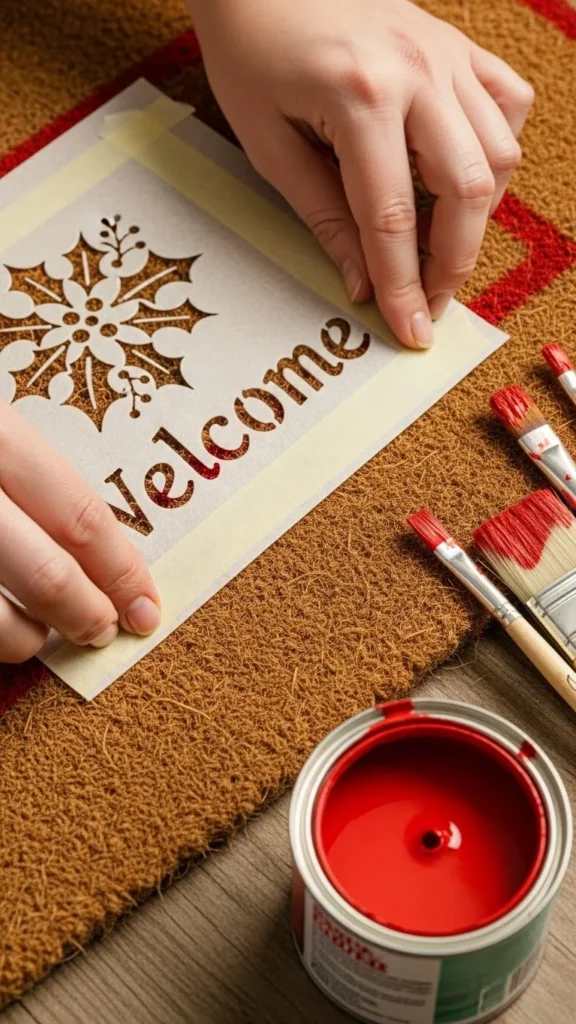
If you’re feeling creative, combine multiple stencil shapes—stars, ornaments, or pine needles—for a layered, custom look.
Start Painting With a Dabbing Technique
Now comes the fun part: adding color!
Because coir is a rough, textured material, brushing back and forth doesn’t work well. Instead, use a dabbing motion to push paint into the fibers. This creates bold, clean edges without bleeding.
Painting tips:
- Pour a small amount of paint onto a paper plate.
- Dip your sponge brush lightly—don’t soak it.
- Dab straight down over the stencil openings.
- Apply several thin layers instead of one heavy coat.
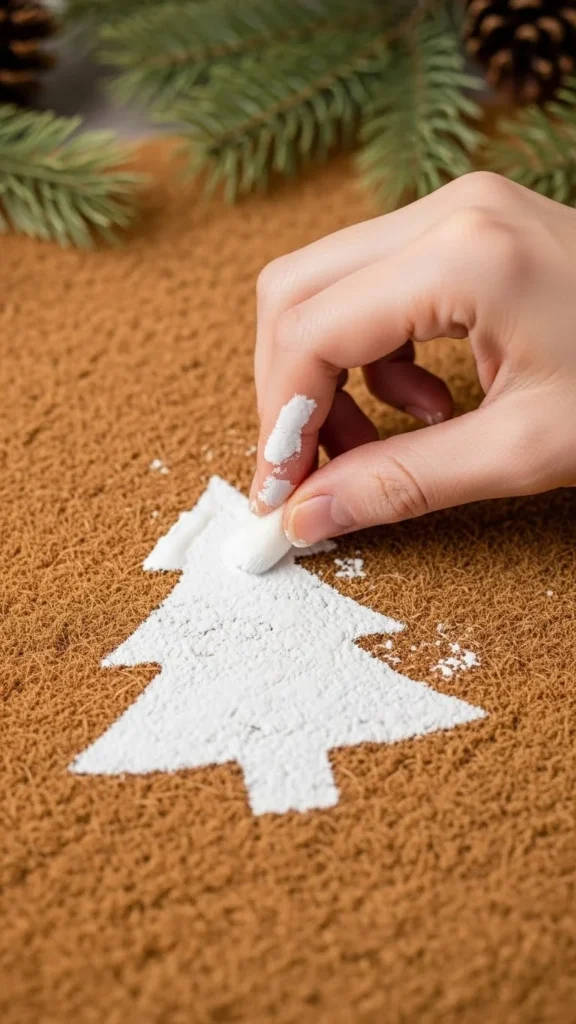
Let the paint dry for at least 20–30 minutes before carefully peeling off the stencil.
Add Extra Details and Color Layers
Once the main design is complete, you can add fun accents. These small touches make your doormat feel boutique-level without the boutique price tag.
Try adding:
- Small stars or snowflakes in a contrasting color
- A simple border around the edges
- Gold or white dots to mimic falling snow
- Tiny holly berries next to lettering
Keep the design simple if you want a modern look, or add layers for a more whimsical holiday feel.
Seal Your Doormat for Weather Protection
To extend the life of your doormat—especially if you live somewhere with rain or snow—seal it with a clear outdoor spray.
How to seal:
- Wait until the paint is fully dry.
- Lightly mist the surface with the sealant from 10–12 inches away.
- Allow it to dry completely before placing outdoors.
This step keeps the colors bright and prevents fading throughout the season.
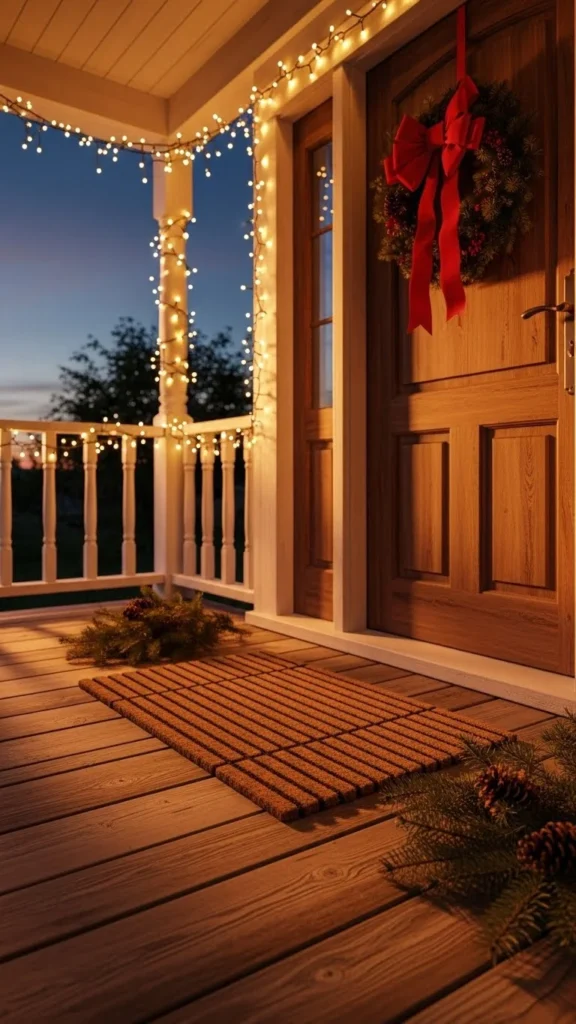
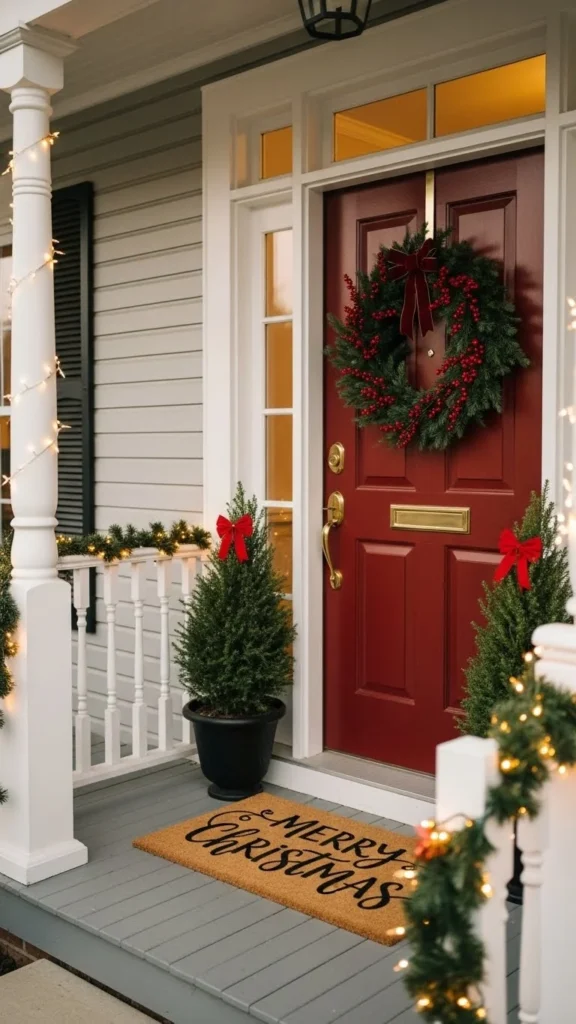
Display Your New Christmas Doormat
Your handmade doormat is ready to shine! Styling your porch or entryway around it makes your whole home feel more festive.
Try pairing it with:
- A wreath that matches the doormat colors
- Pre-lit miniature Christmas trees
- A cozy plaid blanket wrapped around a planter
- A basket of pinecones beside the door
Final Takeaway
Creating a festive DIY Christmas doormat is an easy weekend project that adds instant charm to your home. It’s budget-friendly, creative, and completely customizable—perfect for anyone who loves handmade holiday décor.
Save this idea for later and make one before your guests arrive!