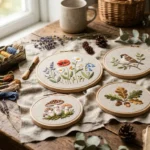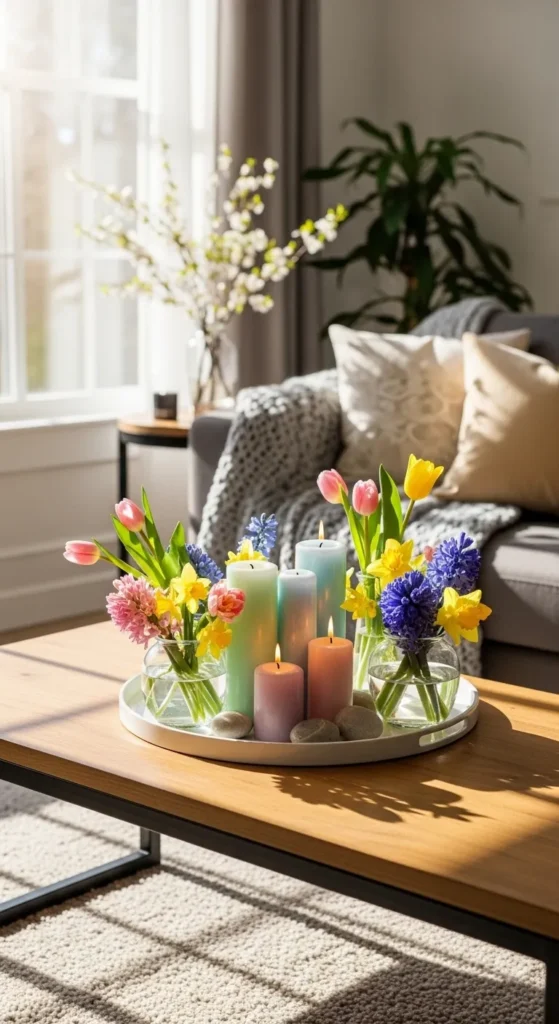
Spring is the perfect time to refresh your home with small but impactful decor touches. Decorative trays are simple DIY projects that instantly add color, texture, and charm to any room. From coffee tables to nightstands, trays help organize, display, and transform your space. You don’t need expensive materials—just a few items, some creativity, and a little time. This guide shares 23 stylish DIY tray ideas that make your home feel light, cheerful, and welcoming for the season.
1. Pastel Painted Tray
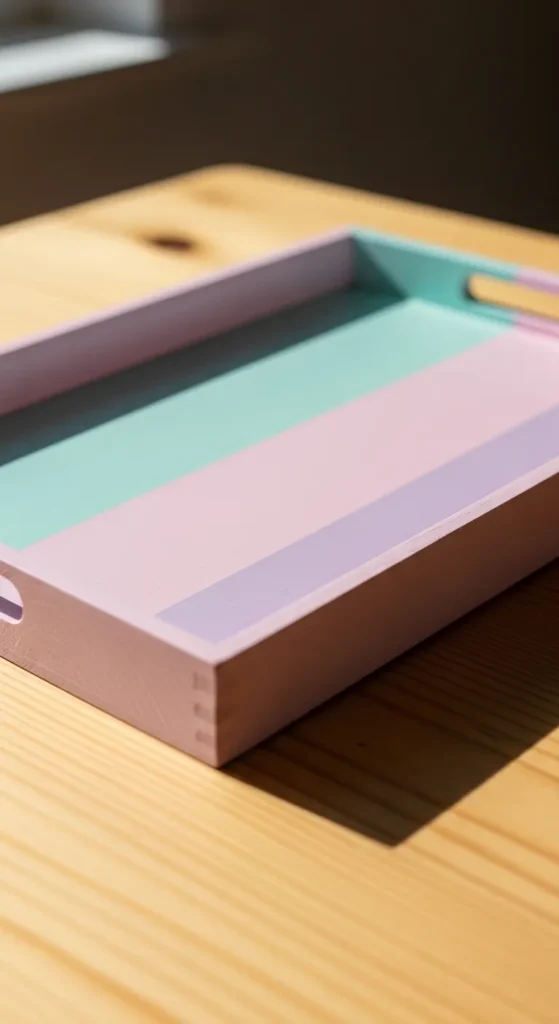
Give a plain wooden tray a cheerful spring makeover with pastel paints. Start with sanding the tray lightly and applying a base coat. Choose 2–3 soft colors and create stripes, blocks, or even a gradient. Once dry, seal with a clear varnish to protect against spills. You can use this tray for morning coffee, flowers, or books. Budget-friendly tip: buy small sample paint pots—they’re cheap and give you plenty of color options.
2. Floral Decoupage Tray
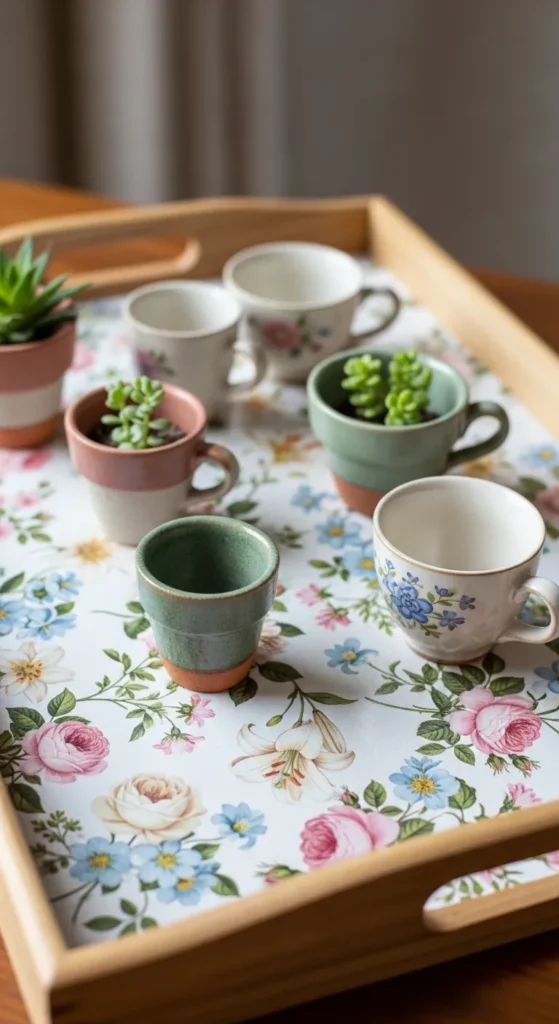
Transform an ordinary tray using floral decoupage. Pick decorative paper, cut patterns to fit, and use mod podge to glue and seal them. Smooth out bubbles with a soft brush. This tray works beautifully on a coffee table or as a centerpiece. Tip: You can use old wrapping paper or scrapbook sheets for a low-cost solution. A light protective coat ensures longevity and adds a subtle shine.
3. Mason Jar Tray Organizer
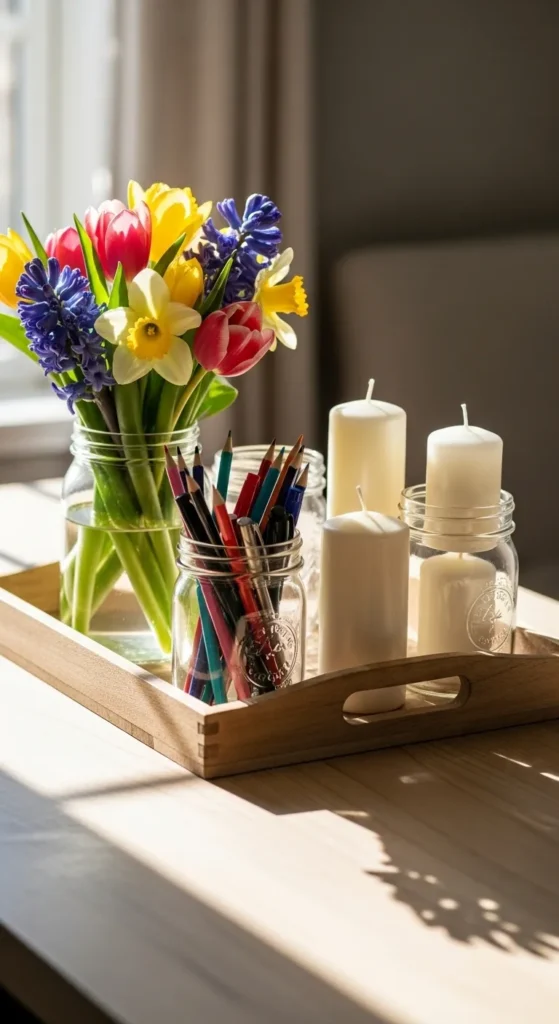
Repurpose mason jars as part of your tray decor. Use jars to hold flowers, succulents, or even pens for a desk tray. Arrange the jars on a wooden or metal tray and add decorative stones or moss around the bases. Affordable tip: thrift shops often have mason jars at very low prices. You can paint the lids or add twine for extra charm.
4. Rope-Wrapped Tray
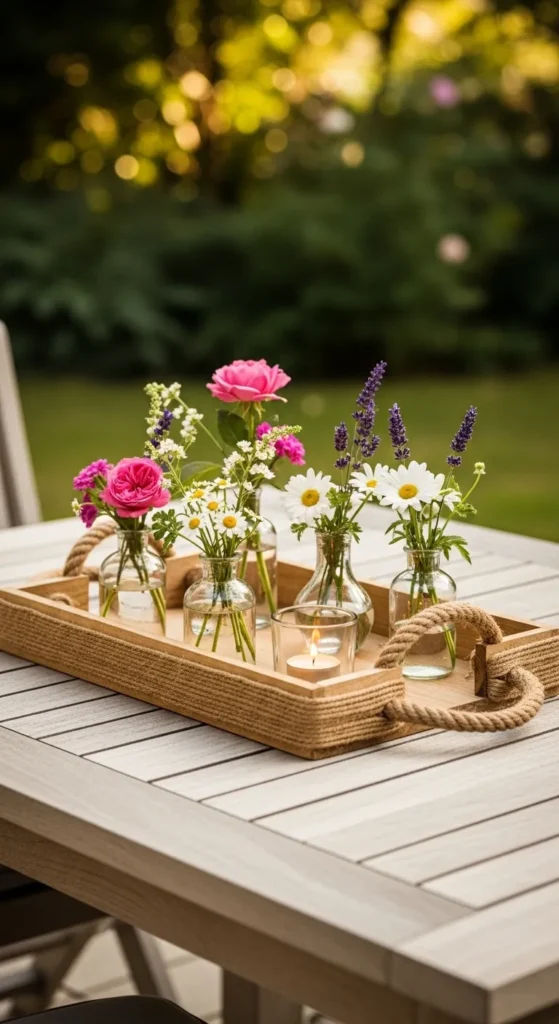
Add a coastal touch with a rope-wrapped tray. Wrap jute or sisal rope around handles or the edges using a hot glue gun. The result is a rustic, spring-ready tray that works indoors or outdoors. Budget tip: a spool of rope costs just a few dollars but adds instant texture and interest. Pair with light-colored items for a bright, airy look.
5. Chalkboard Painted Tray
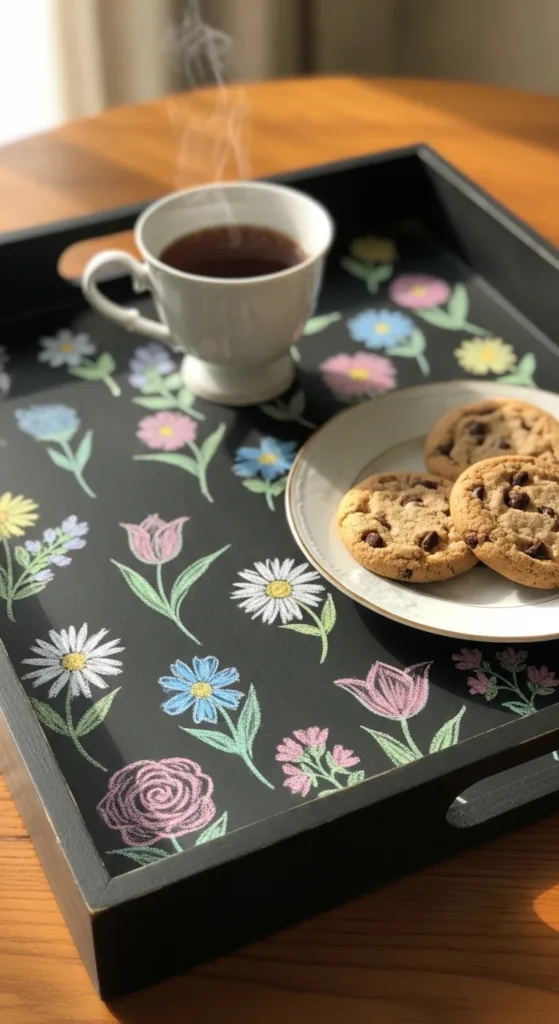
Make your tray interactive with chalkboard paint. Cover the base of the tray with chalkboard paint and write seasonal messages or draw floral patterns. This is perfect for a kitchen or coffee table tray. Cheap and reusable, you can switch designs whenever you like. Tip: seal the edges with a thin coat of varnish to prevent chalk dust from spreading.
6. Mosaic Tile Tray
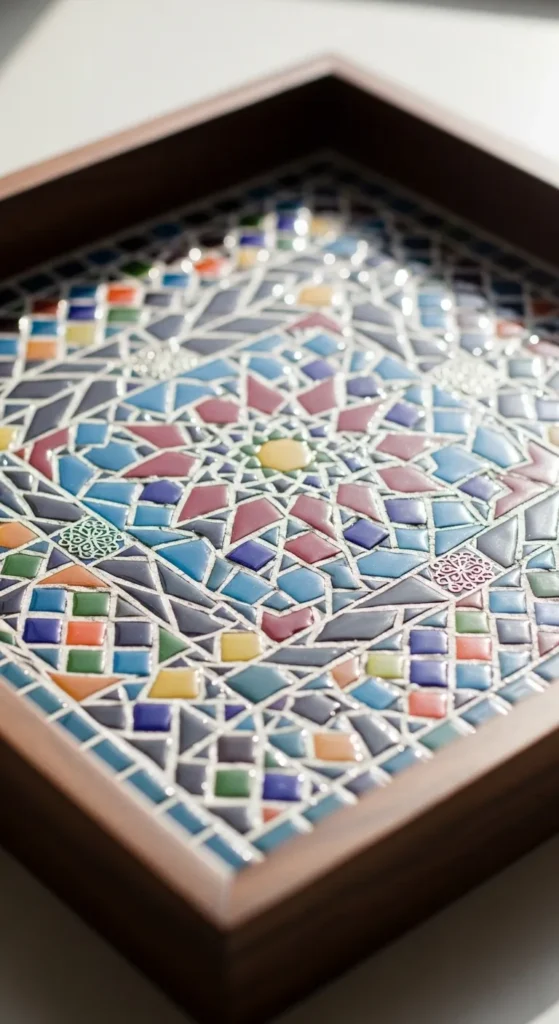
Create a mosaic tray using broken tiles or glass pieces. Arrange the pieces on the tray base with glue, then grout in between. This DIY project gives your tray a sophisticated spring feel. Tip: leftover tiles from home projects or thrifted plates work perfectly. This tray doubles as a decorative piece or serving tray.
7. Burlap and Lace Tray
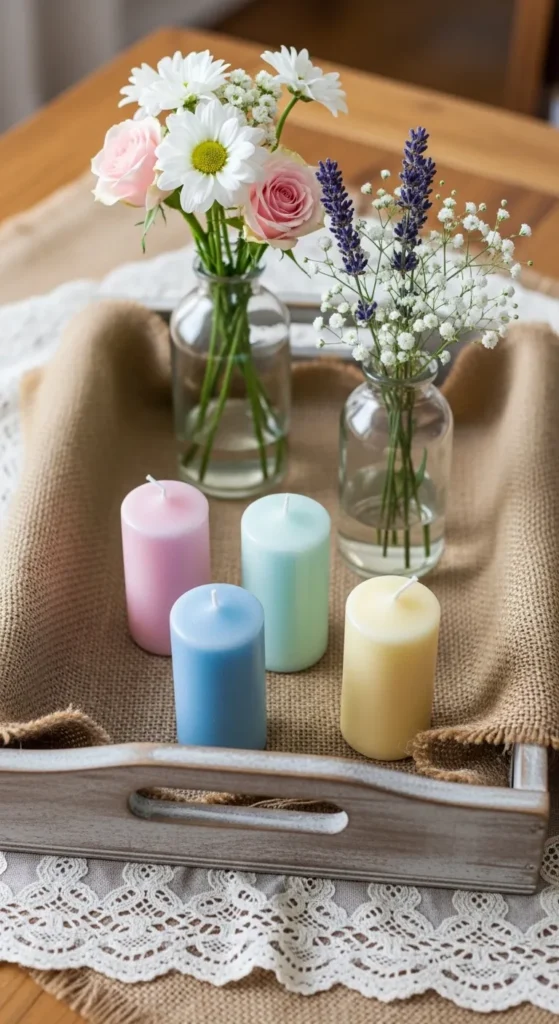
Mix textures by layering burlap and lace on a wooden tray. Cut burlap to fit the tray, then add lace on top for a soft spring look. This works well as a bedside tray or coffee table accent. Budget tip: scrap fabrics from sewing projects are ideal. Secure fabrics with a thin layer of glue or tape on the edges.
8. Terrarium Tray
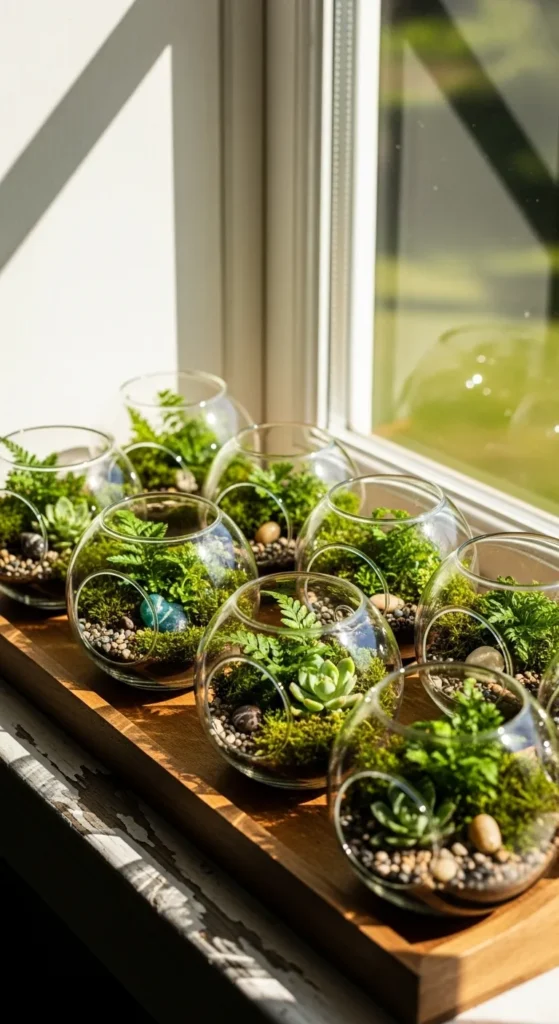
Turn a tray into a mini indoor garden. Arrange glass terrariums, succulents, or small potted plants on the tray. Add pebbles, sand, or moss for detail. Tip: Use small thrifted glass containers to keep costs low. This tray brings nature indoors, making it perfect for spring vibes.
9. Painted Geometric Tray

Create visual interest with geometric painting. Use painter’s tape to create triangles, squares, or stripes, and fill with spring colors. Remove tape once dry for crisp lines. Tip: Spray varnish or sealant protects your design. This is ideal for a living room or office tray.
10. Fabric-Covered Tray
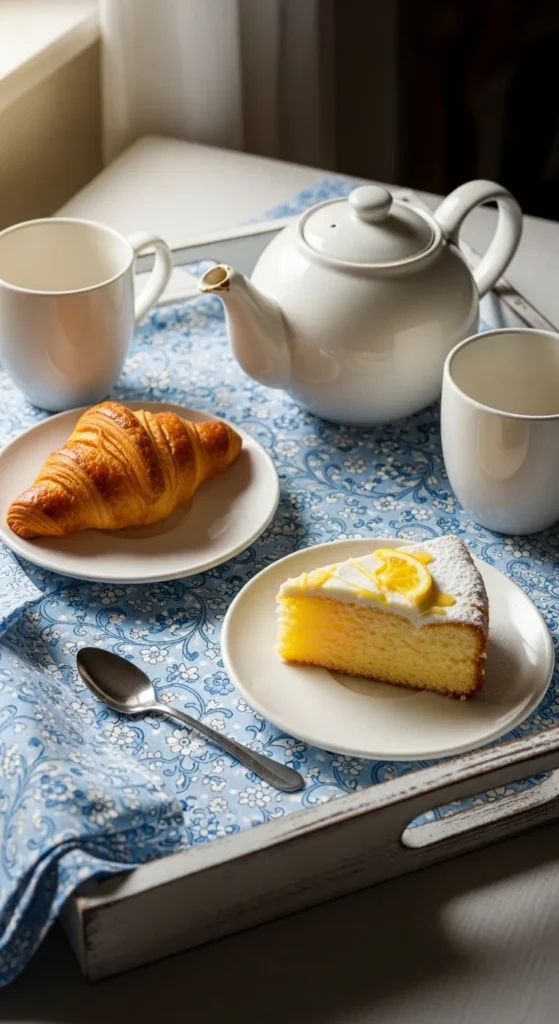
Revive an old tray with fabric lining. Pick a cheerful spring fabric, cut to size, and secure with glue or double-sided tape. Add a clear protective layer if needed. Budget-friendly tip: remnants from fabric stores are perfect for small trays. Use it for morning coffee or tea displays.
11. Spring Herb Tray
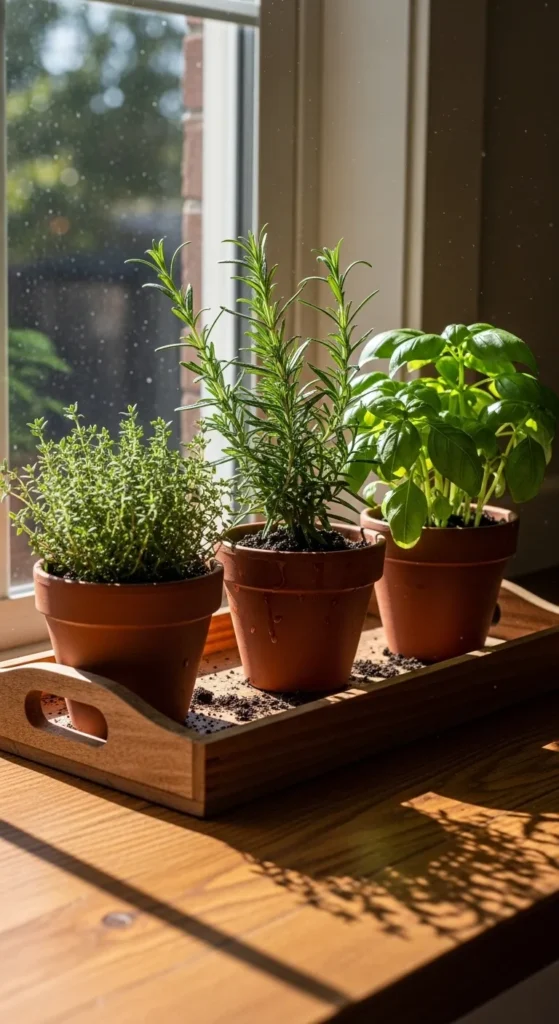
Bring fresh herbs indoors by arranging them on a tray. Small pots of thyme, basil, or rosemary not only look great but also smell amazing. Affordable tip: grow herbs from seeds or cuttings to save money. Use the tray in the kitchen or near a sunny window for a practical spring accent.
12. Upcycled Book Tray

Use old books to create a unique upcycled tray. Stack and tie them securely with twine or ribbon. Place a small board on top if needed for stability. This is a creative and budget-friendly display piece for coffee tables or shelves. Add small decorative items for visual interest.
13. Painted Polka Dot Tray

Polka dots are playful and easy. Paint a base coat, then add dots with a brush or sponge. Stick to spring colors for a cheerful look. Budget tip: craft paint is inexpensive and comes in many colors. Perfect for bedside tables or small kitchen trays.
14. Ribbon-Embellished Tray

Add charm with ribbon accents. Wrap ribbons around handles or edges. Mix colors and textures for interest. Tip: leftover ribbons from past projects are perfect. This tray works well on a console table or vanity.
15. Nature-Inspired Tray

Incorporate natural elements. Arrange twigs, stones, and flowers on a tray for a spring-inspired look. Budget-friendly tip: collect items outdoors. Seal with a spray varnish for durability. This creates a peaceful, organic display anywhere in your home.
16. Watercolor Tray
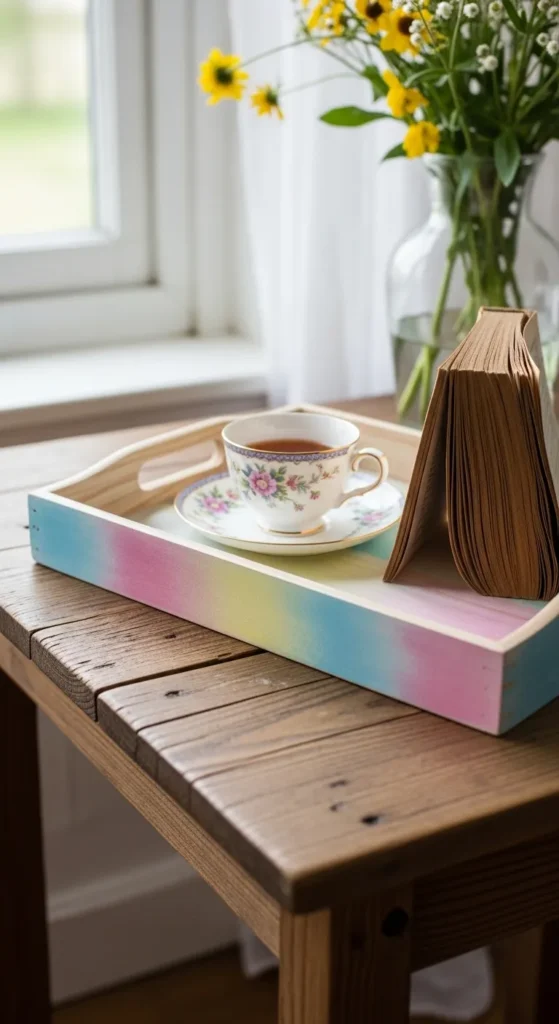
Experiment with watercolors on a tray base. Blend soft shades for a dreamy spring vibe. Seal with a clear coat to protect the design. Tip: leftover watercolor paints are enough for this project. Ideal for relaxation corners or bedrooms.
17. Chalky Finish Tray
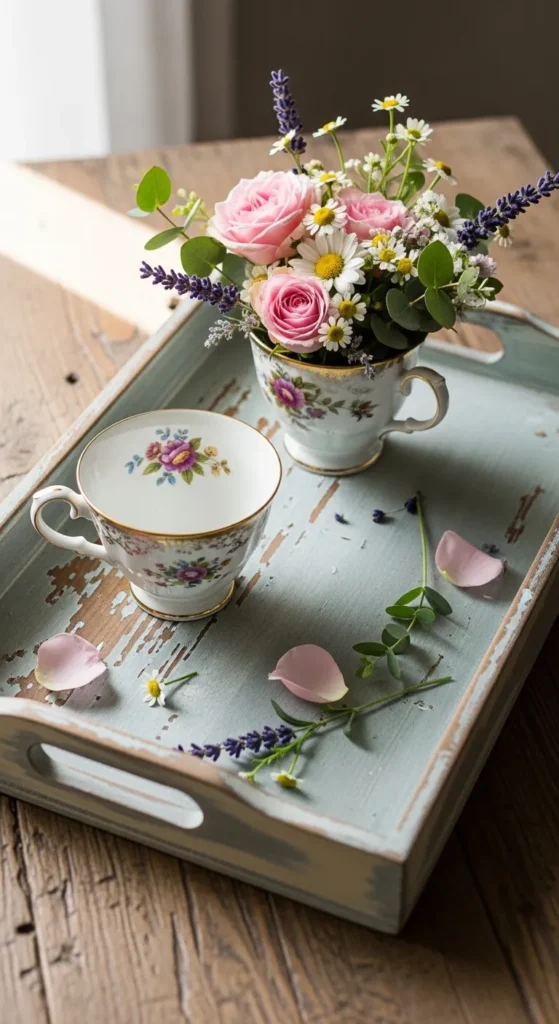
Distress a tray with chalk paint for a soft, aged look. Apply two contrasting shades, then sand edges lightly. Tip: use small paint samples to experiment. Perfect for a vintage or shabby chic spring feel.
18. Seasonal Fruit Tray
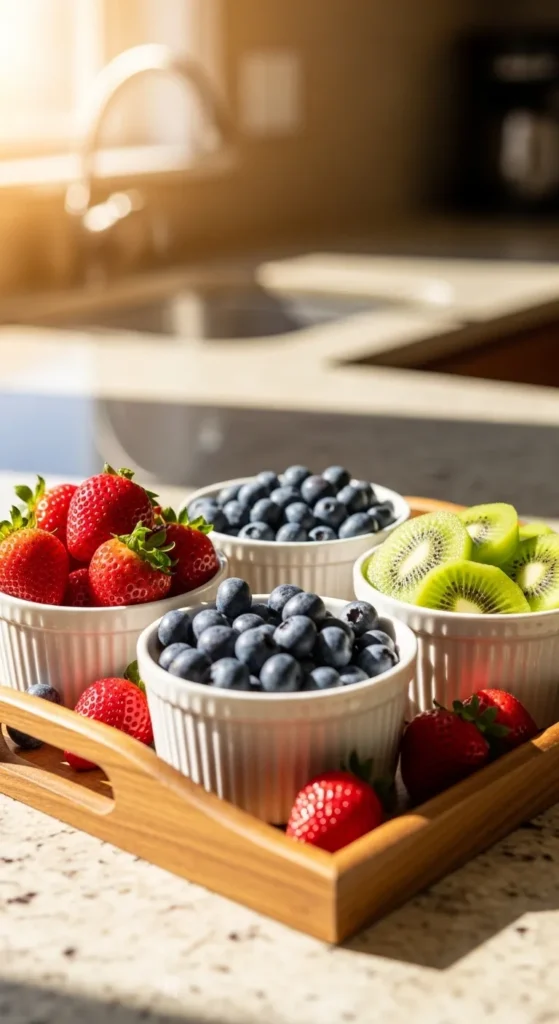
Highlight spring fruits on your tray. Arrange small bowls or plates of colorful produce. Budget tip: seasonal fruits are cheaper and fresher. This tray is both decorative and functional for snacks or brunch displays.
19. Painted Handle Tray

Add color just to the handles for a subtle update. Paint them in spring shades while leaving the base neutral. Tip: masking tape keeps edges clean. Works on any wooden or metal tray to freshen it up.
20. Glass Insert Tray
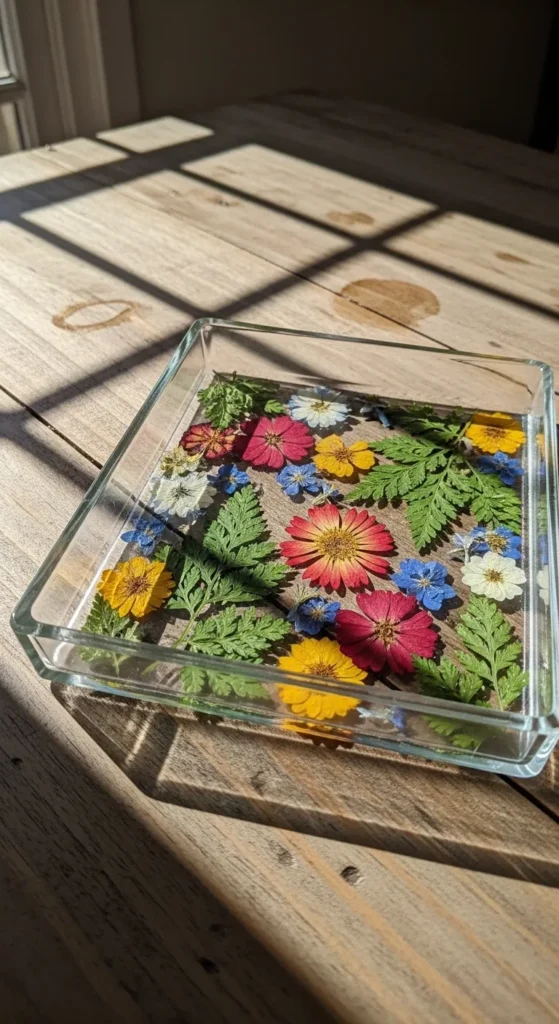
Use pressed flowers under a glass insert. Arrange them carefully on the tray base, then place glass on top. Budget tip: press flowers from your garden or local walks. Creates a delicate, springtime display.
21. Washi Tape Tray
Decorate a tray quickly with washi tape. Create stripes, geometric shapes, or floral accents. Tip: inexpensive and easy to remove or update. Perfect for a temporary seasonal refresh.
22. Mini Garden Tray
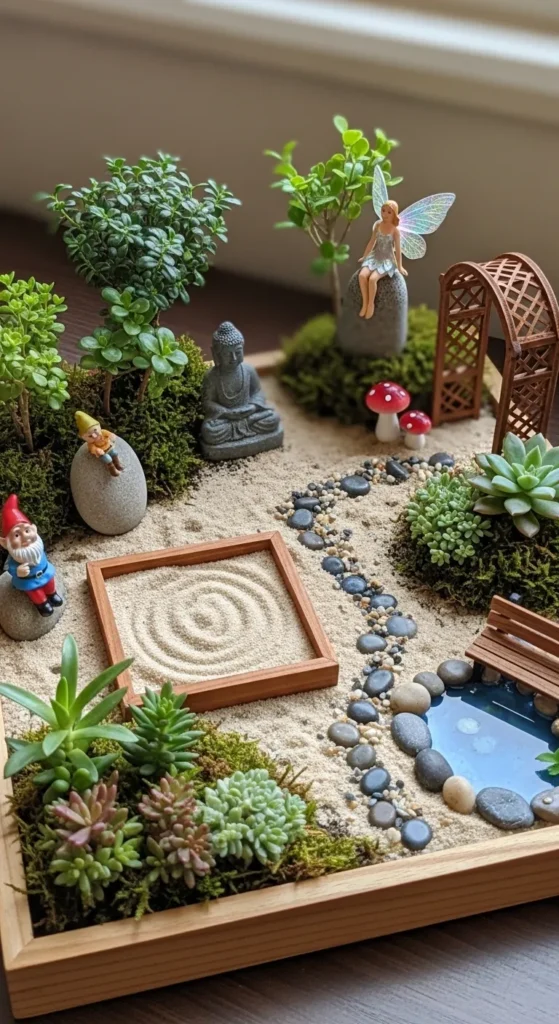
Combine sand, pebbles, and tiny plants for a mini indoor garden. Add small figurines for fun. Budget tip: small plants or succulents are cheap, and you can reuse materials. Works beautifully on shelves or desks.
23. Painted Edge Tray
Sometimes a small touch goes a long way. Paint the tray edges in a bright spring color while keeping the base neutral. Tip: use painter’s tape to get crisp lines. This simple update gives any tray a cheerful seasonal look.
Conclusion
These 23 DIY spring decorative tray ideas show how a few small touches can transform your home for the season. From colorful paint to natural elements, these projects are budget-friendly, easy to create, and bring a cheerful, organized vibe to any room. Pick a style that suits your space, gather your materials, and start crafting a tray that adds spring charm and personality to your home today.