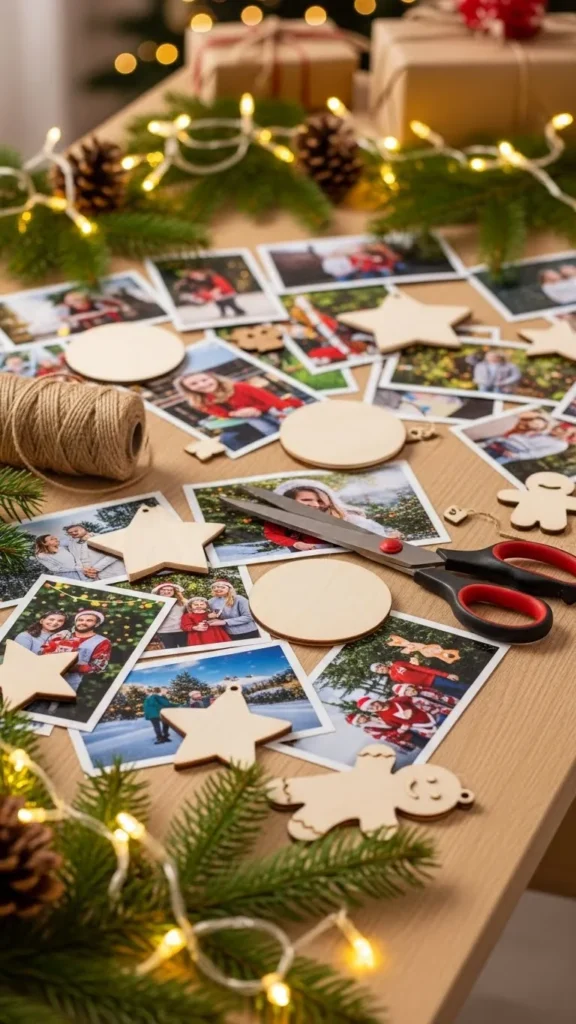
There’s something special about decorating your Christmas tree with ornaments that carry real memories—moments frozen in time, hanging right beside the twinkling lights. DIY Christmas photo ornaments are the perfect way to add that sentimental touch to your holiday décor. They’re personal, inexpensive, and surprisingly easy to make. Whether you want to showcase family portraits, pet photos, or snapshots from past holidays, this project is a warm, joyful way to honor your favorite memories.
Choosing the Right Photos for Your Ornaments
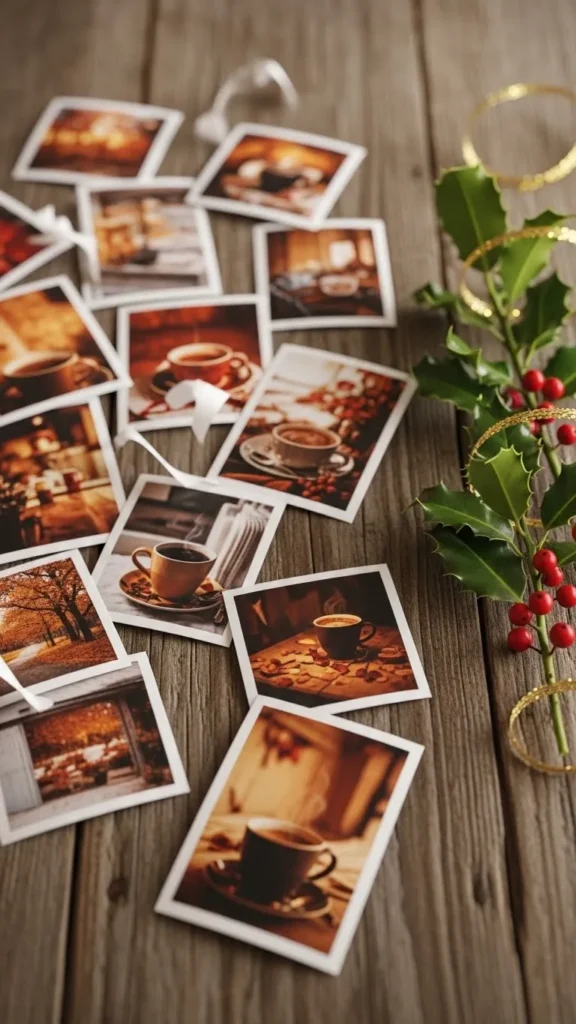
Before diving into the crafting, take a moment to choose the right photos. This step sets the tone for the whole project.
Think about:
- Childhood holiday pictures
- Snapshots from snowy vacations
- Pet photos
- First-Christmas moments for babies or couples
Stick to images with good lighting and clear subjects. If needed, brighten and crop them before printing. Square or circle-friendly compositions work best, depending on the ornament shape you’ll use.
Materials You’ll Need
The good news: You don’t need many supplies—and most are budget-friendly. Gather these before starting:
- Printed photos (matte or glossy)
- Blank ornaments (wood slices, plastic discs, mini frames, or cardstock)
- Craft glue or decoupage glue
- Scissors or a circle punch
- Ribbon, twine, or string
- Optional: Glitter, paint pens, stickers, or tiny embellishments
Having everything ready helps you stay in the creative flow once you begin.
Step-by-Step: How to Make DIY Christmas Photo Ornaments
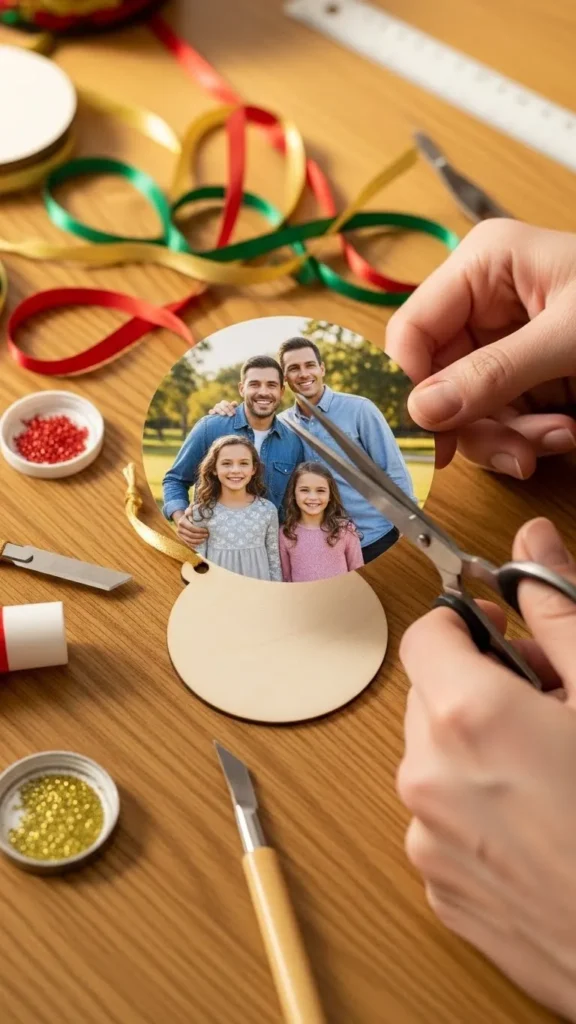
Step 1: Prepare Your Base
If you’re using wooden slices or blank discs, lightly dust them off so the glue sticks well. For mini frames or clear plastic ornaments, check for smudges and wipe them clean.
This is the perfect moment to paint the edges or the back of the ornament if you want a pop of festive color. Let it dry completely before adding your photo.
Step 2: Cut and Fit the Photo
Place your photo on the ornament to measure how much to trim. For round ornaments, trace the shape with a pencil before cutting. For squares or rectangles, trim slowly to avoid cutting off important details.
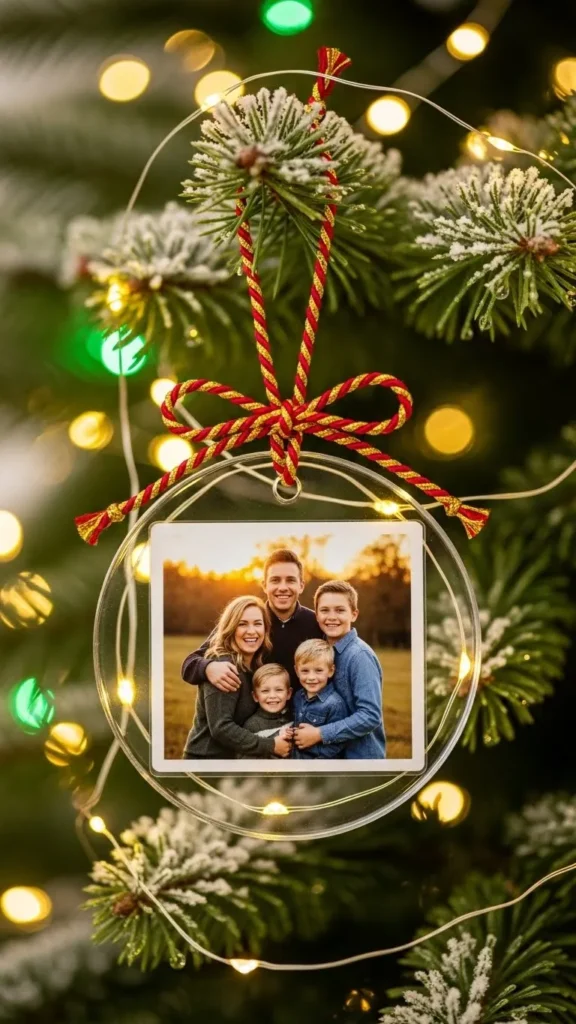
Step 3: Glue the Photo in Place
Apply a thin, even layer of craft glue or decoupage glue. Press the photo gently onto the ornament and smooth out any air bubbles. If you’re using a plastic fillable ornament, sandwich the photo inside the two halves instead.
Let the glue dry before handling further.
Step 4: Add Optional Decorations
This is your moment to get creative. Add little flourishes that reflect your style, such as:
- A dusting of subtle glitter
- A painted border
- Stickers or tiny stars
- A handwritten year at the bottom
These small touches make the ornament feel extra personal and unique.
Step 5: Attach the Hanging Ribbon
Thread ribbon or twine through the ornament’s opening and tie a secure knot. Choose colors that complement your tree—deep red, gold, forest green, or simple jute twine work beautifully.
Creative Variations to Try
Once you’ve mastered the basics, experiment with new styles that make your ornaments even more meaningful:
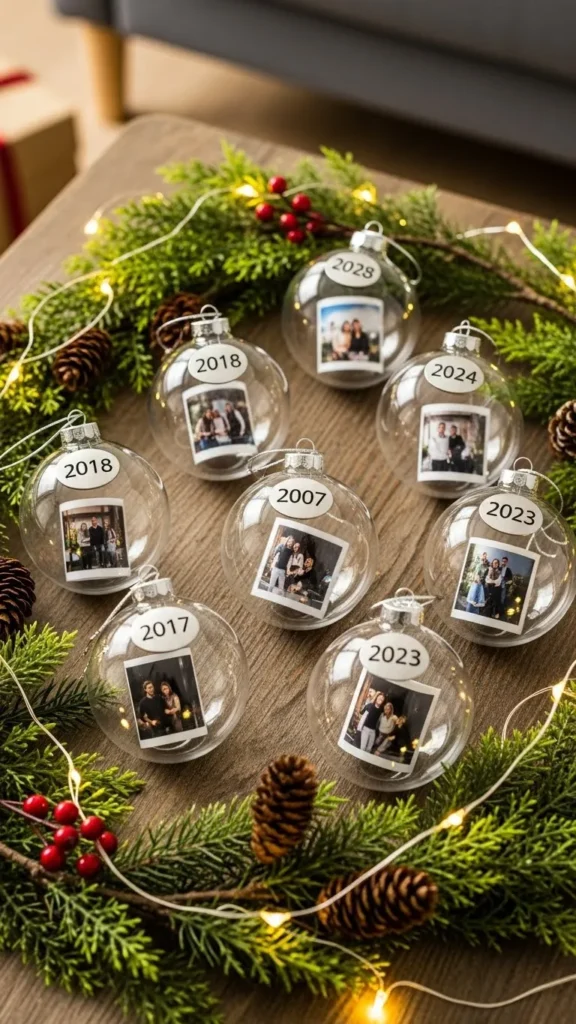
❄ Photo Collage Ornaments
Cut out several mini photos and arrange them on one ornament. Great for showcasing a year’s worth of memories.
❄ Glitter-Filled Ornaments
Use clear ornaments and slip the photo inside, then add faux snow or glitter before sealing it. Shake gently to create a snow-globe effect.
❄ Vintage-Themed Keepsakes
Print photos in sepia or black-and-white, pair with rustic twine, and add dried orange slices or wooden beads for an old-fashioned charm.
❄ Kids’ Artwork + Photo Combo
Let children decorate the background with crayons or paint, then glue their photo on top. These make adorable grandparent gifts.
❄ Pet-Themed Ornaments
Use snapshots of furry family members and add paw-shaped stickers or mini bells for personality.
Tips for Long-Lasting Keepsake Ornaments
If you want these ornaments to last for years, a few extra steps go a long way.
- Seal with a top coat: Use decoupage glue or clear varnish to protect the surface.
- Avoid humidity: Store ornaments in a cool, dry place.
- Wrap individually: Use tissue paper or bubble wrap to keep them safe from scratches.
- Date them: Write the year somewhere discreet so you’ll always remember when you made them.
Final Thoughts
DIY Christmas photo ornaments aren’t just décor—they’re keepsakes that grow more meaningful every year. Whether you’re crafting alone with soft music playing or making them with family around the table, this project fills the season with warmth and creativity.
Save this idea for later and start building your collection of memory-filled ornaments—your future self will thank you!