


Christmas advent calendars make December feel special. They add a little excitement to each morning and create a warm countdown the whole family enjoys. DIY versions are even better because you can tailor them to your space, color palette, and holiday traditions. Whether you like rustic wood, soft fabrics, or simple paper crafts, you’ll find inspiration here to create something meaningful, inexpensive, and charming.
1. Mini Drawer Tower Calendar
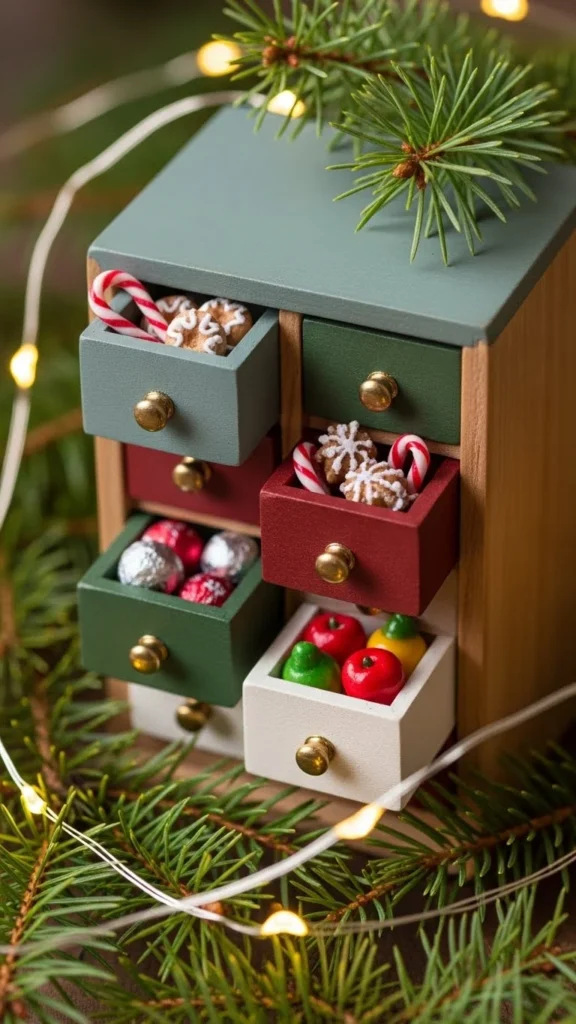
Create a tiny drawer tower using an inexpensive set of unfinished mini drawers. Paint each drawer in simple red, green, or neutral tones. Add easy number stickers for a clean finish. This project works well for small surprises like stickers, candies, or rolled notes. Keep the design simple if you want a modern look, or distress the edges for something more rustic. You can even glue a short piece of ribbon inside each drawer so kids can pull them out easily. If you don’t have wooden drawers, small cardboard drawers from craft stores offer the same charm at a lower price. Stack two or three towers for a taller display, or place one on a mantel for subtle holiday magic.
2. Hanging Burlap Pouch Calendar
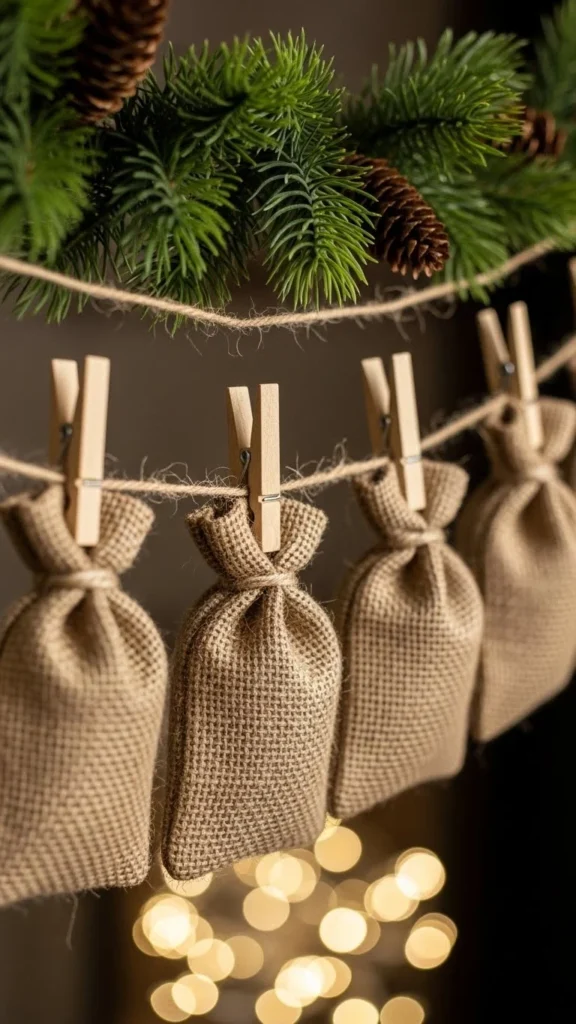
This calendar gives a warm farmhouse feel without spending much. Use mini burlap pouches or sew your own from scrap fabric. Clip them to twine with wooden clothespins and number each one with simple tags. Hang the line across a mantel, stair rail, or blank wall. Add sprigs of greenery for texture. These pouches are roomy enough for treats, folded notes, or activity cards. If you want more color, tie small ribbons around each pouch or layer two colors of twine. It’s an easy setup you can pack away neatly after the season.
3. Shadow Box Advent Calendar
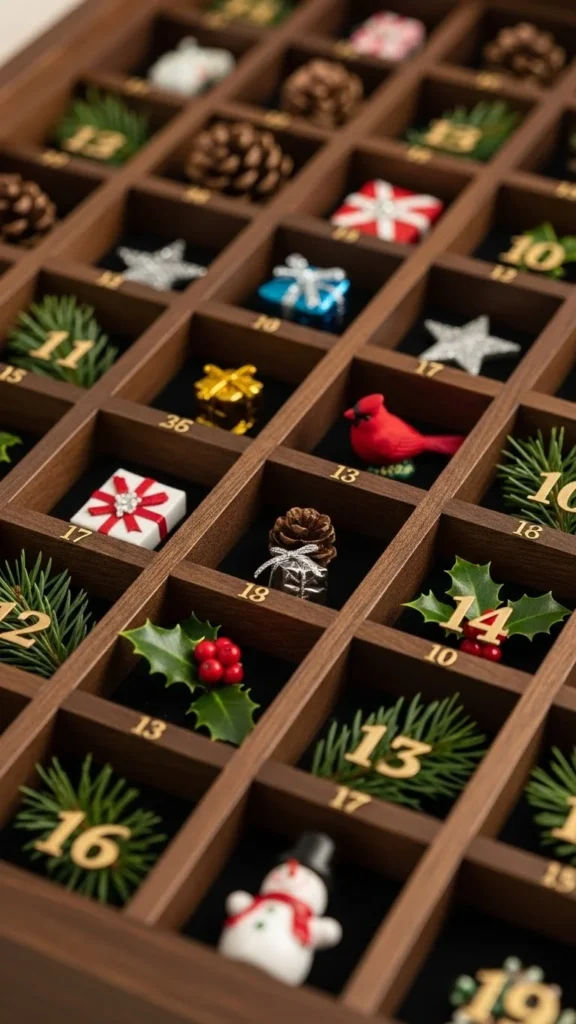
A shadow box calendar works well if you love tidy displays. Divide a wooden shadow box into 25 slots. Use cardstock boxes, tiny jars, or mini envelopes to fill each opening. Add small charms, trinkets, or handwritten notes. Paint the frame white for a bright look or stain it dark for a warm finish. To save money, repurpose a thrifted display case. If your compartments are large, mix in lightweight filler like tissue paper to keep surprises in place. This project becomes a beautiful keepsake you’ll enjoy each year.
4. Mason Jar Lid Countdown Garland
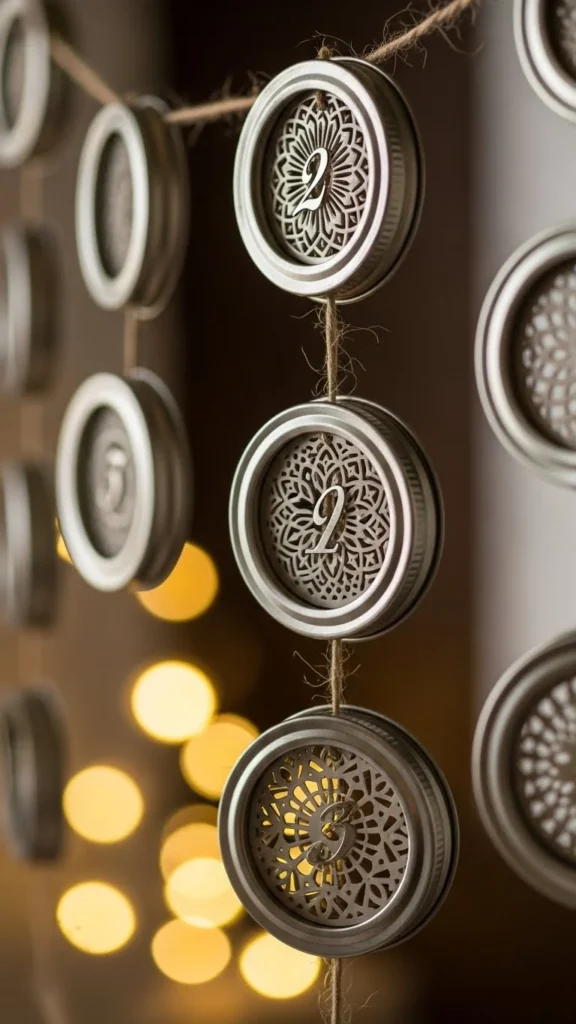
Mason jar lids make a fun and simple base for a countdown. Add scrapbook paper inside each lid, then number them with stickers. Attach them to twine with hot glue, ribbon loops, or metal clips. You can hide small treats behind each lid using mini envelopes or small mesh bags. Hang the garland on a shelf, mantel, or doorway. Use paper that matches your holiday color palette for a cohesive look. This idea is affordable, customizable, and easy to store for next year.
5. Mini Houses Village Calendar
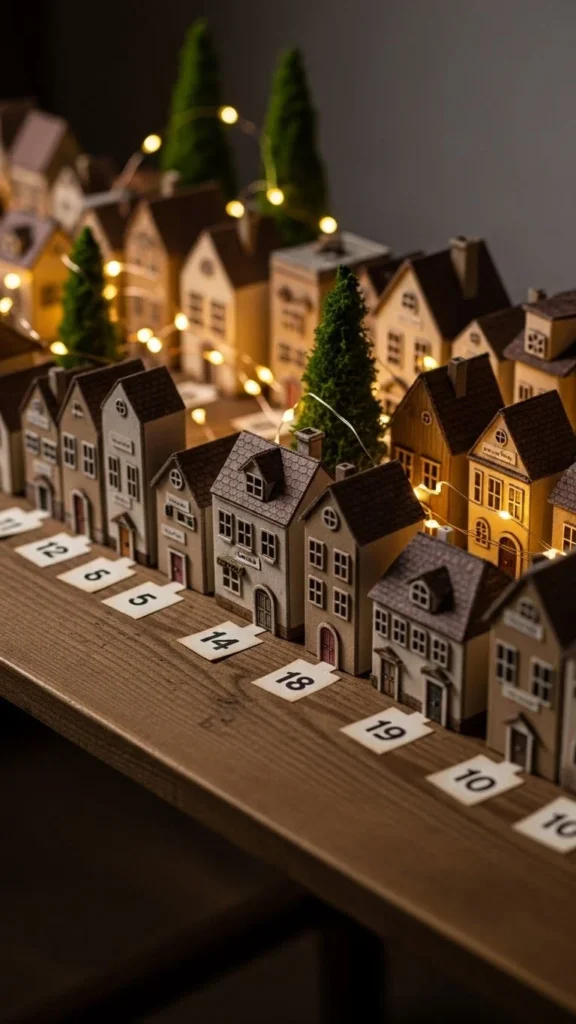
Build a little village of numbered houses using cardstock templates or wooden blanks. Each house can hold a treat or a small activity note. Vary the heights to create dimension. Add snowy rooftops using cotton or white paint. Place the village on a tray or arrange it along a windowsill. For a budget version, print free house templates, fold them, and decorate with markers or stickers. Add a string of fairy lights behind the houses to make the scene feel magical at night.
6. Envelope Wall Grid Calendar
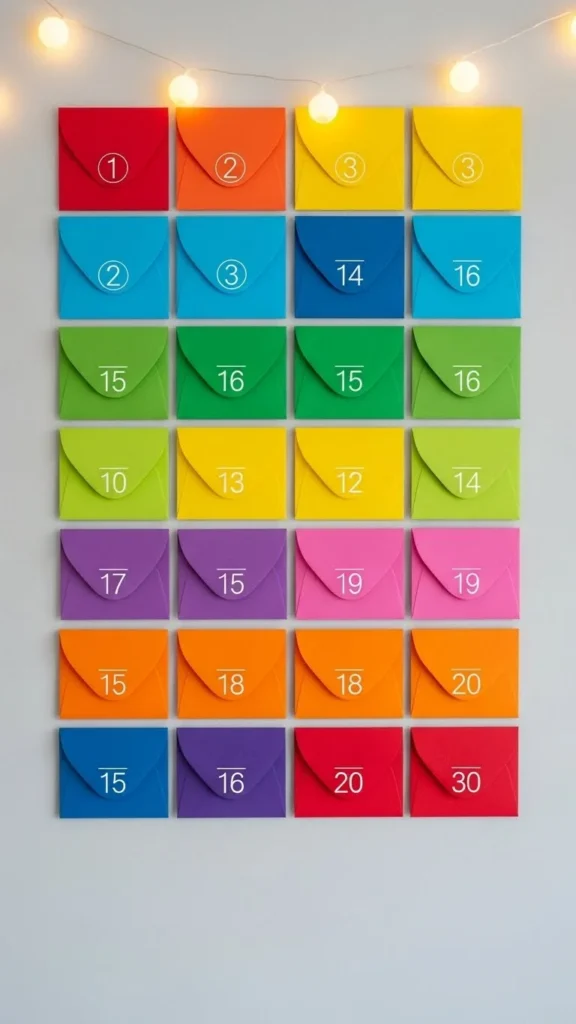
Envelopes are perfect for tiny notes or activities. Create a symmetrical grid using 25 envelopes in coordinating colors. Attach them to a corkboard, foam board, or directly onto the wall with gentle adhesive. Add number stickers or handwrite the dates for a warm touch. Fill each envelope with drawings, crafts, or thoughtful tasks like “bake cookies together.” It’s an inexpensive project that still looks stylish. You can swap the envelope colors each year to refresh the look without starting over.
7. Scrap Fabric Pocket Banner
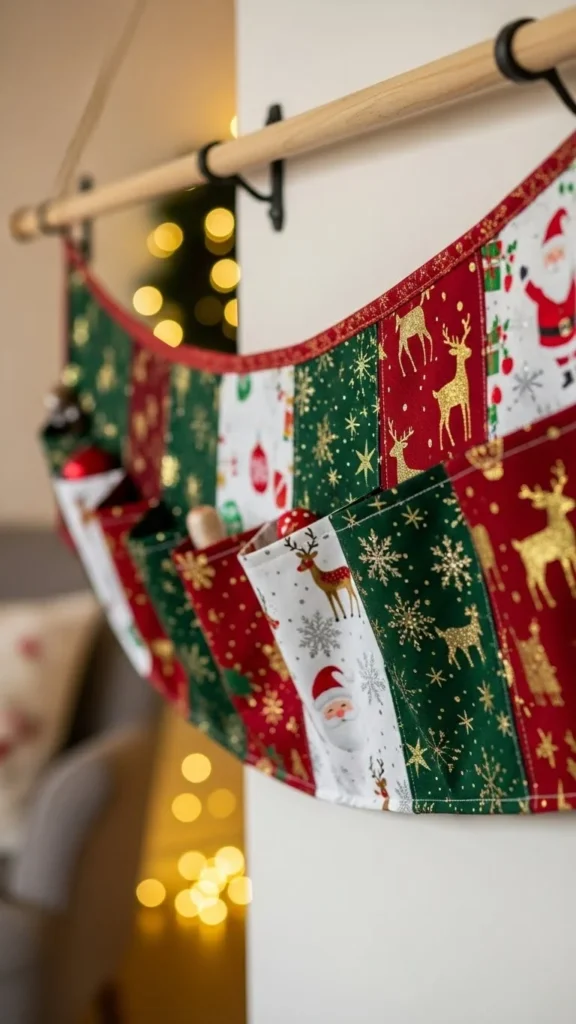
Use scrap fabric to create 25 small pockets on a long banner. This is a great way to repurpose leftover materials. Sew or glue pockets onto a larger fabric base, then hang the banner from a dowel or branch. Add small tags with numbers or use fabric paint to label each pocket. Fill each one with notes, treats, or small toys. This project works well for hallways or narrow walls. Choose fabrics in different patterns for a fun, mismatched style or stick to one palette for a calmer look.
8. Ornament Advent Tree

Turn a small tree into an advent countdown by hanging numbered ornaments. Use simple DIY options like painted wood tags, clay shapes, or filled mini baubles. Each day, someone picks the ornament with the matching number. You can also hide tiny treats inside clear ornaments. Keep the tree on a console table or kitchen counter for easy access. If you’re on a budget, mix handmade ornaments with inexpensive dollar-store finds. This project brings a playful touch to your holiday setup.
9. Paper Roll Countdown Wall Art
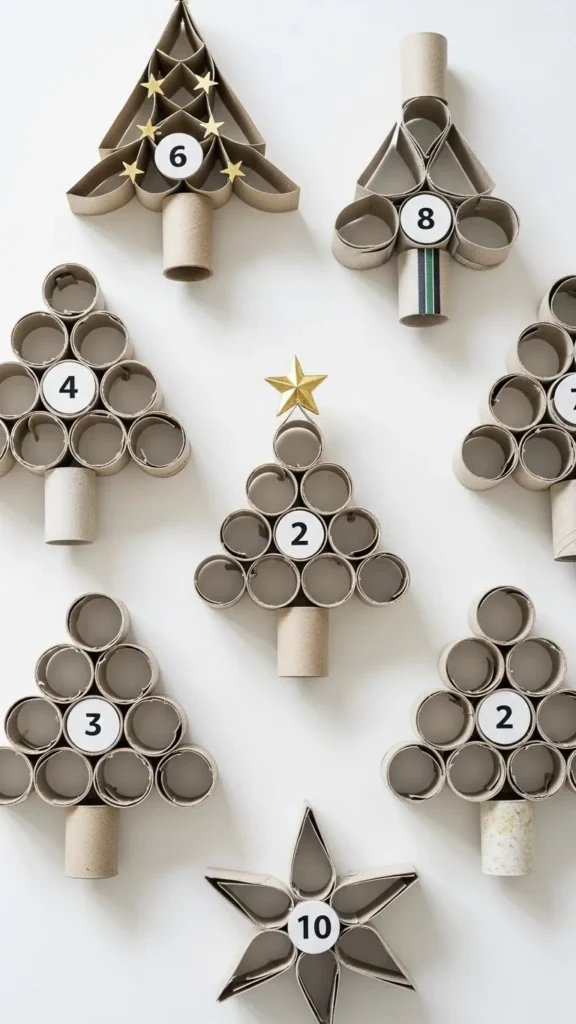
Save paper rolls and turn them into tiny treat holders. Decorate each roll with washi tape, paper, or paint. Arrange them into a tree, wreath, or star shape. Cover one end of each roll with tissue paper so kids can “pop” it to access the surprise inside. Keep the other end sealed with glue or tape. It’s inexpensive and eco-friendly. Add a cardboard backing if you want to move the calendar easily. Hang it on the wall or place it flat on a table.
10. Hanging Gift Box Ladder
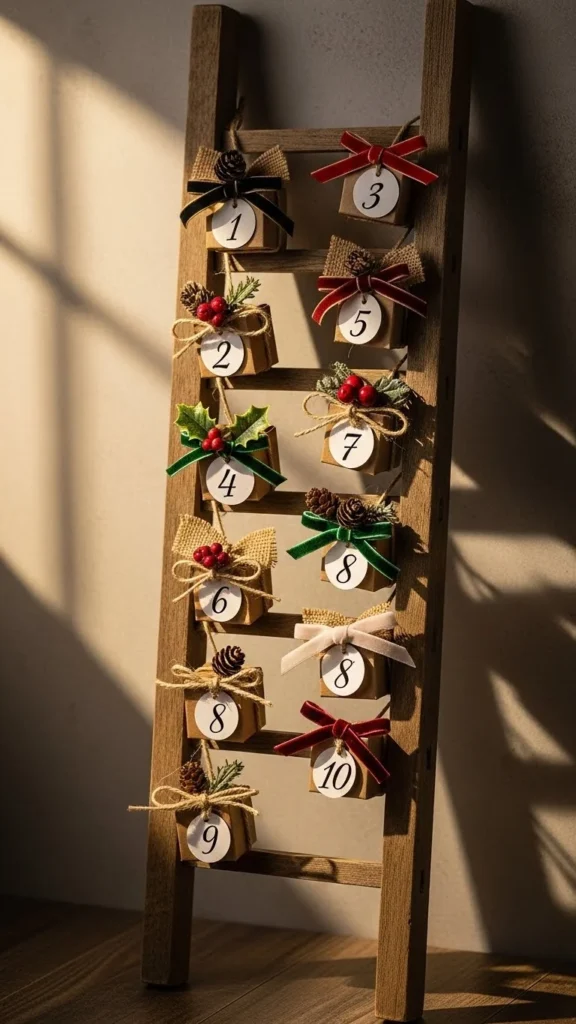
Use a decorative ladder and tie 25 mini boxes to each rung. Mix colors and shapes for a fun layered look. Add simple numbers using tags, stickers, or stamps. Keep the ladder leaning safely against the wall. Place heavier boxes near the bottom and lighter ones on top. This project fills empty corners and adds height to your décor. For a cost-friendly version, build a ladder using dowels and rope. Once December ends, fold and store the boxes for next year.
11. Cookie Cutter Countdown Line

Metal cookie cutters make festive holders for tiny surprises. Attach a small bag, envelope, or candy wrapper behind each cutter. Hang them along ribbon or twine with clips. Use shapes like stars, trees, and snowflakes. Add greenery for texture and place the line along a kitchen window or shelf. Choose cutters of similar colors for a coordinated look. This project is very affordable if you already have a holiday baking stash.
12. Gift Bag Staircase Calendar
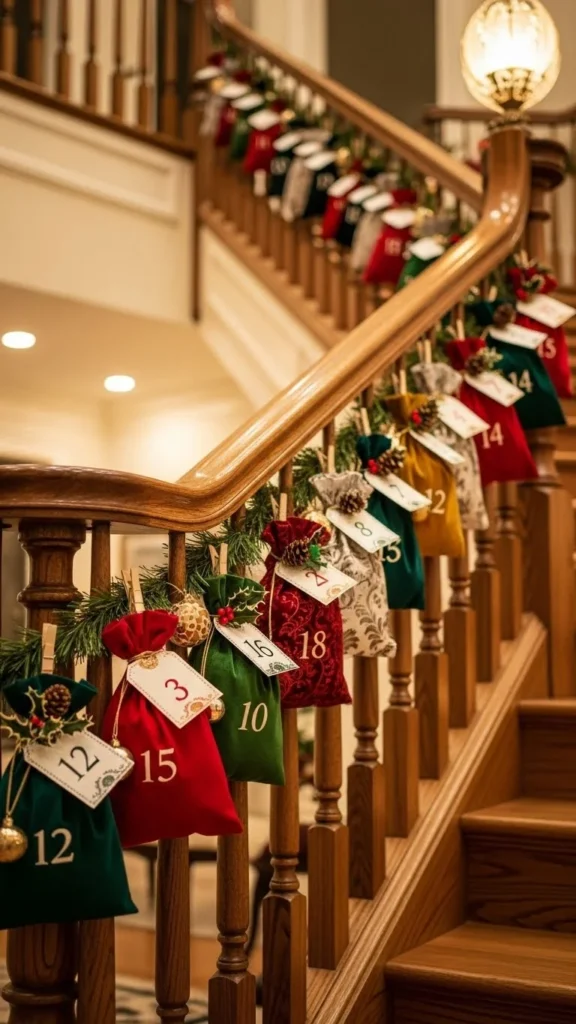
Attach mini gift bags along your stair rail using ribbon or clips. Number each bag and add tissue paper for a colorful pop. This layout works well for kids who enjoy checking the stairs each morning. You can mix bag sizes to make the design feel playful. Try using kraft bags for a neutral theme or bold colors for a lively look. Keep treats lightweight so the bags hang neatly. After the season, fold the bags flat for easy storage.
13. Tiny Tin Advent Calendar

Small tins are perfect for holding miniature items. Decorate the lids with paper circles, snowflakes, or ribbon strips. Arrange the tins in a grid on a board or tray. Secure them with removable adhesive if needed. Fill them with candies, stickers, or folded affirmations. Choose tins in different metallic shades for a stylish look without extra paint. This setup stores easily and can be reused every December.
14. Kraft Box Countdown Tower

Stack kraft boxes into a tree-shaped tower or arrange them in a 5×5 block. Add twine bows, small greenery sprigs, or simple stickers. Kraft boxes are inexpensive and sturdy. Fill each box with small surprises and stack them carefully so the tower stays stable. Add a heavier box at the bottom to keep the base solid. You can reuse these boxes for many seasons or repurpose them as gift packaging.
15. Felt Mitten Garland

Cut mitten shapes from felt and stitch or glue the edges, leaving the top open as a pocket. Clip the mittens to twine or ribbon. Add simple numbers using fabric paint or tags. Fill the mittens with treats or small tasks for the day. Choose two or three felt colors for a coordinated look. Add buttons, ribbon strips, or stitched details for extra charm. This garland works well along mantels, doorways, or windows.
16. Chalkboard Countdown Calendar
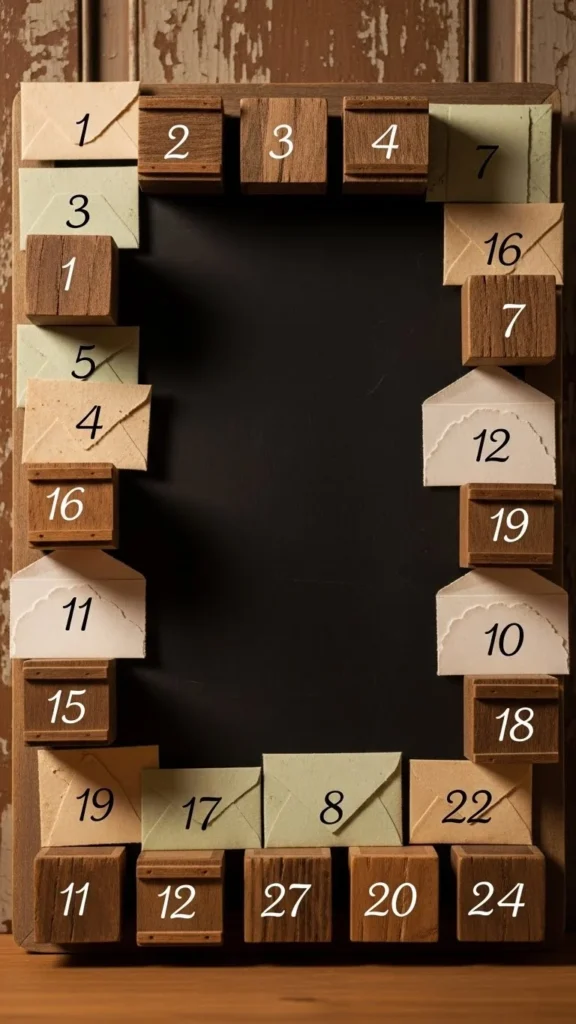
Use a chalkboard as the base for your countdown. Attach envelopes, tiny boxes, or mini clothespins around its edges. Write a holiday message in the center. Kids can remove one piece each day to reveal the surprise inside. This project works well for farmhouse or classic décor styles. If you don’t have a chalkboard, create one using chalkboard paint on any wooden board. Erase and rewrite designs each year for a new look.
17. Hanging Hoop Advent Ring
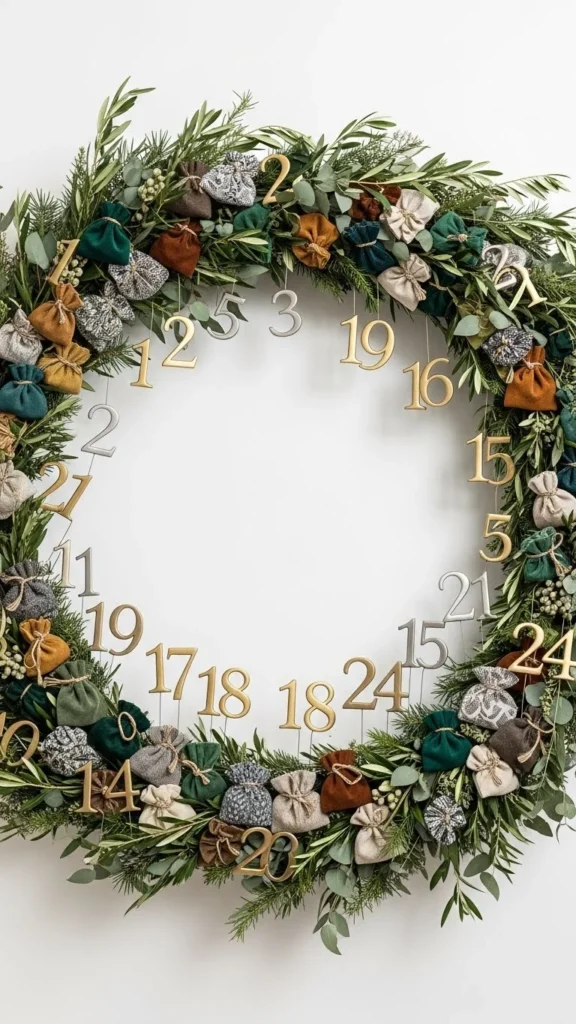
A metal hoop makes a pretty and modern base. Attach 25 tiny pouches or envelopes to the bottom half of the hoop using ribbon or jute. Add greenery or faux stems around the top half. Number each pouch with small tags. Hang the hoop flat against a wall or let it float in front of a window. It’s lightweight and packs away easily. Choose neutral tones for a calm look or bold colors for a lively version.
18. Clip-On Mini Ornament Board
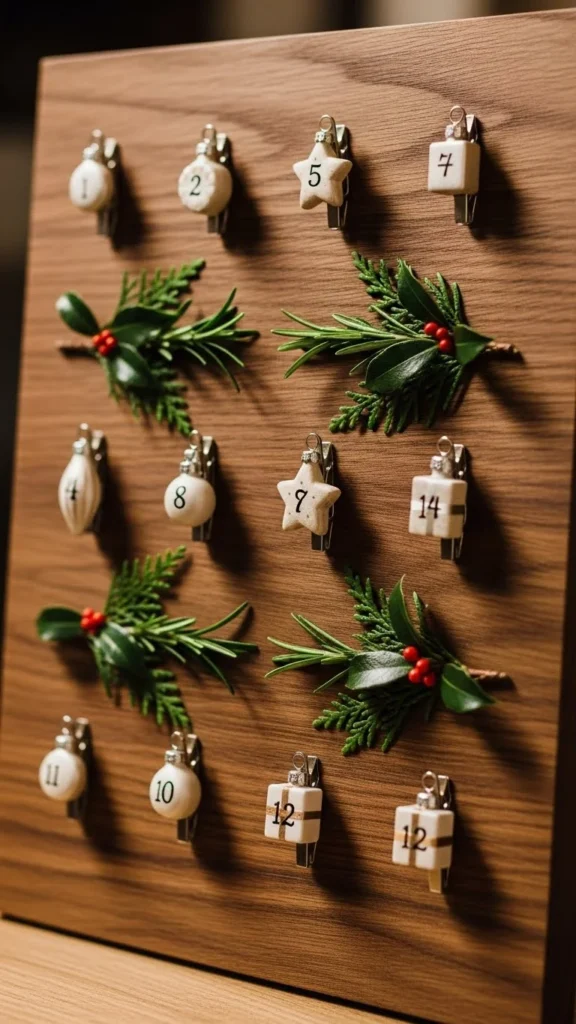
Use a wooden board or corkboard and attach rows of mini ornaments with clips. Paint or stain the board for your style. Number the ornaments and let kids remove one each day. This is a nice option if you prefer flat displays instead of bulky shelves or boxes. You can find mini ornaments cheaply or paint plain ones yourself. Add ribbon loops for easy clipping. Store the whole board safely in a flat container.
19. Book-Style Pocket Calendar
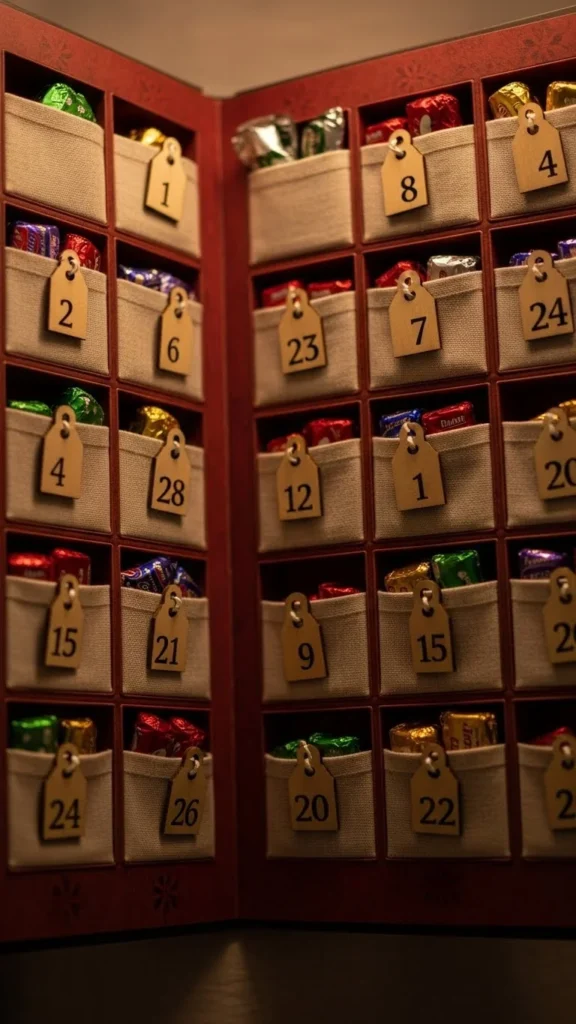
Turn a sturdy notebook or handmade booklet into a countdown. Add pockets on each page using cardstock or fabric. Number the pockets and place a tiny surprise in each one. This calendar closes neatly and stores well. You can decorate each page with small drawings or stickers. It’s a cozy project that feels thoughtful and personal. Kids love flipping each page to see what’s inside. This option works well if you want a compact design.
20. Wooden Crate Advent Display
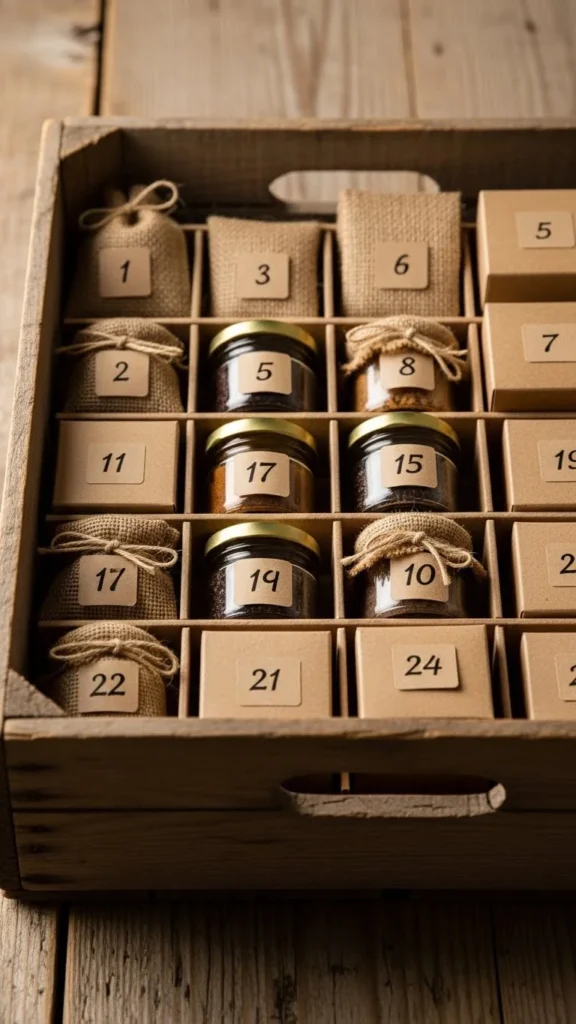
Use a small crate as a base for holding 25 tiny surprise containers. Jars, bags, or small boxes all work well. Arrange them in layers and add greenery or pinecones for texture. The crate makes it easy to move the calendar from room to room. Use kraft bags for a neutral look or bright colors for something more cheerful. You can reuse the crate year-round for storage or décor.
21. Mini Bucket Countdown Line

Tiny buckets look adorable and hold a good amount of treats. Hang them along twine using hooks or clips. Add number tags and lightweight filler like tissue paper. Use silver buckets for a classic look or painted buckets for a colorful theme. These are very durable and can be stored without much care. Add a few greenery stems for softness. Place the garland over a window or mantel for a cheerful touch.
22. Matchbox Tower Calendar
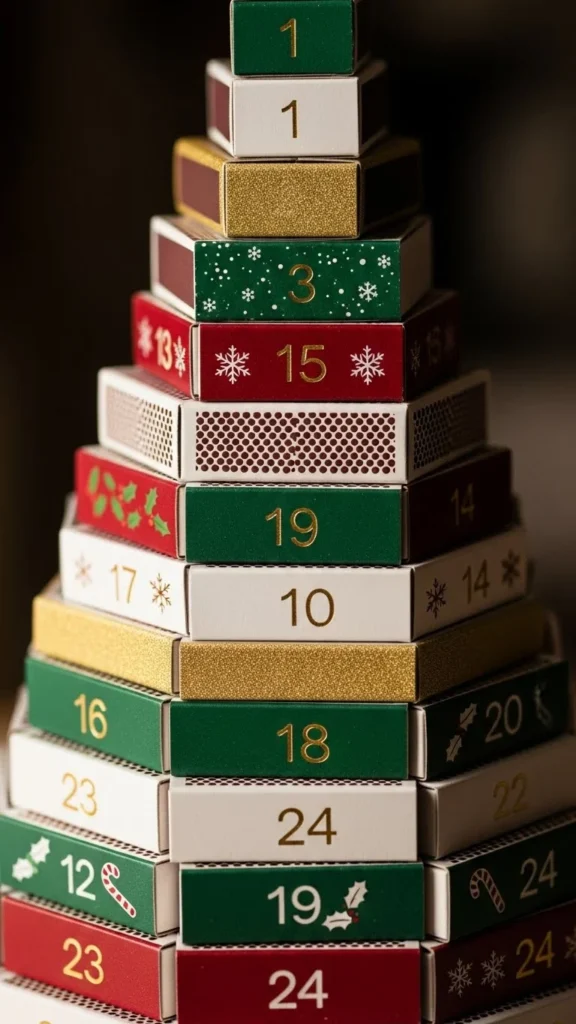
Save matchboxes and decorate them with paper, stickers, or paint. Stack them into a tower or arrange them in a neat grid. Glue them together if you want a stable structure. Each drawer pulls open easily and can hold small trinkets. Matchboxes are budget-friendly and perfect for a minimalist look. Use a single color palette for a clean, coordinated calendar. Store it in a small box after the holiday season.
23. Paper Cone Forest
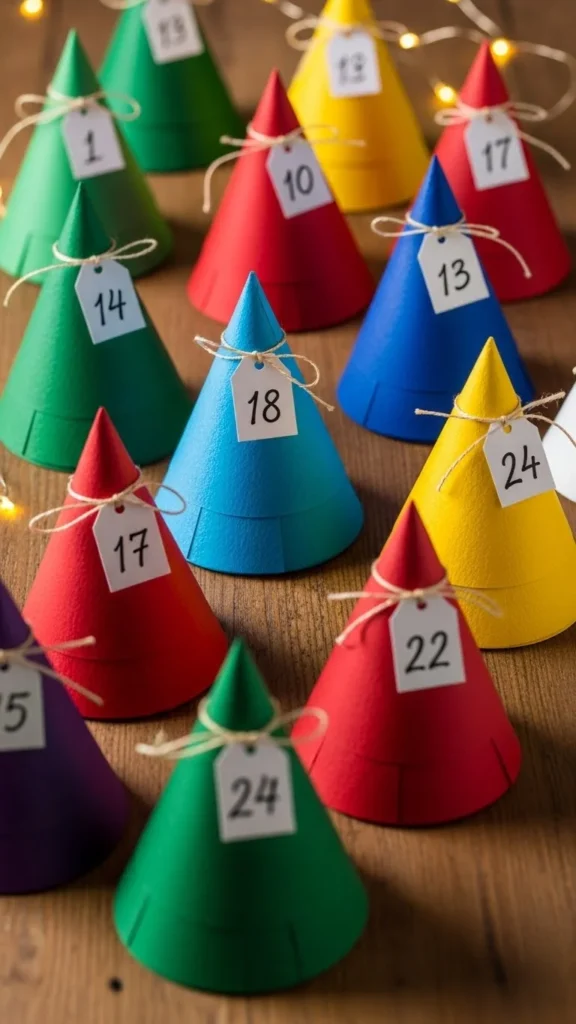
Make little tree cones using cardstock. Number each one and hide a small surprise underneath. Arrange the cones on a tray to create a forest scene. Vary the heights to add dimension. Use patterned paper for a lively look or stick to neutrals for something calm. This project is very inexpensive and easy to assemble. Replace the items inside each year without remaking the cones.
24. Magnetic Tin Fridge Calendar
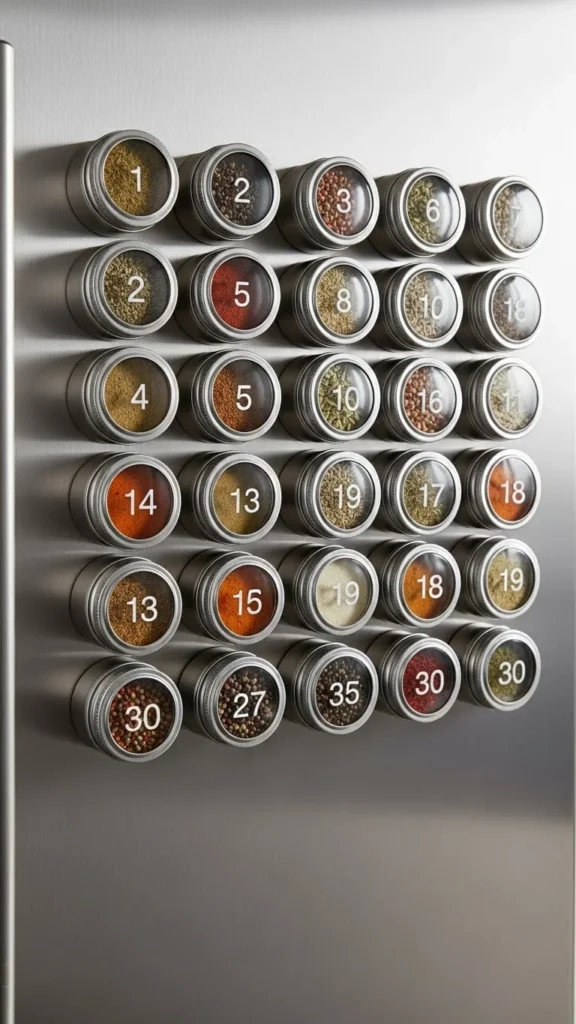
Attach magnets to the back of small tins and arrange them on your fridge in a 5×5 pattern. Add stickers, painted lids, or small decorations. Fill the tins with little notes, candies, or stickers. This calendar is perfect for families who spend lots of time in the kitchen. Kids can reach their day’s tin easily. Keep the tins lightweight so they don’t slide. Store them together in a small bag after the season.
25. Mini Stocking Garland
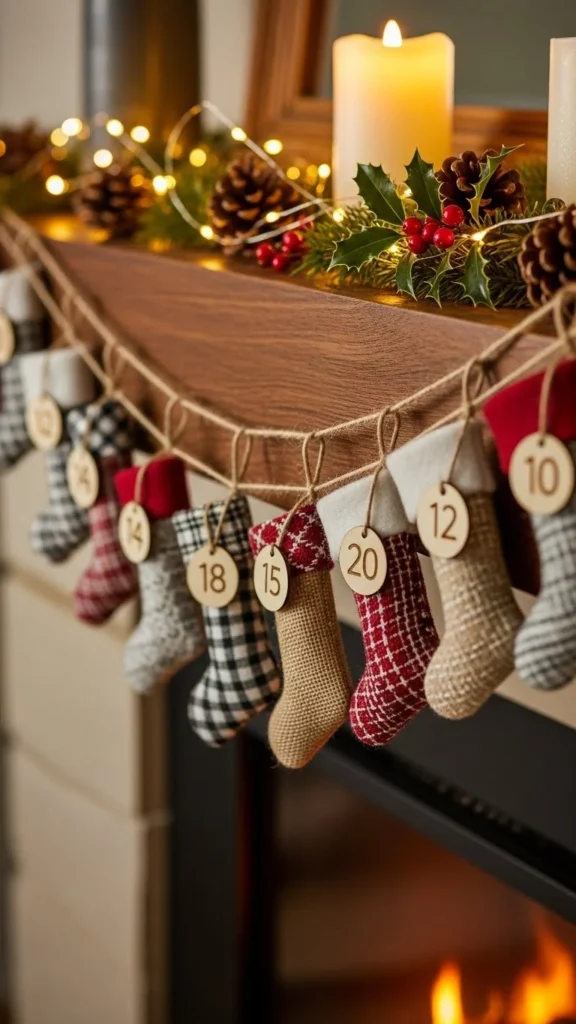
Sew or buy small stockings and hang them along a mantel or shelf. Add simple numbers using iron-on decals, fabric paint, or tags. Fill the stockings with notes, tiny toys, or wrapped candies. Mix fabric patterns for a playful look or stick to solids for something calmer. These stockings fold flat, making storage effortless. Add greenery or fairy lights around the garland for extra warmth.
Conclusion
DIY advent calendars bring charm and anticipation to every December day. They’re simple, personal, and work for any home style or budget. Whether you prefer fabric, paper, wood, or mixed materials, each idea adds a little wonder to your holiday routine. Pick the design that fits your space, gather your supplies, and start creating a countdown that will become a tradition your family looks forward to each year.

Leave a Reply