

There’s something magical about lighting a handmade Christmas candle—especially one you crafted yourself. The soft glow, the warm seasonal scents, and the personal touch make your home feel instantly festive. Whether you want to create heartfelt gifts or simply add charm to your holiday décor, DIY Christmas candles are easier to make than you might think.
This guide walks you through simple steps, cozy scent ideas, and fun decorating tips so you can create candles that look and smell professionally crafted.
What You Need to Get Started
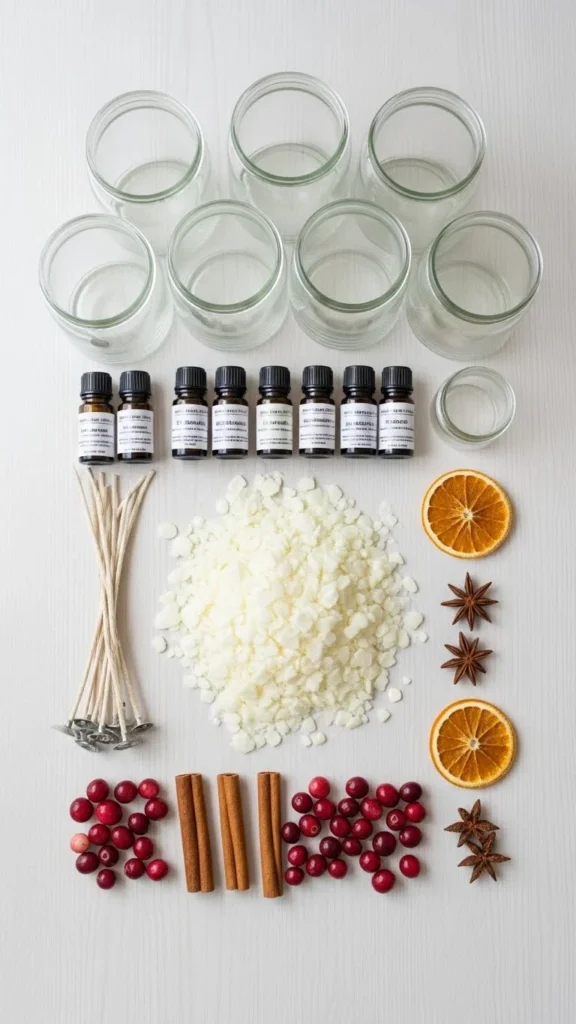
Before you begin pouring and mixing, gather a few basic supplies. You don’t need fancy tools—just simple, affordable materials that work beautifully for Christmas DIY projects.
Essential Materials
- Soy wax flakes or beeswax
- Candle wicks (cotton or wood)
- Heatproof jars, tins, or glass containers
- A double boiler or a heat-safe bowl placed over a pot
- Essential oils for fragrance
- Wooden skewers or clothespins to center your wick
- Optional décor: dried oranges, cinnamon sticks, pine sprigs, star anise
Helpful Tips
- Choose soy wax if you want a clean, long-lasting burn.
- Pre-waxed wicks make centering much easier.
- Keep a kitchen thermometer nearby to avoid overheating the wax.
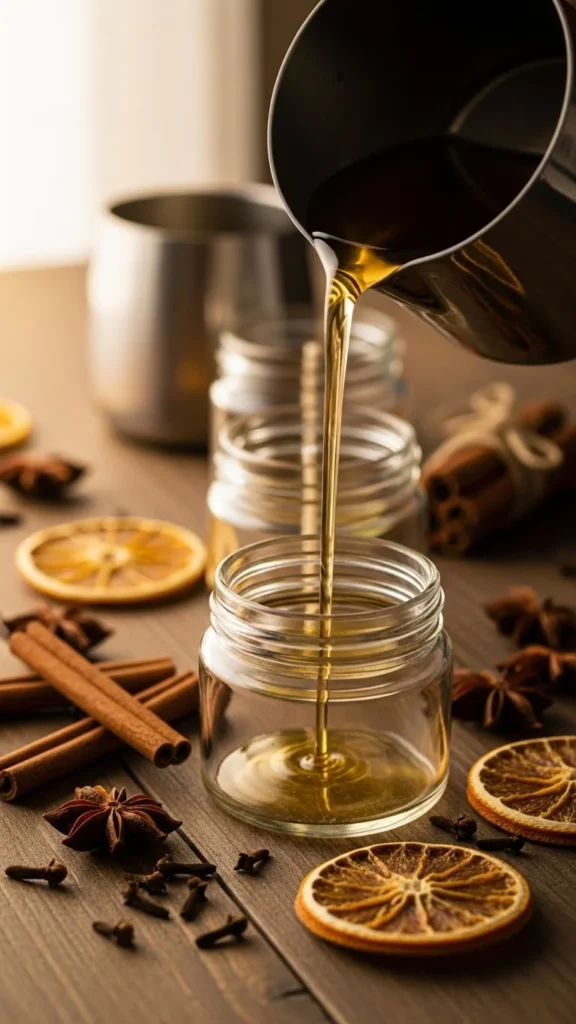
Step 1: Melt the Wax Slowly
Start by melting your wax over low heat. Slow, gentle melting prevents the wax from burning and helps your candle set smoothly.
- Add your wax flakes to the top of a double boiler.
- Stir occasionally as they melt down.
- Remove from heat once the wax reaches about 70–80°C (160–175°F).
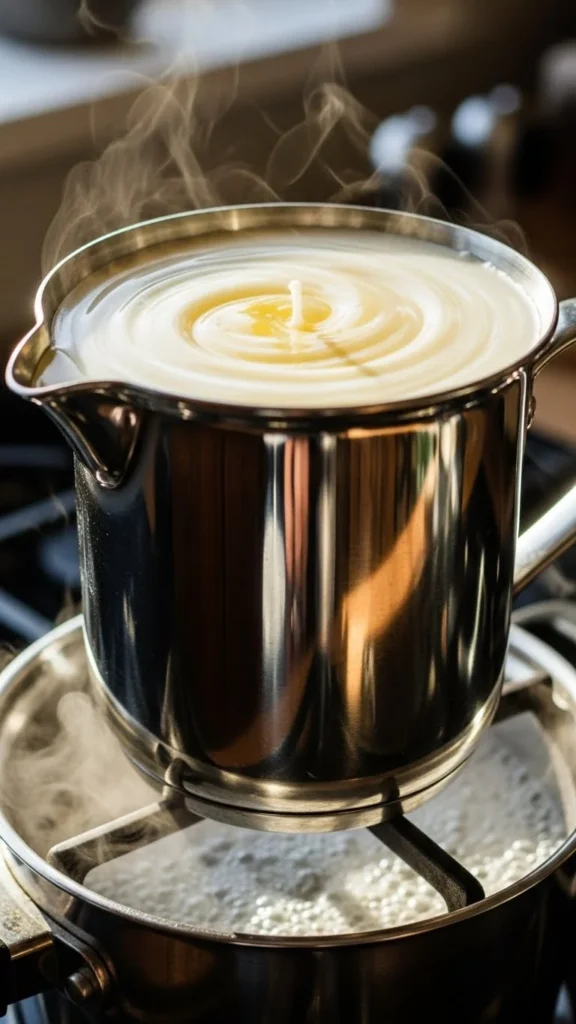
Pro Tip:
Don’t rush this step. Slow melting equals fewer bubbles and a better finish.
Step 2: Add Your Cozy Christmas Scents
This is where the festive magic begins. You can create simple blends or layered scents that remind you of a Christmas market or a cozy winter cabin.
Popular Christmas Scent Ideas
- Cinnamon + vanilla for a warm bakery feel
- Orange + clove for a bright holiday spice blend
- Fir needle + cedarwood to bring the scent of fresh Christmas trees indoors
- Peppermint + vanilla for a fresh candy-cane twist
Add your essential oils once the wax has cooled slightly (around 60°C / 140°F). Pouring oils into very hot wax can weaken the scent throw.
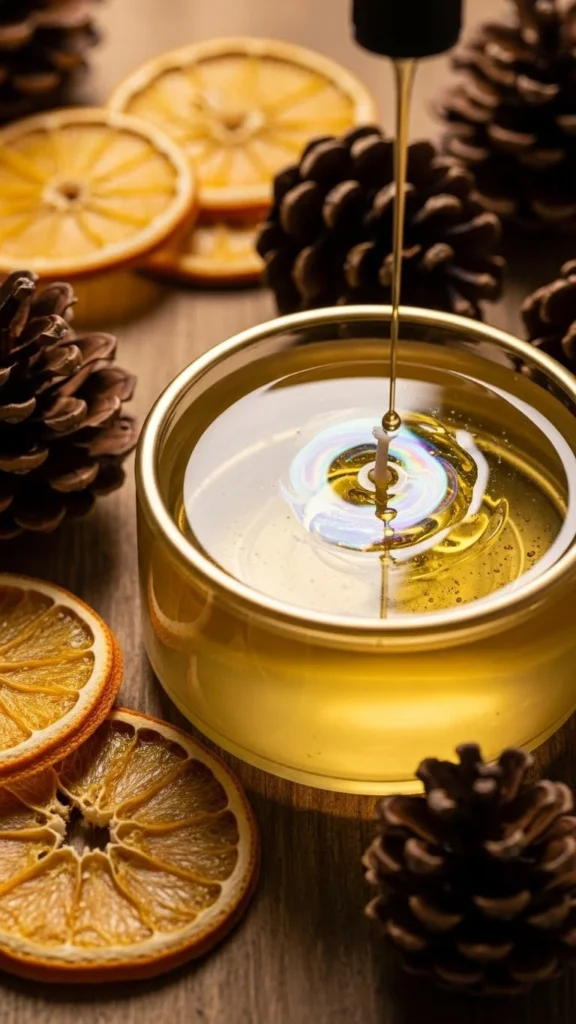
Pro Tip:
Start with 20–30 drops of essential oil per small jar and adjust based on your scent strength preference.
Step 3: Prepare the Jars and Wicks
While your scented wax cools, prepare your containers.
- Place a wick in the center of each jar.
- Use a clothespin, wick holder, or wooden skewer balanced across the top to keep it straight.
- Add any decorative elements that won’t interfere with the burn—like a few dried orange slices pressed to the side of the jar or a sprinkle of dried herbs.
Tip:
Avoid over-decorating the inside of the jar. Keep any items away from the flame path.
Step 4: Pour Your Wax Gently
Once your wax is ready, pour it slowly into your jars.
- Pour in a thin, steady stream to avoid bubbles.
- Leave a little space at the top for a clean, finished look.
- Let the candles sit undisturbed as they cool.
Let the candles cool completely for several hours—overnight is even better.
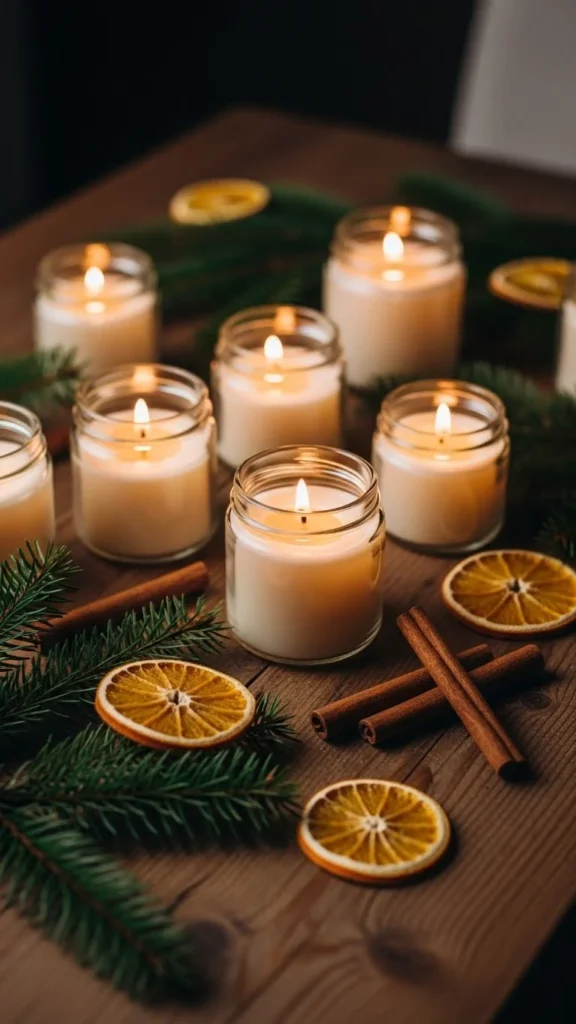
Step 5: Add Final Touches and Decorations
Now comes the fun, creative part.
Easy Decorating Ideas
- Wrap the jar with twine or a thin ribbon
- Add a small kraft tag with the scent name
- Tie on a tiny pine cone for a rustic look
- Sprinkle crushed dried herbs on top of the candle before it fully sets
These final details make your candles feel thoughtful and gift-ready.
Step 6: Cure Your Candles for Better Scent Throw
Curing helps deepen the fragrance and ensures the scent spreads through the room when you light the candle.
- Let the candles rest for at least 48 hours.
- For stronger scents, cure for up to a week.
The longer the wax and oils bond, the more impressive the aroma.
Troubleshooting Common Candle Problems
Even simple DIYs can come with small challenges. Here’s how to handle the most common ones:
Uneven Tops
Reheat a small amount of wax and pour a thin layer on top to smooth it out.
Weak Scent
Use higher-quality essential oils and let your candles cure longer.
Wick Drowning
Choose a thicker wick next time or trim your wick to ¼ inch before lighting.
Creative Christmas Candle Variations
Try these charming ideas once you’ve mastered the basics:
- Layered candles with different scents or colors
- Frosted glass jars coated with Epsom salt for a snowy effect
- Mini tin candles perfect for stocking stuffers
- Herb-infused candles using dried rosemary, cloves, or star anise
These variations look stunning on shelves, dinner tables, and gift baskets.
Final Thoughts
Homemade Christmas candles are more than just décor—they’re cozy, personal, and full of seasonal charm. With a handful of simple supplies, you can create candles that make your home smell warm and festive all winter long.
Save this guide so you can come back to it anytime you want to make a fresh batch of holiday candles!

Leave a Reply