

Creating a warm and festive glow on your holiday table doesn’t have to be complicated or expensive. DIY Christmas candle rings are one of the easiest ways to elevate your décor, add seasonal charm, and make your table feel intentionally styled. Even better—they’re customizable, stylish, and come together in minutes.
Whether you’re prepping for a dinner party or simply want your home to feel extra cozy, this guide walks you through everything you need to create your own stunning candle rings with ease.
Gather Your Supplies
Before you begin, pull together a few simple materials. You probably have several of them already in your holiday storage bins.
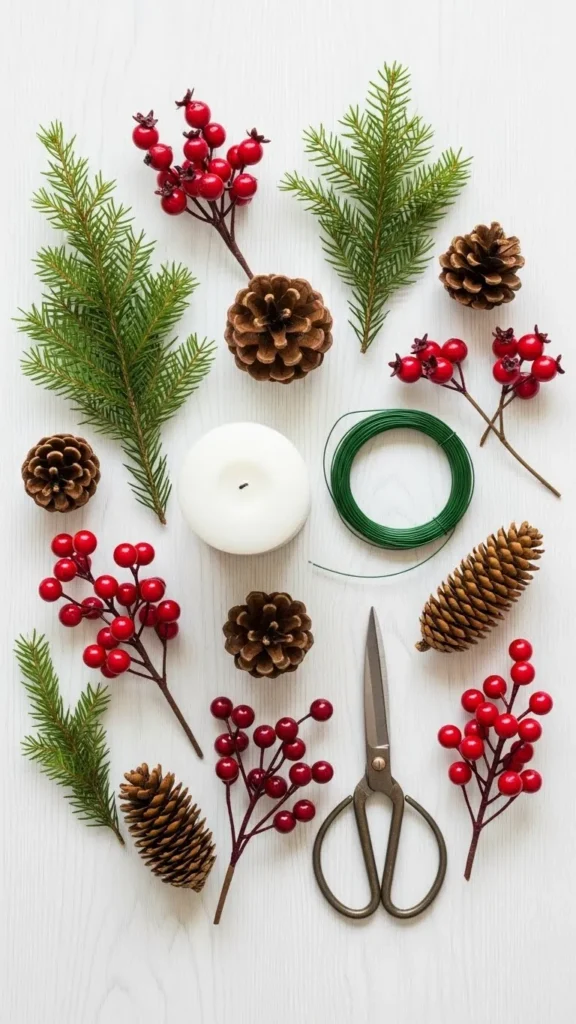
Basic supplies you’ll need:
- Faux greenery or real cuttings
- Small pinecones or berry stems
- Floral wire or twine
- A candle (pillar or taper)
- Wire cutters and scissors
You can also add touches like mini ornaments, cinnamon sticks, dried orange slices, or ribbon. Keep your color palette consistent with your tablescape—classic red and green, rustic naturals, metallic accents, or soft winter neutrals.
Step 1: Shape Your Candle Ring Base
Start with the circular structure that will support your decorations.
Cut a piece of floral wire long enough to wrap around the candle with a little extra room. Join the ends to form a secure ring. If you’re using twine, simply knot the ends tightly.
Pro tip:
Make the ring slightly larger than the candle so the finished piece sits comfortably without being too snug.
This base doesn’t need to look perfect—it will be fully covered by greenery later.
Step 2: Add Your Greenery
Once the base is ready, begin layering your greenery all the way around it.
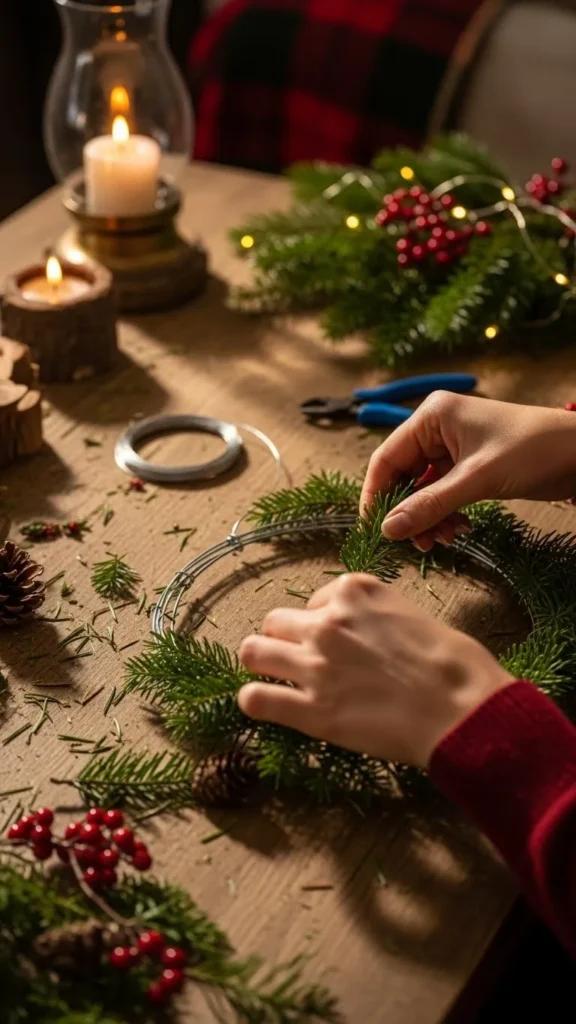
Use short sprigs for a fuller look. Attach each piece using floral wire, overlapping them to hide the stems and create a seamless circle. Work in one direction to keep the ring looking clean and professional.
Tips for choosing greenery:
- Faux greenery gives a long-lasting result.
- Real cedar or fir smells amazing and creates a natural, cozy feel.
- Mix textures—soft needles, broad leaves, and frosted pieces bring depth.
Stop once your ring looks lush but not overcrowded. You want the candle to remain the main focus.
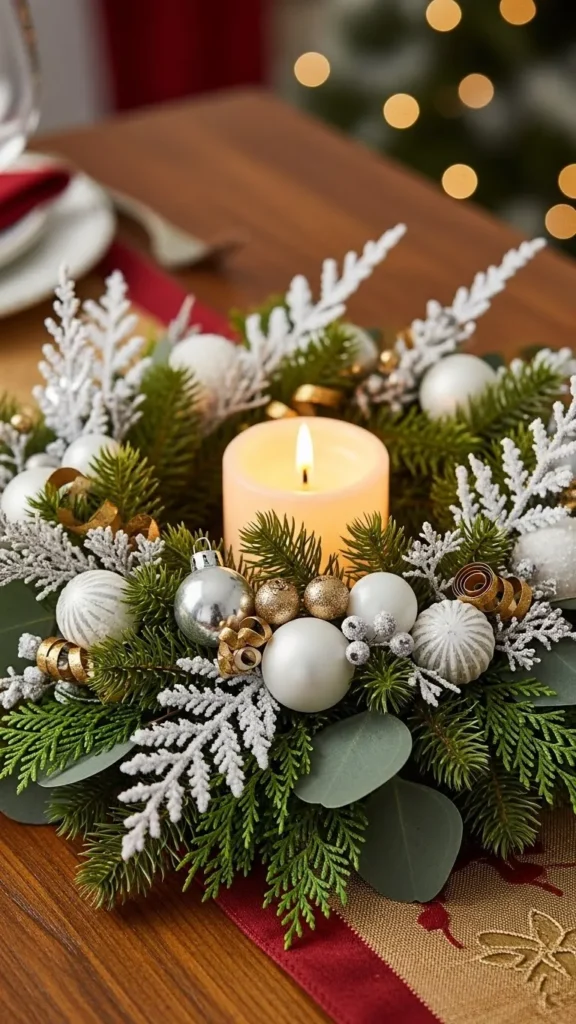
Step 3: Add Decorative Accents
Now it’s time to elevate things!
Choose a theme that fits your table style:
- Rustic: pinecones, wooden beads, burlap ribbon
- Traditional: red berry clusters, gold accents
- Minimalist: frosted branches, small white baubles
- Glam: metallic elements, tiny sparkly stems
Attach each item securely so nothing shifts when moving the ring. Keep the arrangement balanced but organic—not perfectly symmetrical.
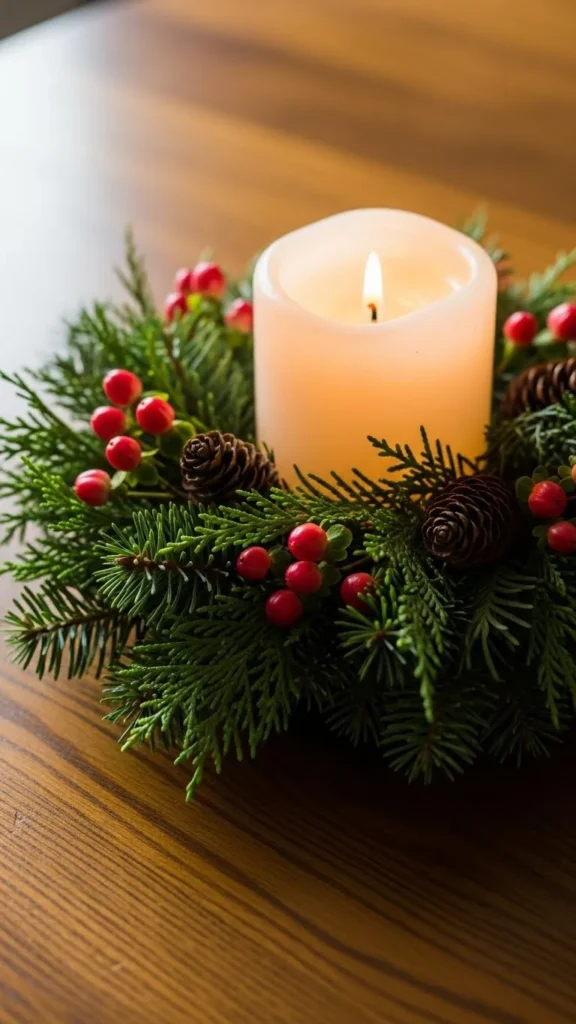
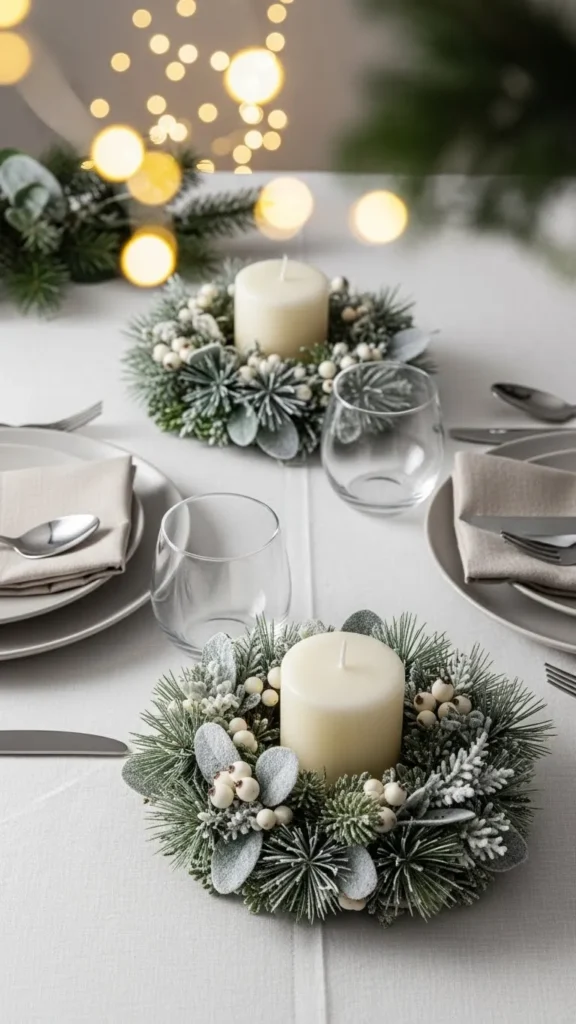
Step 4: Style Your Candle Rings on the Table
Once your candle rings are complete, it’s time to make them shine—literally and visually.
Place each ring around your candle of choice and set them directly on your dining table, mantel, or coffee table.
Here are some styling ideas:
- Pair different sizes of candles for a layered centerpiece.
- Use matching candle rings down a long table runner.
- Mix in natural elements like fresh garland, ornaments, or ribbon.
If you’re hosting a dinner gathering, candle rings instantly add a cohesive and polished look without overwhelming your setup.
Extra Tips for Long-Lasting Beauty
To keep your décor looking fresh:
- Store faux greenery pieces in a labeled box for next season.
- If using real greenery, mist lightly with water to keep it vibrant.
- Keep candle flames a safe distance away—use LED candles if you prefer peace of mind.
- For scented décor, tuck in dried orange or cinnamon sticks for a cozy touch.
These little details make your creation look thoughtful and professionally styled.
Final Thoughts
Creating elegant DIY Christmas candle rings is one of the simplest ways to upgrade your holiday table without spending much. With just a few craft materials and a little creativity, you’ll have beautiful pieces that instantly warm up any room.
Save this idea for later so you can recreate these charming candle rings every holiday season!

Leave a Reply