

If you want your Christmas gifts to feel extra personal this year, embossed gift tags are a simple and stunning way to elevate any present. They add texture, shine, and a handmade charm that looks like you spent hours crafting—even though they’re surprisingly quick and beginner-friendly. Whether you’re wrapping gifts for family, friends, or a holiday party, embossed tags make every package feel special.

This guide will walk you through everything you need—from tools to techniques—so you can create beautiful Christmas embossed gift tags right at home.
What You Need to Get Started
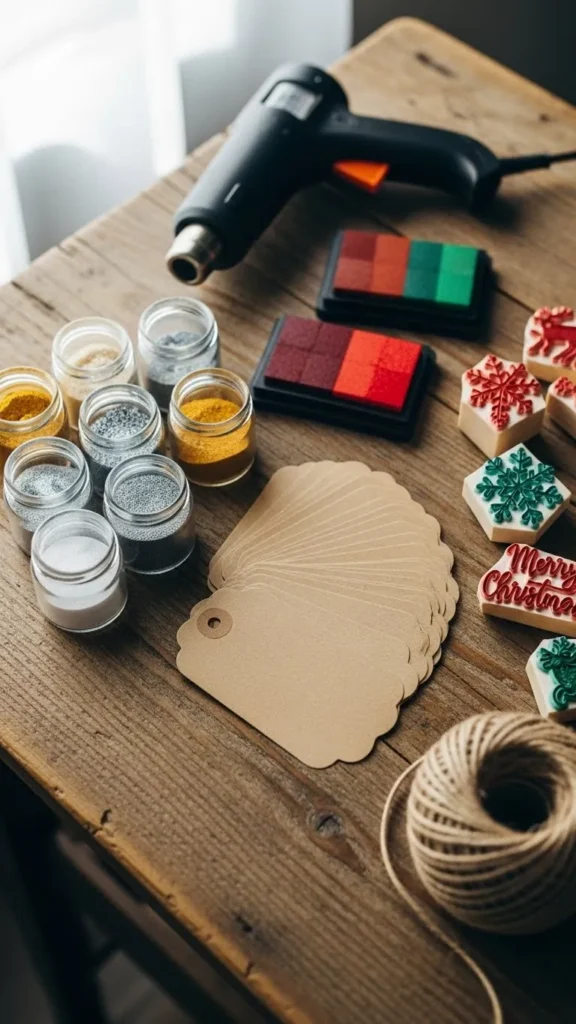
Embossing sounds fancy, but you only need a few basic supplies. Most can be found at local craft stores or online.
Here’s what to gather:
- Blank gift tags (kraft, white, or colored cardstock)
- Embossing ink pad or clear watermark ink
- Embossing powder (gold, silver, red, green, or glitter)
- Heat tool (or embossing gun)
- Stamps with Christmas designs
(Think snowflakes, trees, stockings, holly leaves, stars, or script greetings.) - Small brush for removing stray powder
- Twine, ribbon, or thread for tying
Once everything is nearby, you’re ready for the fun part.
Step 1: Stamp Your Design
Start by choosing the design you want on each tag. Stamping is the easiest way to get crisp, clean lines.
- Press your stamp gently into the embossing ink pad.
- Stamp the design directly onto the tag.
- Make sure the image is clear before moving ahead.
The great thing about embossed gift tags is that even the simplest designs—like stars or small messages—turn out beautiful once the powder melts.

Tips for Clean Stamping
- Use firm, even pressure (don’t rock the stamp).
- Test on scrap paper before stamping the actual tag.
- If using clear stamps, a stamping block helps keep the design straight.
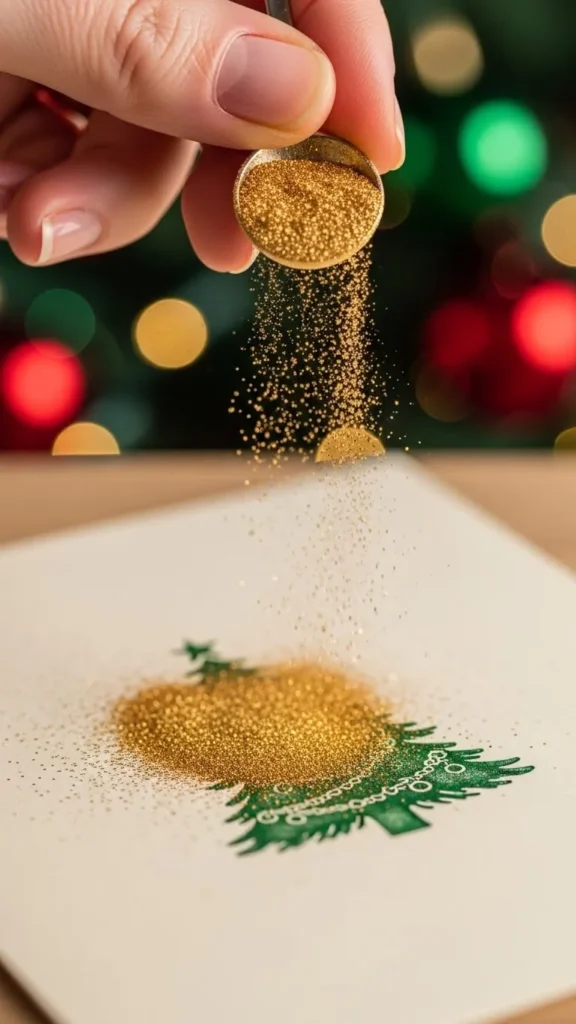
Step 2: Apply Embossing Powder
While the ink is still wet, sprinkle embossing powder over the stamped design. The powder sticks instantly.
Then:
- Shake off the extra powder.
- Tap the tag lightly to keep only the powder on the stamped image.
- Use a small brush to flick away stray grains.
Gold and white powders are especially stunning for Christmas tags and show up beautifully on both kraft and black cardstock.
Powder Tips
- Work over a tray or paper to catch excess powder.
- Pour leftover powder back into the container—no waste!
- For extra contrast, try metallic powders on dark tags.
Step 3: Heat and Emboss
This is the magical moment. Once the powder is applied, use a heat tool to melt it.
Hold the tool a few inches away and heat until the powder turns shiny and raised. It usually takes 10–15 seconds.
Keep the heat moving to avoid scorching the paper.
As the powder melts, your design becomes three-dimensional with a glossy finish that instantly transforms your tag into something gift-worthy.
Heat Tool Tips
- Heat from underneath for an ultra-smooth melted finish.
- Rotate the tag as needed so the powder melts evenly.
- Do not use a hair dryer—it blows the powder away.
Step 4: Add Finishing Touches
Once the embossing cools, you can dress up your tags however you like.
Try:
- Adding small adhesive gems or stickers
- Edging the tag with metallic marker
- Layering cardstock behind the tag for more contrast
- Punching an extra hole for decorative twine
- Writing names in calligraphy or simple print
These details make your tags feel crafted with intention—and they look amazing in holiday photos.

Fun Design Ideas to Try
If you want each tag to look unique, here are simple themes that always turn out beautifully:
❄ Winter Snowflakes
Use white or silver powder on navy, black, or kraft cardstock for an elegant frosted look.
🎄 Minimal Christmas Trees
A single embossed tree with the recipient’s name underneath feels clean and modern.
⭐ Metallic Stars
Scatter small star stamps across the tag for a magical, night-sky effect.
❤️ Simple Holiday Words
Try embossed phrases like Joy, Merry, Peace, or Love. Script fonts emboss beautifully.
🎁 Layered Designs
Combine embossing with washi tape, mini cutouts, or scrapbook papers for a layered, textured finish.
Step 5: Tie and Style Your Tags
Once your embossed tags are ready, pair them with:
- Rustic twine for a farmhouse feel
- Velvet ribbons for a luxe touch
- Red and white striped string for a classic Christmas look
Attach your tags to:
- Gift boxes and bags
- Hot cocoa jars
- Handmade cookie boxes
- Stocking stuffers
- Teacher gifts
Your packages will immediately look more thoughtful and festive.
Final Thoughts
Creating DIY Christmas embossed gift tags is easy, fun, and incredibly rewarding. They add personality to every present and help your gifts stand out under the tree. Plus, they’re a wonderful holiday craft you can enjoy with friends, family, or kids.
If you want your Christmas wrapping to feel extra special this year, try making a small batch—you might end up crafting dozens!
Save this idea for later and use it for all your holiday wrapping!

Leave a Reply