

Nothing welcomes the holidays quite like a beautiful wreath on your door. And when it’s made with faux flowers, it lasts season after season without wilting or shedding. A floral DIY Christmas wreath is perfect if you love a softer, elegant holiday look instead of heavy greenery or traditional red-and-green décor. The best part? You don’t need advanced crafting skills or expensive supplies.

In this guide, I’ll walk you through the process step by step. You’ll learn how to choose the right faux blooms, arrange them naturally, and secure everything so your wreath looks full and polished. Whether you’re decorating your own home or making a thoughtful gift, this project is simple, relaxing, and very Pinterest-worthy.
Why Choose Faux Blooms for a Christmas Wreath?
Faux flowers are a game changer for holiday crafts. They look realistic, hold their shape, and give you total creative control.
Here’s why they work so well for Christmas wreaths:
- Reusable year after year with no maintenance
- Available in endless colors, from winter whites to muted pastels
- Easy to customize for modern, rustic, or classic styles
- No mess or drying out, even indoors
You can also mix faux blooms with greenery, pinecones, or ribbon for a layered look that feels festive without being overwhelming.
Supplies You’ll Need
Before you start, gather everything in one place. This makes the process smoother and more enjoyable.
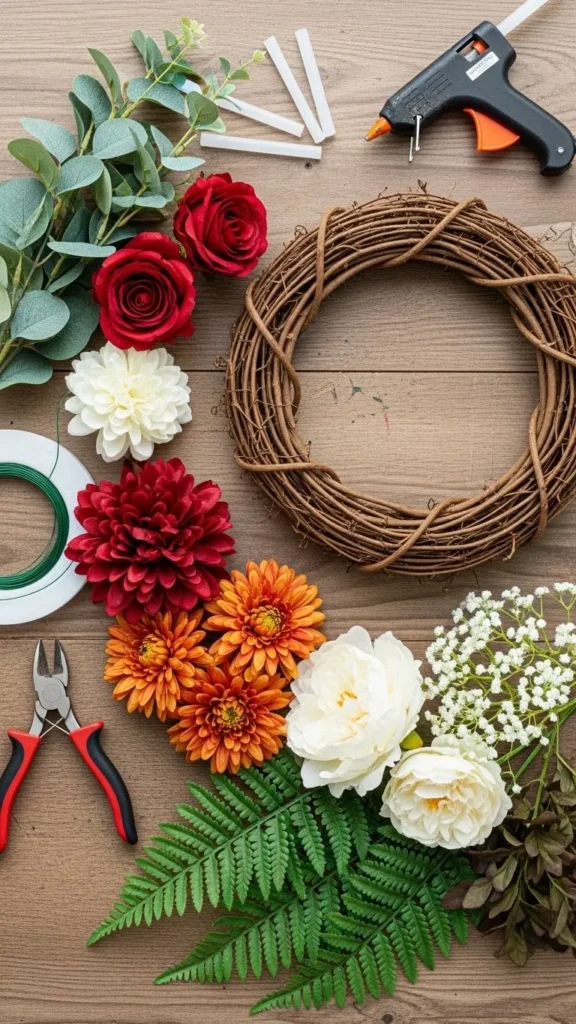
Basic supplies:
- Wreath base (grapevine or wire frame)
- Faux flowers (3–5 varieties works well)
- Faux greenery or filler stems
- Floral wire or zip ties
- Wire cutters
- Hot glue gun (optional)
- Ribbon or accents (optional)
Tip: Choose flowers in different sizes. One larger bloom, a few medium ones, and smaller filler flowers help create depth.
Step 1: Prep Your Wreath Base
Start by deciding how full you want your wreath to be. Some people prefer a half wreath with flowers clustered on one side. Others love a full, evenly spaced design.
If you’re using a grapevine base:
- Fluff and adjust loose twigs
- Remove anything sharp or broken
- Decide which side will be the top
For a wire frame:
- Lightly wrap greenery around first
- Secure with floral wire
- Leave space for your main blooms
This base layer sets the tone for the entire wreath.
Step 2: Plan Your Floral Arrangement
Before attaching anything, lay your flowers on top of the wreath to test placement.

Helpful layout tips:
- Place larger flowers first
- Space them evenly or cluster them for impact
- Add medium blooms next
- Finish with small filler flowers
Step back and look at your design from a distance. If it feels balanced and natural, you’re ready to secure everything.
Step 3: Attach the Faux Flowers Securely
Now it’s time to make it permanent. Trim flower stems to about 2–3 inches so they sit flush against the wreath base.
You can secure blooms using:
- Floral wire for strong hold
- Zip ties for thicker stems
- Hot glue for small accents only
Wrap wire tightly around the stem and wreath base. Twist firmly and tuck the ends in so nothing sticks out. Work slowly and check that each flower feels stable before moving on.
Step 4: Fill Gaps With Greenery and Texture
This step is what makes your wreath look full and professional.

Add greenery between flowers to soften transitions and hide mechanics. You can use:
- Faux eucalyptus
- Pine or cedar sprigs
- Berry stems
- Small frosted leaves
Tuck these pieces in at different angles. This creates movement and keeps the wreath from looking flat.
Step 5: Add Finishing Touches
Once your florals are in place, it’s time for the details.
Optional finishing ideas:
- A soft fabric or velvet ribbon
- Neutral bows for a modern look
- Metallic accents for subtle shine
- Seasonal picks like faux snow-dusted leaves
Attach accents with wire or glue, keeping them lightweight. Less is more here. The flowers should remain the main focus.
How to Hang and Care for Your Wreath
Hang your wreath using a sturdy hook, ribbon, or over-the-door hanger. If displaying outdoors, place it in a covered area to protect it from strong sun and moisture.
To keep it looking fresh:
- Store in a wreath box after the season
- Keep away from heat sources
- Lightly dust before rehanging next year
With proper care, your faux floral wreath can last for many holidays.
Final Thoughts
A floral DIY Christmas wreath using faux blooms is one of those projects that feels creative, calming, and rewarding all at once. You can tailor it to your style, your color palette, and your space without worrying about fading or mess.
Save this tutorial for later, gather your favorite faux flowers, and make a wreath that welcomes the season in a beautiful, lasting way.

Leave a Reply