

Christmas décor doesn’t have to be expensive—or complicated—to feel magical. With a simple roll of foil and a little creativity, you can make shiny DIY Christmas decorations that sparkle beautifully under lights and look stunning in photos. These projects are perfect for cozy craft nights, kid-friendly activities, or last-minute decorating when you want big impact fast.

Whether you love modern metallics or classic holiday shine, foil decorations are flexible, affordable, and surprisingly elegant. Let’s walk through how to make them step by step.
Why Foil Is Perfect for DIY Christmas Decor
Foil is one of those everyday items that turns magical during the holidays. It reflects light beautifully and can be shaped into almost anything.
Here’s why it works so well:
- Budget-friendly and easy to find
- Lightweight for trees, windows, and garlands
- Reflects string lights for extra sparkle
- Simple enough for beginners and kids
You can keep things minimal and modern or layer textures for a more handcrafted look.
Supplies You’ll Need (Simple & Affordable)
Before you start crafting, gather a few basics. You probably already have most of these at home.
- Aluminum foil (standard or heavy-duty)
- Scissors
- Clear tape or glue dots
- String, twine, or ribbon
- Toothpicks or wooden skewers (optional)
- Clear-drying craft glue (optional)
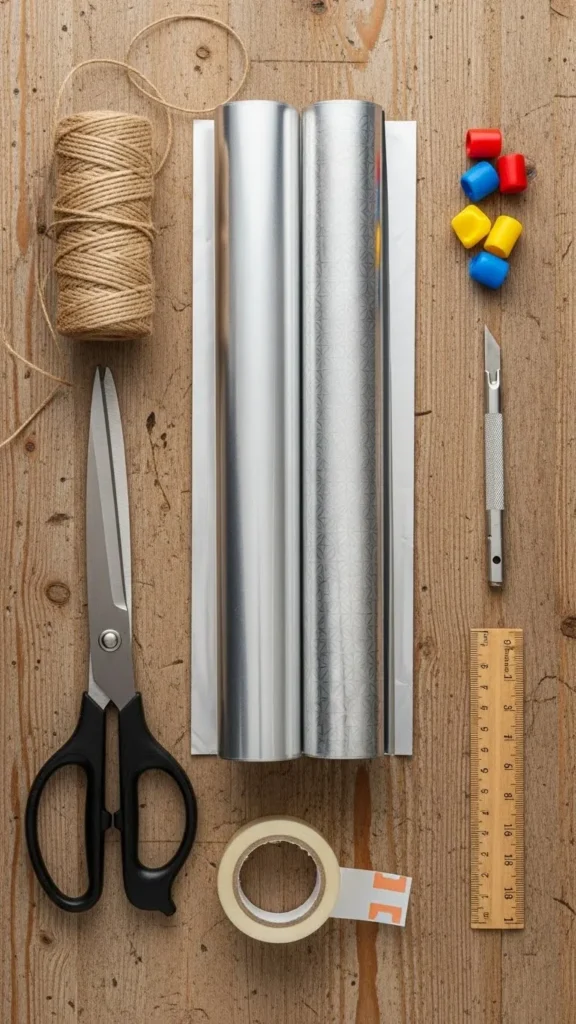
Tip: Slightly crumpling foil before shaping adds texture and helps hide fingerprints.
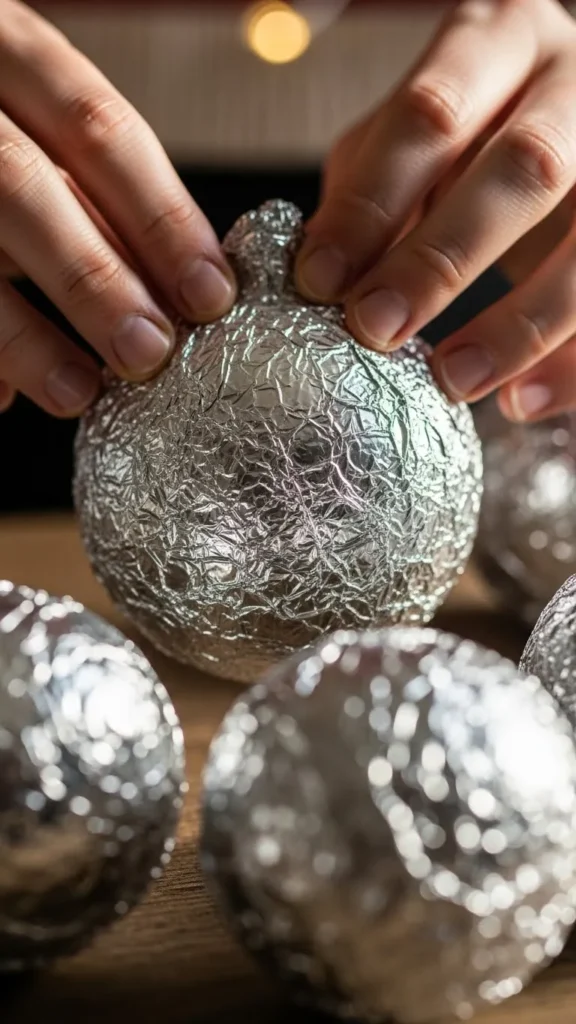
DIY Foil Christmas Ornaments (Step-by-Step)
These shiny ornaments look beautiful on trees, wreaths, or hanging from windows.
How to Make Them
- Tear off a sheet of foil.
- Gently crumple it into a loose ball.
- Smooth the surface slightly with your hands.
- Shape into spheres, stars, or teardrops.
- Attach string using tape or a small glued loop.
Creative ideas:
- Twist foil into stars using folded strips
- Layer smaller foil balls onto larger ones for dimension
- Mix sizes for a more designer look
Hang them in clusters for extra sparkle.
Foil Snowflakes for Windows & Walls
Foil snowflakes are stunning when light hits them. They work especially well on windows, mirrors, or white walls.
How to Make Foil Snowflakes
- Fold a square of foil like you would paper
- Cut small shapes along the edges
- Unfold carefully and flatten slightly
- Tape to windows or hang with thread

These look beautiful during the day and glow softly at night when indoor lights are on.
Shiny Foil Garland for Instant Impact
Garlands are one of the easiest ways to fill a space fast. Foil garlands add movement and shimmer without extra cost.
Simple Garland Method
- Tear foil into long strips
- Twist gently to create texture
- Wrap around string or twine
- Secure ends with tape
You can drape these across:
- Mantels
- Stair railings
- Door frames
- Shelves

Mix foil garlands with greenery for a balanced, festive look.
Foil Christmas Trees & Table Decor
Foil isn’t just for hanging décor—it makes beautiful tabletop accents too.
Mini Foil Trees
- Roll foil into cone shapes
- Press gently to stabilize the base
- Add texture by tapping with fingers
- Display in groups of three for balance
You can also:
- Wrap foil around cardboard shapes
- Create foil-wrapped centerpieces
- Use foil as a base layer for DIY displays
These pieces catch candlelight and room lighting beautifully without overpowering the space.
Styling Tips for a Polished Look
To keep foil décor from feeling messy or overdone, a little styling goes a long way.
- Stick to one or two shapes per area
- Balance foil with soft textures like fabric or greenery
- Group items in odd numbers
- Use warm lighting to soften reflections
Less is more when it comes to shine.
Final Thoughts: Shine Without Stress
DIY Christmas foil decorations prove that you don’t need fancy supplies to create a festive, eye-catching home. With just a roll of foil and a bit of imagination, you can make décor that feels intentional, modern, and joyful.
These projects are fast, flexible, and perfect for last-minute decorating—or turning into a cozy holiday tradition.
Save this guide for later and try one foil project tonight!

Leave a Reply