

There’s something magical about a table that glows during the holidays. A glitter table runner instantly transforms your dining room into a festive, shimmering scene—no fancy décor required. Whether you’re hosting a cozy family dinner or a full holiday party, this easy DIY adds sparkle without stress.
With just a few materials and simple steps, you’ll create a stunning centerpiece that looks store-bought but costs a fraction of the price. Let’s get crafting!
Gather Your Supplies
Before you begin, collect everything you need. This project is beginner-friendly and works with a variety of color themes.
- Plain fabric runner (cotton, felt, or burlap work well)
- Loose glitter or glitter flakes
- Mod Podge or fabric-safe adhesive
- Foam brush or paintbrush
- Painter’s tape
- Paper or plastic to protect your workspace
- Optional: sealant spray for less shedding
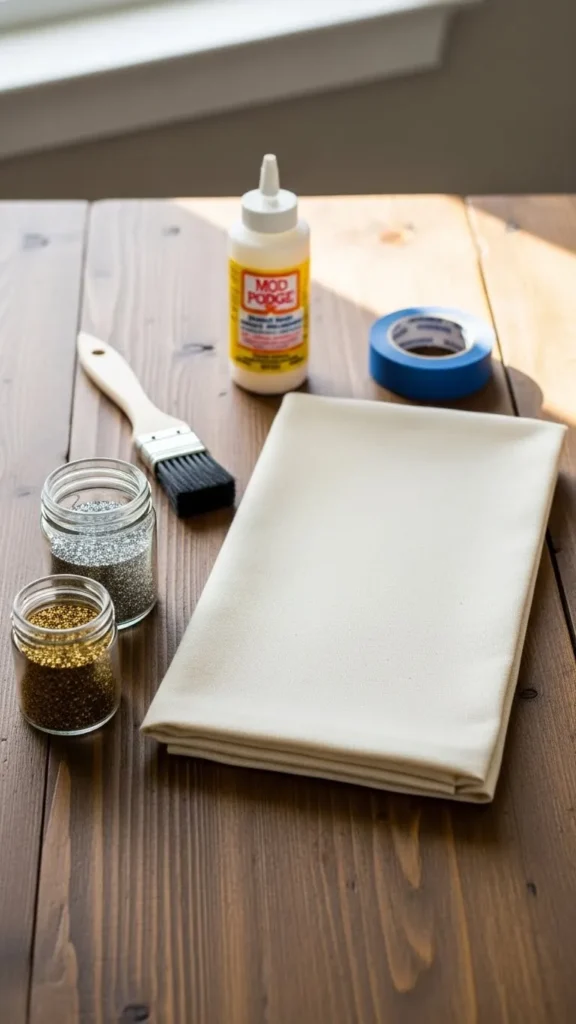
Choose glitter that matches your theme—gold for a classic look, silver for icy elegance, or red and green for bold festive charm.
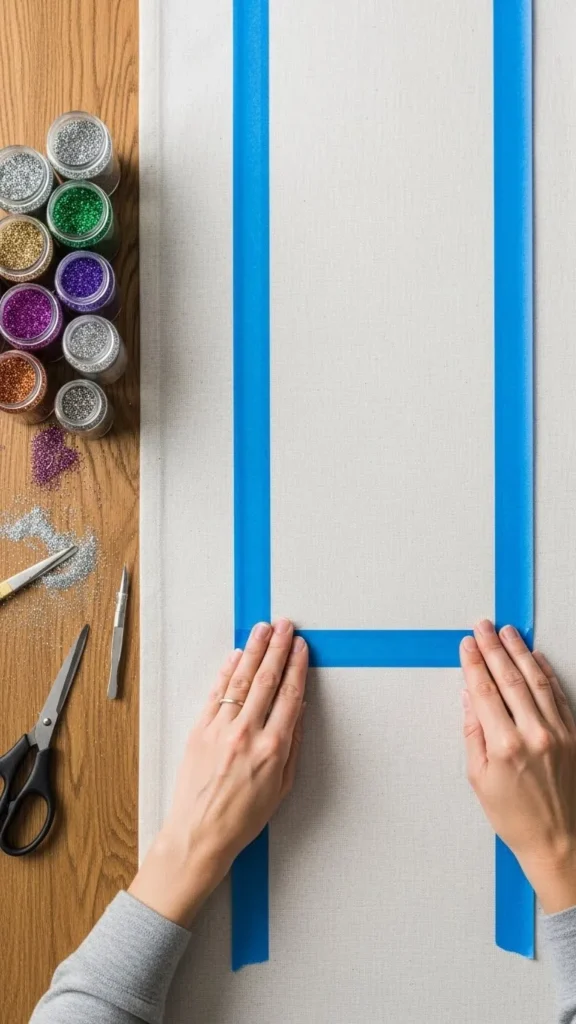
Prep Your Runner and Workspace
A little prep work saves a lot of cleanup later.
Lay down a protective surface. Glitter has a way of traveling everywhere, so give yourself space to work without worry. Smooth out your table runner and iron it if needed. Wrinkles can affect how evenly the glitter adheres.
Use painter’s tape to map out your glitter design. You can:
- Outline the edges of the runner
- Create geometric shapes
- Make stripes for a modern look
- Leave the center solid for a sparkling focal point
This tape will help keep clean lines once the glitter goes on.
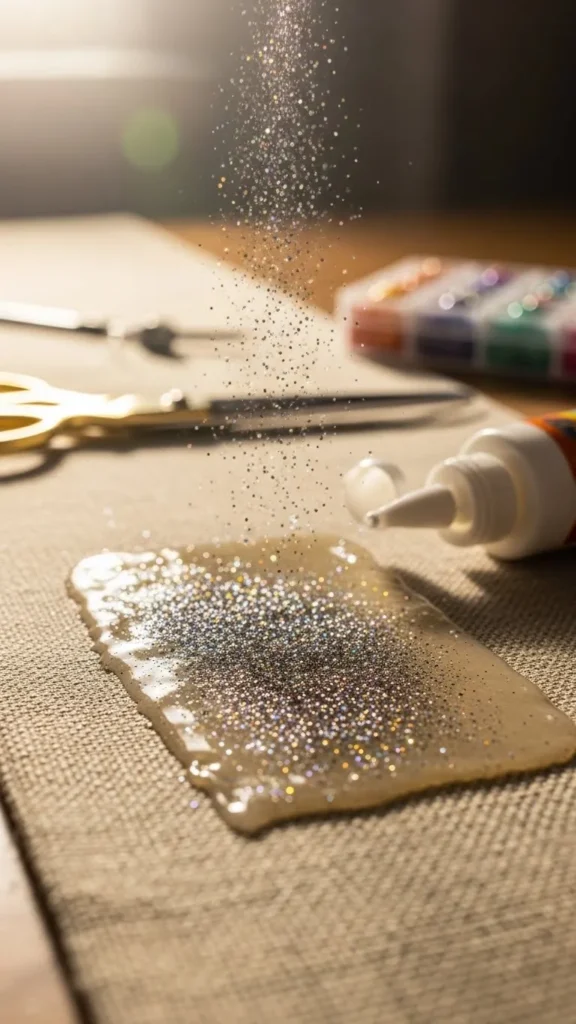
Apply the Glitter Adhesive
Once your layout is ready, it’s time for the fun part.
Dip your foam brush into the adhesive and spread it evenly over the taped areas. A thin, smooth coat works best—too much glue can create clumps, while too little may cause patchy glitter coverage.
Work in small sections to prevent the glue from drying before glitter is added. If you’re doing patterns, focus on one stripe or block at a time.
This step sets the foundation for the sparkle, so take your time and keep the strokes even.
Sprinkle on the Glitter
Now watch the magic happen.
Hold your glitter jar above the adhesive and sprinkle generously. Don’t be shy—using more glitter ensures full coverage. Anything that doesn’t stick will shake off later.
You can mix textures or shades of glitter to add depth. For example, combine fine glitter with chunkier flakes to create a dimensional, glowing effect.
Gently press the glitter with your fingers to help it adhere, then move on to the next section. Shake off excess as you go to avoid piles forming.
Let It Dry and Reveal the Design
Drying time varies, but give your runner at least a few hours—overnight is even better.
Once completely dry, carefully peel off the painter’s tape. This is the most satisfying moment, revealing crisp, clean edges that make your runner look polished and professional.
Hold the runner over a trash bag or sink and gently shake to remove remaining loose glitter.
If you want to minimize shedding, lightly mist the glittered surface with a sealant spray. This helps lock everything in place while keeping the sparkle visible.
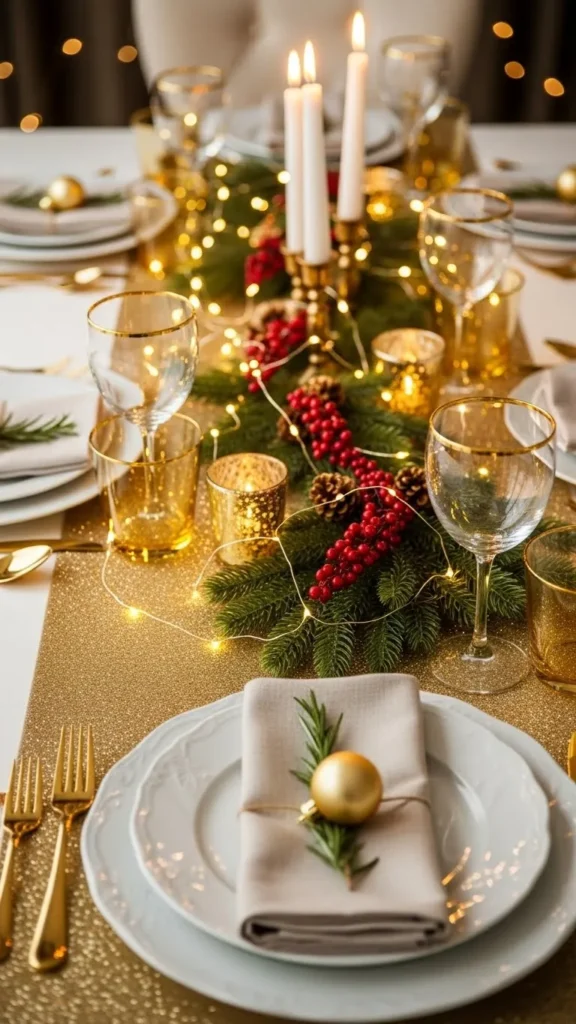
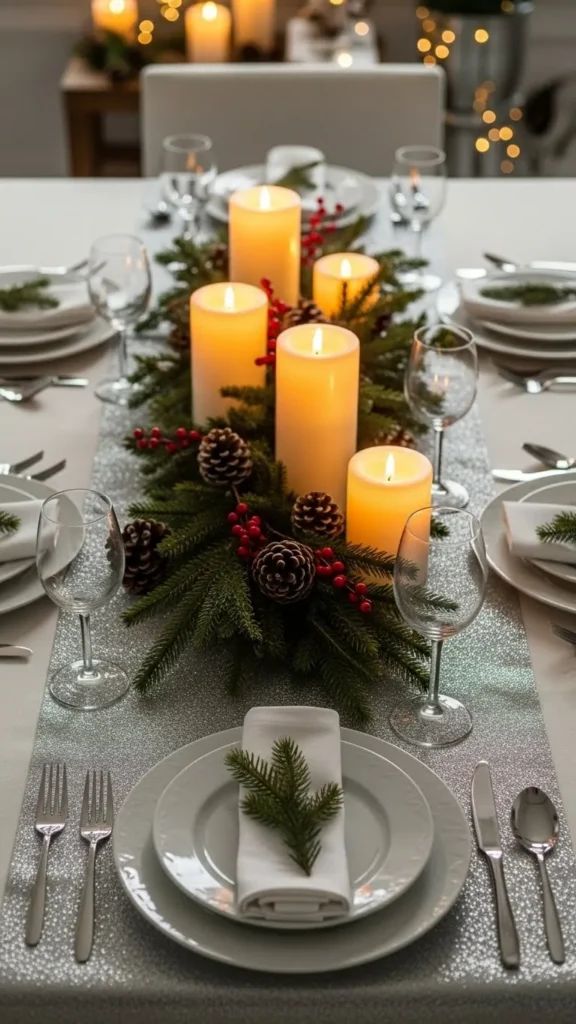
Style Your Glitter Table Runner
Now that your masterpiece is complete, it’s time to show it off.
You can style the runner in many festive ways:
- Layer it over a plain tablecloth to make the glitter pop.
- Pair it with simple place settings so the sparkle takes center stage.
- Add greenery, candles, or ornaments for a full holiday tablescape.
- Use it on a buffet, entryway table, or mantel for extra shine.
This DIY is perfect for holiday dinners, cookie swaps, or cozy family gatherings.
Tips for Extra Sparkle
Want even more glow? Try these ideas:
- Mix different glitter colors for an ombré effect.
- Use stencils for shapes like stars, trees, or snowflakes.
- Add a second layer of adhesive and glitter for maximum shine.
- Try a gradient design that sparkles from one end of the runner to the other.
The best part about this DIY is the flexibility—you can adjust it to match any holiday theme or décor style.
Final Thoughts
A DIY Christmas glitter table runner instantly elevates your holiday table, bringing shimmer and joy to every meal. It’s simple, affordable, and customizable for any festive look you want to create.
Save this idea for later and make your table sparkle all season long!

Leave a Reply