

A tiny paper village glowing softly under Christmas lights has a kind of magic that’s impossible to resist. It feels nostalgic, cozy, and surprisingly easy to make—especially when you start with printable templates. Whether you’re decorating a mantel, creating a festive centerpiece, or giving your kids a fun craft, a DIY paper village brings instant charm to your holiday setup.
In this guide, you’ll learn how to craft your own enchanting paper village step-by-step using templates, simple supplies, and creative touches that make each piece uniquely yours.
Gathering Your Supplies and Templates
Before cutting or folding a single roofline, gather everything you need. Keeping your materials organized makes the building process smooth and enjoyable.
- Printable house and tree templates
- Cardstock or thick craft paper
- Scissors or a craft knife
- Cutting mat
- Glue or double-sided tape
- Markers, glitter, or decorative paper scraps for detailing
- LED tea lights for glow
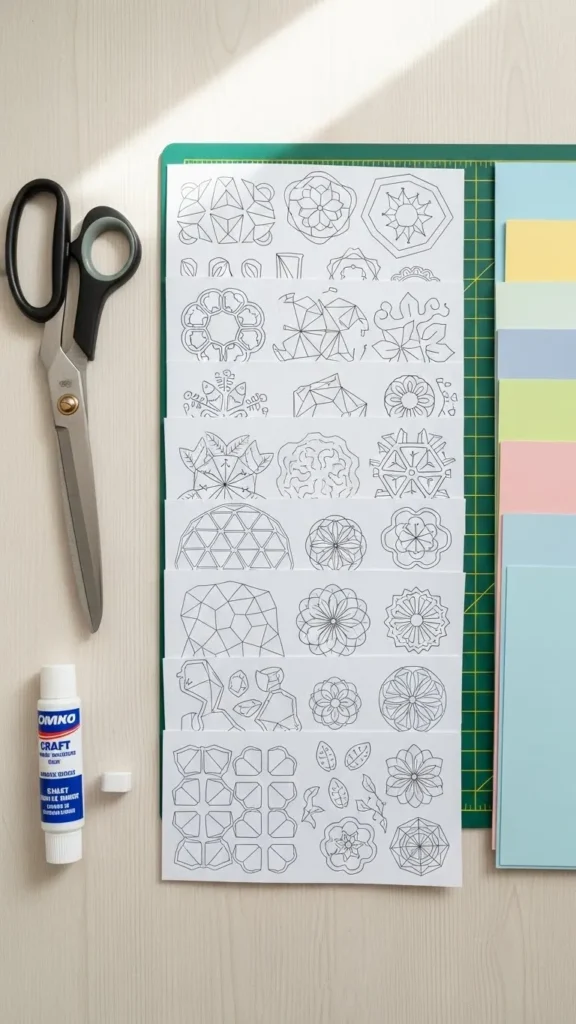
Cardstock matters. Regular paper can warp or sag when folded into 3D shapes, so choose thicker paper for a crisp, clean finish.
If you’re building multiple houses, consider printing each type of building on different colored cardstock—pastels, neutrals, or classic whites all work beautifully.
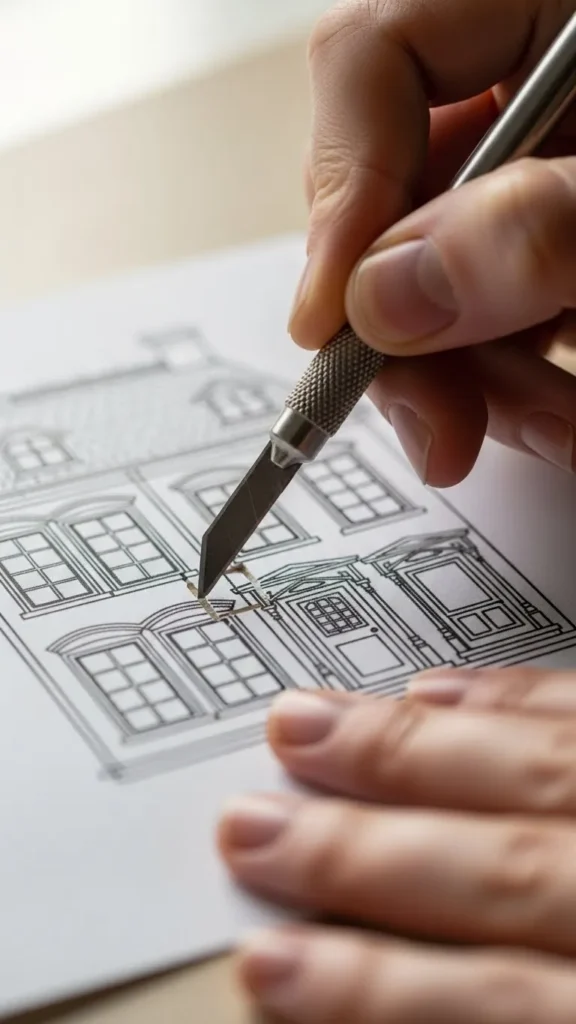
Cutting and Preparing Your Village Pieces
Once your templates are printed, it’s time to bring your village to life. This part is relaxing and satisfying, especially if you enjoy precise cutting or working with your hands.
Follow the Template Lines Carefully
Use scissors for simple shapes and a craft knife for tighter, delicate areas like windows or door trims.
Pro tip:
If your template includes tiny windows, cutting them out instantly gives your houses a more realistic, glowing effect when paired with LED tea lights.
Score the Fold Lines
Before folding, lightly score the dotted lines with the back of a craft knife or a scoring tool. This helps the paper bend neatly without cracking.
Fold and Pre-Shape
Fold along all scored lines to get the shape of each house or tree. Pre-shaping makes the final assembly quick and frustration-free.
Assembling the Paper Houses and Trees
Now comes the fun part—turning flat paper pieces into adorable miniature buildings.
Glue the Tabs
Add a thin layer of glue or double-sided tape to the tabs. Slow drying glue gives you more flexibility, while tape offers instant hold.
Press each side gently until the structure is stable.
Attach Roofs
Roofs usually come as separate pieces. Fold and secure them on top of the house frame, making sure edges line up cleanly.

Build Variety
Don’t stick to one house style.
Mix:
- Tall townhouses
- Tiny cottages
- Storefront-style buildings
- Cone-shaped or layered paper trees
A village always feels more magical when the buildings vary in size, shape, and detail.
Decorating Your Paper Village
This is where your creativity really shines. You can keep the look minimal and Scandinavian or go all out with color and sparkle.
Add Charming Details
Use markers to draw:
- Windowpanes
- Tiny wreaths
- Snowy roof edges
- Door handles
Cut small paper scraps to create shutters or doors for extra dimension.
Sprinkle in Textures
A touch of glitter on rooflines mimics fresh snow. Soft brushing with white paint creates a frosty effect.
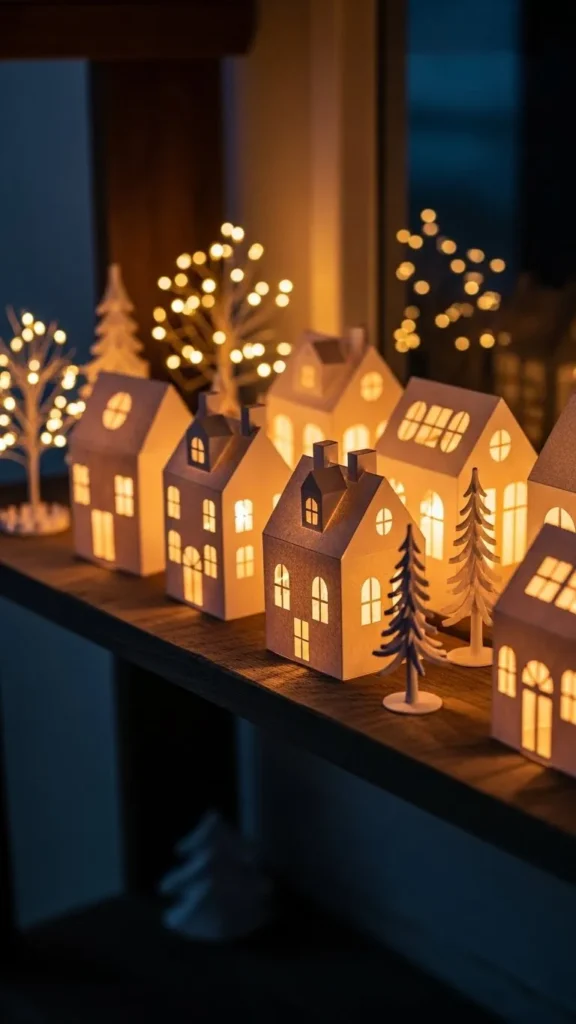
Place LED Tea Lights Inside
LED lights give your village a warm glow. Avoid candles that produce heat—LEDs keep things safe and steady.
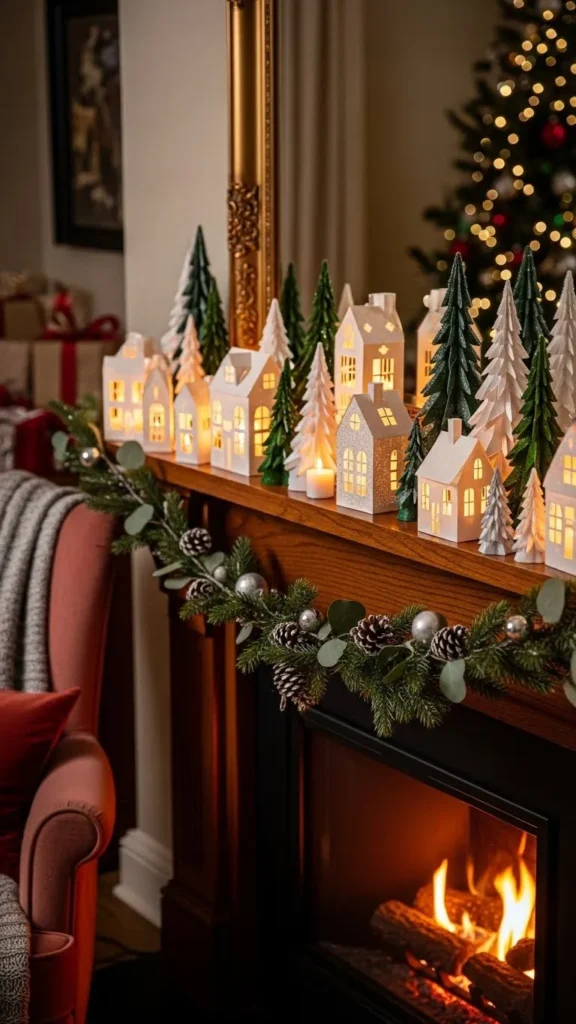
Displaying Your Finished Christmas Paper Village
Once your village is ready, choosing the right display area makes all the difference.
Try placing your village on:
- A mantle with evergreen garland
- A dining table as a winter centerpiece
- A windowsill where lights glow beautifully at night
- A bookshelf layered with faux snow
Use risers like stacked books or small boxes to add height and dimension. Add trees, tiny figurines, or fairy lights to build a story around your village.
Tips for Making Your Village Last
If you’d like to reuse your village year after year, consider these simple tricks:
- Store each house separately in a small box to prevent bending.
- Use thicker cardstock for sturdier walls.
- Create duplicates of your favorite buildings to replace pieces quickly if needed.
With a little care, your village can become a cherished part of your annual holiday traditions.
Final Thoughts
Crafting a DIY Christmas paper village is one of those projects that feels peaceful, joyful, and endlessly customizable. Whether you follow templates exactly or add your own creative twist, your finished village will bring warmth and charm to any room.
Save this project for later—and start your own magical paper village this Christmas!

Leave a Reply