

There’s nothing quite like the scent of fresh pine filling your home during the holidays. A handmade garland instantly transforms any space—mantel, staircase, doorway—into a cozy, wintery scene full of charm and warmth. And the best part? Making your own fresh pine garland is simpler than you think.
In this guide, you’ll learn how to create your own lush, fragrant garland using affordable materials, beginner-friendly steps, and styling tricks that make it look like something from a high-end holiday catalog.
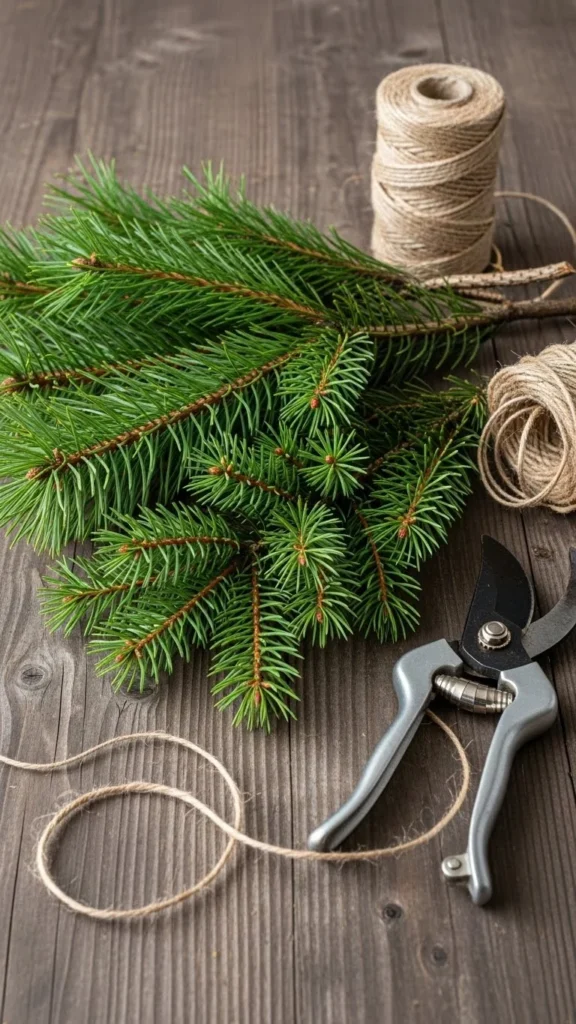
Gathering Your Fresh Pine and Supplies
Before you start, you need the right evergreens and tools. This step keeps the process easy and ensures your garland lasts longer.
Best greens to use
- Pine (long needles look full and fluffy)
- Cedar (adds wispy texture)
- Fir (classic Christmas look)
- Eucalyptus (for scent and soft color)
Mixing varieties creates a more interesting, layered garland.
Tools you’ll need
- Floral wire or green wire
- Scissors or pruning shears
- Twine or rope for the base
- Optional accents: dried orange slices, pinecones, cinnamon sticks, ribbon

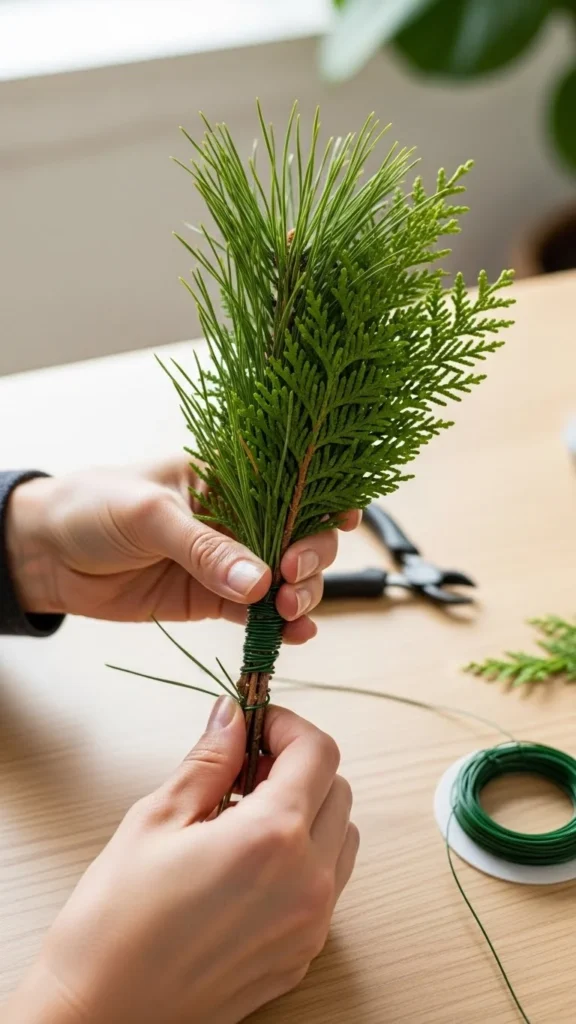
Preparing and Bundling the Greens
This is where your garland starts to take shape. Working in small bundles helps you build a fuller, more polished final piece.
Step-by-step prep
- Trim branches into smaller 6–10 inch pieces.
- Group 3–5 pieces together to form mini bundles.
- Mix textures—pair long pine needles with leafy eucalyptus or cedar.
- Secure each bundle tightly with floral wire so they hold their shape.
Pro tip:
Make at least 15–20 bundles for standard-length garland. You can always add more if you want it extra lush.
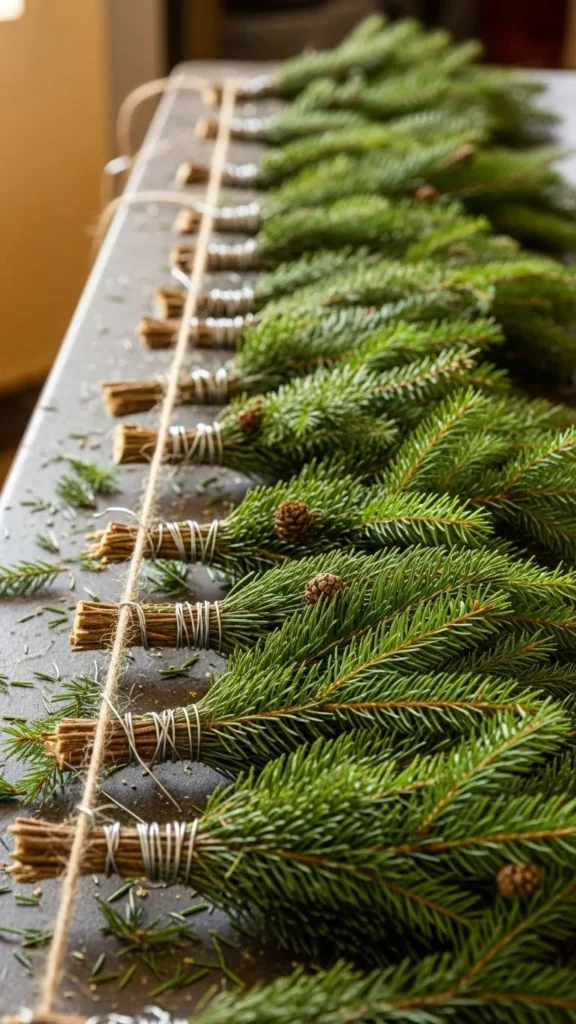
Building the Garland on a Twine Base
Now it’s time to assemble everything. This is the most satisfying part because you’ll see the garland come to life.
How to attach the bundles
- Lay your twine or rope on a flat surface.
- Place the first bundle at one end and wrap wire around both the bundle and the twine tightly.
- Add your next bundle slightly overlapping the previous one to hide the stems.
- Keep layering bundles in the same direction until you reach your desired length.
This creates a beautiful, flowing garland with a natural look—no gaps, no awkward bare spots.
Make it extra secure
Wrap wire around each added bundle three to four times to hold everything in place. Strong support keeps your garland fresh and fluffy even after days of hanging.
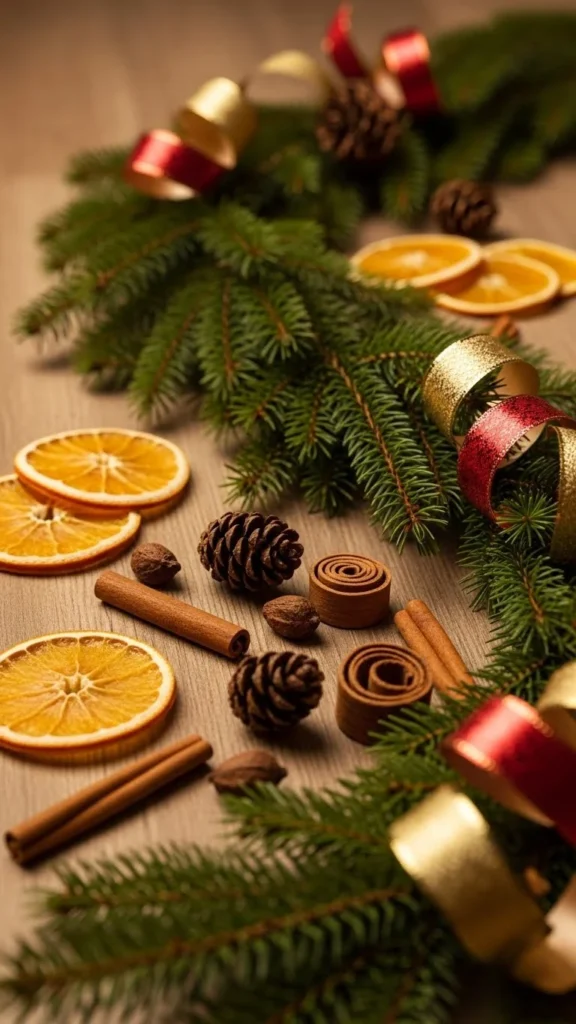
Adding Natural Accents for Beauty and Scent
Once your garland is fully assembled, it’s time to decorate. You can keep it simple and classic or add cozy, rustic accents.
Ideas for added charm
- Pinecones: Natural texture and winter vibes.
- Dried oranges: Add color and a subtle citrus scent.
- Cinnamon sticks: Warm fragrance that pairs beautifully with pine.
- Ribbon: Choose velvet, satin, or burlap for your style.
Attach these accents with thin wire or hot glue (if your garland won’t be outdoors).
Where and How to Display Your Fresh Garland
Fresh pine garland looks good almost anywhere, but a little styling goes a long way.
Favorite places to hang
- Mantel: Classic and cozy
- Staircase railing: Creates a grand entrance
- Front door frame: Adds instant holiday cheer
- Dining table: Lay it flat for a stunning centerpiece
Quick styling tips
- Let the ends drape naturally for a softer look.
- Add fairy lights for a magical glow.
- Layer two garlands together for extra fullness.
- Mist occasionally with water to keep it fresh.
If hanging indoors, avoid placing it directly over heating vents—heat dries out pine faster.
How to Keep Your Garland Fresh Longer
The whole point of a fresh pine garland is that amazing scent—so you want it to last as long as possible.
Make it last with these tips:
- Soak your branches in water for a few hours before crafting.
- Store the finished garland in a cool place until ready to hang.
- Mist it every couple of days with a spray bottle.
- Avoid direct sunlight or strong indoor heat sources.
With proper care, your garland can look great and smell incredible for up to two weeks or more.
Final Thoughts
Making your own fresh DIY pine garland is an easy, beautiful way to bring the holiday spirit into your home. It smells wonderful, looks luxurious, and gives your space a warm, natural charm you can’t get from store-bought decorations.
If you enjoyed this guide, save it for later and come back to it every Christmas season!

Leave a Reply