

If you love Christmas décor that feels warm, natural, and handmade, wood slice decorations are the perfect project. They bring a cozy woodland vibe to your tree, gifts, or mantel, and the best part? They’re incredibly easy to customize. Whether you’re a beginner or a seasoned crafter, you can transform simple slices of wood into charming ornaments that look straight out of a boutique holiday shop.

This guide walks you through everything you need to get started—from prepping your wood slices to decorating them with simple yet beautiful designs.
Step 1: Gather and Prep Your Wood Slices
Before you jump into painting or decorating, take a moment to prepare your materials. This makes the crafting process easier and gives your ornaments a polished finish.
What You’ll Need:
- Wood slices (store-bought or cut at home)
- Sandpaper
- Acrylic paint or paint pens
- Drill (optional for hanging)
- Twine or ribbon
- Clear sealant spray
Start by sanding both sides of each wood slice. This helps the paint glide smoothly and prevents splinters. If your slices don’t have holes, use a small drill bit to add one near the top edge so you can hang them later.
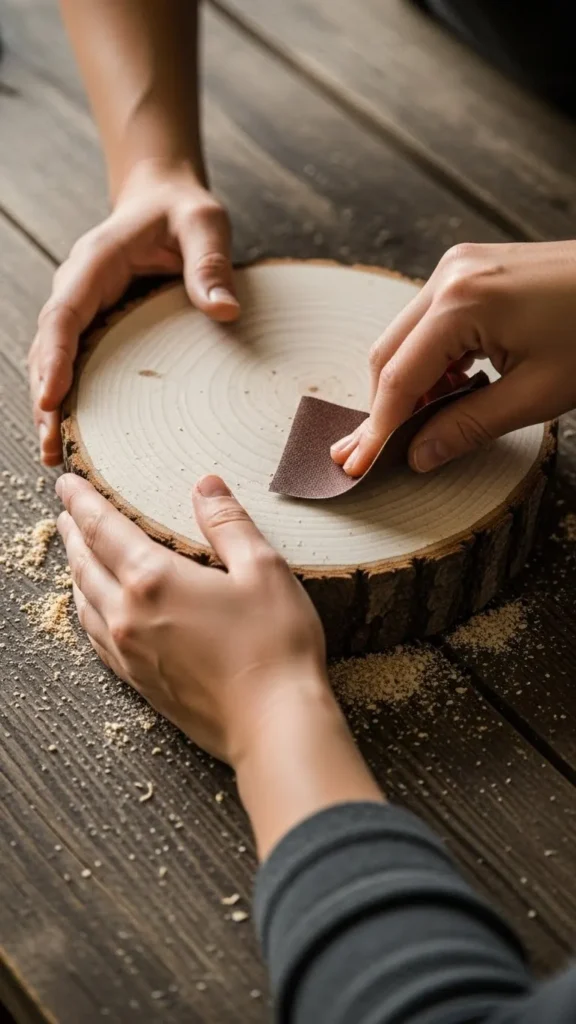
A quick tip: If your slices still have bark around the edges, leave it on. It adds a beautifully natural, rustic touch that feels perfect for Christmas décor.
Step 2: Paint or Personalize Your Designs
Now comes the fun part—turning plain slices into charming Christmas art. You can keep things simple with a few brushstrokes or go detailed with layered designs.
Easy Ideas to Try:
- Snowflakes — simple, graphic, and always festive.
- Mini Christmas trees — great for a farmhouse look.
- Names or initials — perfect for gift tags or personalized ornaments.
- Cute holiday icons — stars, mittens, ornaments, or reindeer silhouettes.
If you’re nervous about free-hand painting, lightly sketch your design with a pencil first. Paint pens also make outlining and details easier, especially on small surfaces.

Keep your strokes light and don’t worry about perfection. Rustic charm comes from the handmade look.
Step 3: Add Finishing Touches
Once the paint is dry, it’s time to dress up your wood slices so they’re ready to display or gift.
Add Hanging Loops
Thread twine or ribbon through the drilled hole. Twine gives that cozy, cabin-inspired look, while ribbon adds a soft, decorative touch.
Seal the Surface
To protect your artwork from smudges or moisture, spray a thin coat of clear sealant over each slice. Let it dry fully before handling.
Embellish for Extra Charm
If you want to go beyond paint, try adding:
- Small bows
- Mini pine cones
- Felt shapes
- Glitter accents
- Evergreen sprigs
A tiny glue dot is enough to secure these items in place.

These little details make your decorations look polished and festive without much effort.
Creative Ways to Use Your Wood Slice Decorations
Once your pieces are finished, you can use them in so many fun ways around your home.
Hang Them on Your Christmas Tree
This is the classic option. Mix different designs to create a sweet homemade look.
Dress Up Gift Wrapping
Tie a personalized wood slice onto a present for an extra-special touch. It becomes a bonus keepsake that the recipient can hang on their tree.
Create a Garland
String several slices together for a rustic banner to hang over the mantel or on the wall.
Use Them as Place Cards
Paint each guest’s name on a slice and set it at their seat for a personal and festive table detail.
Display Them in a Tray
Cluster a mix of decorated slices, pine cones, and greenery for a simple holiday centerpiece.

The possibilities are endless—and the best part is that these decorations are durable enough to enjoy year after year.
Final Takeaway
Rustic DIY Christmas wood slice decorations are simple, affordable, and endlessly customizable. Whether you make one or an entire set, they add a heartwarming handmade touch to your holiday décor. Save this idea for later and create a batch every year to grow your collection!
Save this project to your holiday crafting list!

Leave a Reply