

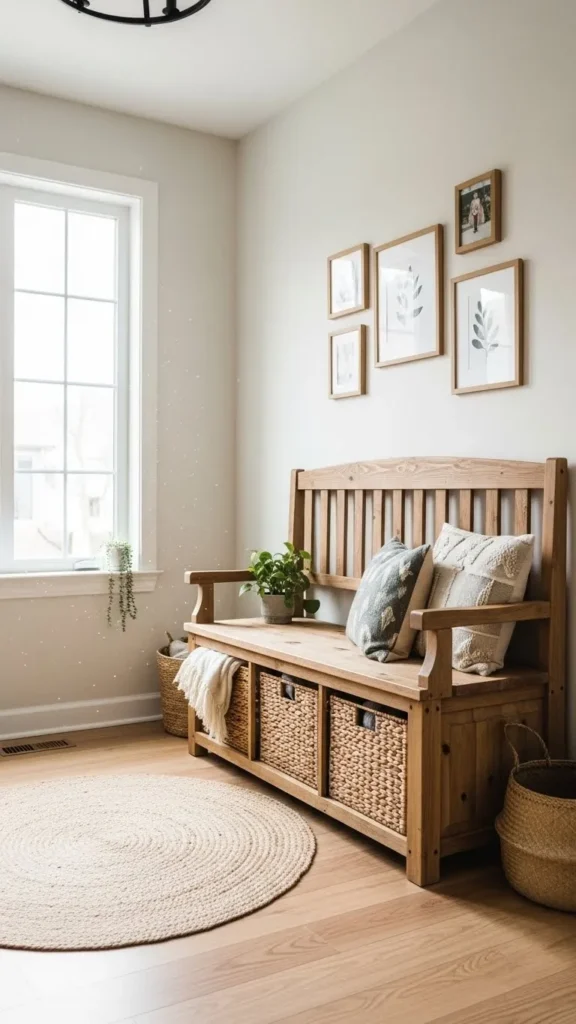
First impressions start at the door—and nothing clutters an entryway faster than scattered shoes, bags, and coats. A DIY storage bench solves that problem beautifully. It gives you a place to sit, stash essentials, and instantly make the space feel more welcoming. Best of all, you don’t need to be a professional woodworker to build one. With simple tools and a clear plan, this project is totally beginner-friendly.
Why a Storage Bench Is Perfect for Entryways
Entryways are usually small but busy. A storage bench works so well because it does double duty.
It helps you:
- Keep shoes, backpacks, and seasonal items out of sight
- Create a dedicated drop zone for daily essentials
- Add warmth and character to the space
Unlike bulky cabinets, a bench feels light and practical. You can customize it to fit your exact space—long and low for narrow hallways or compact for apartment entryways.
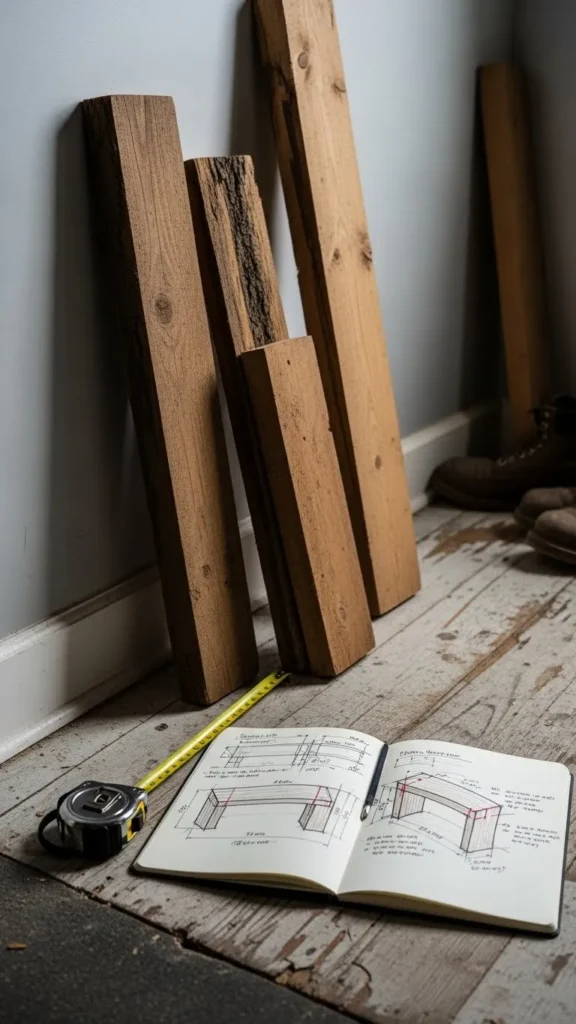
Planning Your Storage Bench Design
Before picking up tools, take a few minutes to plan. This step saves time and prevents mistakes later.
Think about:
- Size: Measure the wall where the bench will sit
- Height: Standard bench height is 17–19 inches
- Storage type: Open cubbies, baskets, or a lift-up seat
- Style: Modern, farmhouse, or minimal
If this is your first build, open storage with baskets is the easiest. Hinged lids look great but require more precision.
Materials and Tools You’ll Need
You don’t need fancy supplies. Most items are available at local hardware stores.
Materials:
- Plywood or solid wood boards
- 2×2 or 2×4 lumber for the frame
- Wood screws
- Wood glue
- Sandpaper
- Paint or stain (optional)
Tools:
- Drill
- Saw (hand saw or circular saw)
- Measuring tape
- Level
- Clamps (helpful but optional)
Tip:
Many stores will cut wood to size for you. That’s a huge help if you don’t own a saw.
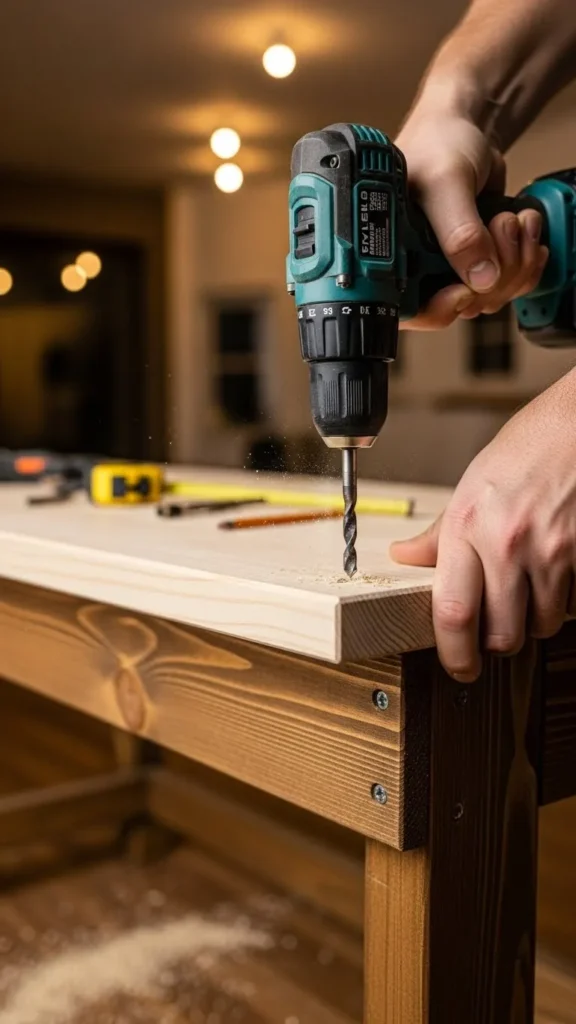
Step-by-Step: Building the Storage Bench
1. Build the Frame
Start with a simple rectangular frame using 2×2 or 2×4 boards. This frame supports the weight of people sitting on it, so make sure it’s sturdy.
- Pre-drill holes to prevent splitting
- Use wood glue before screwing pieces together
- Check for level as you go
2. Add the Bench Top
Attach your plywood or solid wood board to the top of the frame.
- Clamp it in place before securing
- Screw from underneath for a cleaner look
- Lightly sand edges to remove sharp corners
3. Create the Storage Area
Depending on your design, add vertical dividers or leave the space open.
Options include:
- Open cubbies for baskets
- One large open space for boots
- Dividers sized for shoes
Keep spacing consistent so the bench looks balanced.
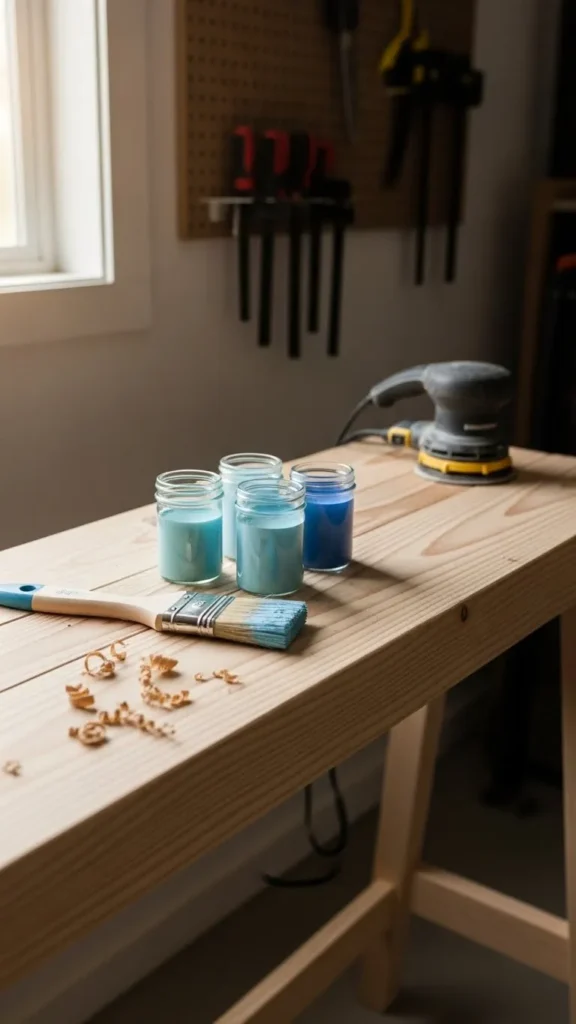
Sanding and Finishing Touches
This step makes a big visual difference. Don’t rush it.
- Start with medium-grit sandpaper
- Finish with fine-grit for smoothness
- Wipe away dust before painting or staining
For entryways, durable finishes work best. Semi-gloss or satin paint is easy to clean and holds up to daily use.
Styling Your Entryway Storage Bench
Once the bench is built, styling brings it to life.
Try:
- Woven baskets for shoes
- A cushion or pad for comfort
- Hooks or wall shelves above the bench
- A small tray for keys and mail
Stick to a limited color palette so the space feels calm instead of crowded. Even small entryways can feel organized with the right balance.
Common Mistakes to Avoid
A few simple tips can save frustration:
- Don’t skip measuring twice
- Avoid thin boards for the seat
- Leave enough toe space underneath
- Secure everything tightly
Remember, this bench gets daily use. Strength matters just as much as style.
Final Thoughts
Building a storage bench is one of those DIY projects that pays off every single day. It makes your entryway more functional, more organized, and more inviting—all with a personal touch you won’t get from store-bought furniture.
Take it step by step, keep the design simple, and enjoy the process.
Save this project idea for later and build a storage bench that finally tames your entryway clutter!

Leave a Reply