

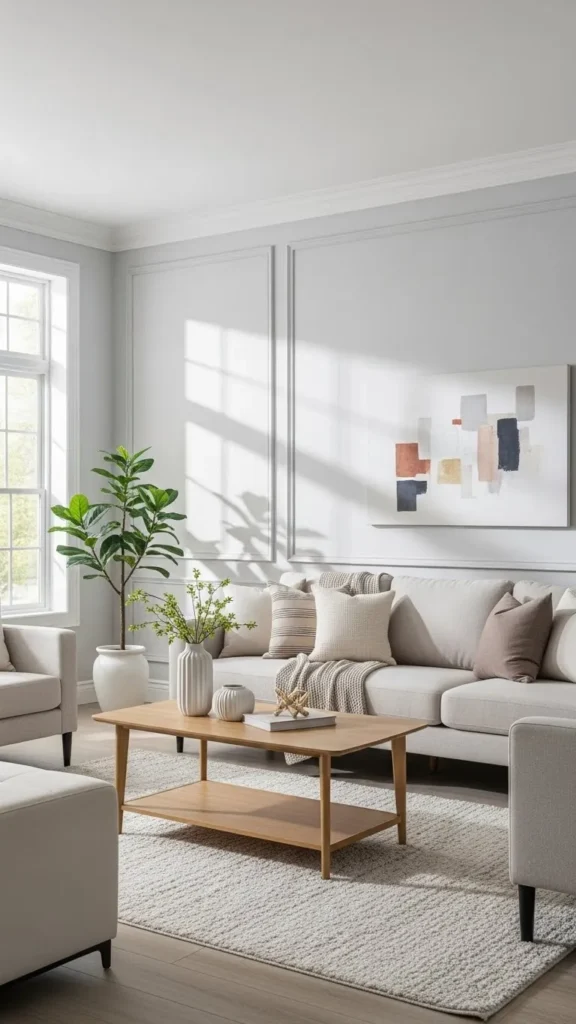
Crown molding has a quiet superpower. It instantly makes a room feel taller, finished, and thoughtfully designed—even if nothing else has changed. That clean line where wall meets ceiling is what turns a plain space into one that feels custom and high-end.
The good news? Installing crown molding is absolutely doable as a DIY project with the right prep and a little patience. This guide walks through the process step by step so you can get polished results without frustration.
Why Crown Molding Instantly Elevates a Room
Before tools come out, it helps to understand why crown molding works so well.
- It visually connects walls and ceilings
- It hides small imperfections and uneven edges
- It adds architectural interest without clutter
Even simple profiles can feel upscale when installed cleanly. In most rooms, medium-width molding (3–5 inches) strikes the perfect balance between subtle and statement.
Choosing the Right Crown Molding Style
Not all crown molding creates the same look. The profile you choose sets the tone.
- Simple profiles → modern, minimal spaces
- Layered or stepped profiles → classic or transitional homes
- Ornate designs → formal rooms or tall ceilings
Material matters too:
- MDF: budget-friendly and smooth for painting
- Polyurethane: lightweight and flexible
- Wood: traditional and durable but more costly
Tip:
When in doubt, choose simpler molding. Clean lines almost always read more high-end than overly busy designs.
Tools and Materials You’ll Need
Gather everything before starting so the process stays smooth.
- Miter saw (preferably compound)
- Nail gun or hammer and finish nails
- Measuring tape and pencil
- Stud finder
- Caulk and paintable wood filler
- Level
- Coping saw (optional but helpful)

Measure, Mark, and Plan Your Cuts
This is where most mistakes happen—so slow down here.
- Measure each wall carefully (twice is not optional)
- Mark stud locations lightly on the wall
- Decide which corners will be coped vs. mitered
Pro tip:
Inside corners look cleaner when one piece is coped instead of mitered. Outside corners usually work best with precise miter cuts.
Always dry-fit pieces before nailing. Small gaps now are much easier to fix than after everything is attached.
Cutting Crown Molding the Right Way
Crown molding sits at an angle, which can feel confusing at first.
Two common approaches:
- Upside-down and backward on the miter saw
- Using a crown stop to hold it at the correct angle
Label each piece after cutting so nothing gets mixed up.
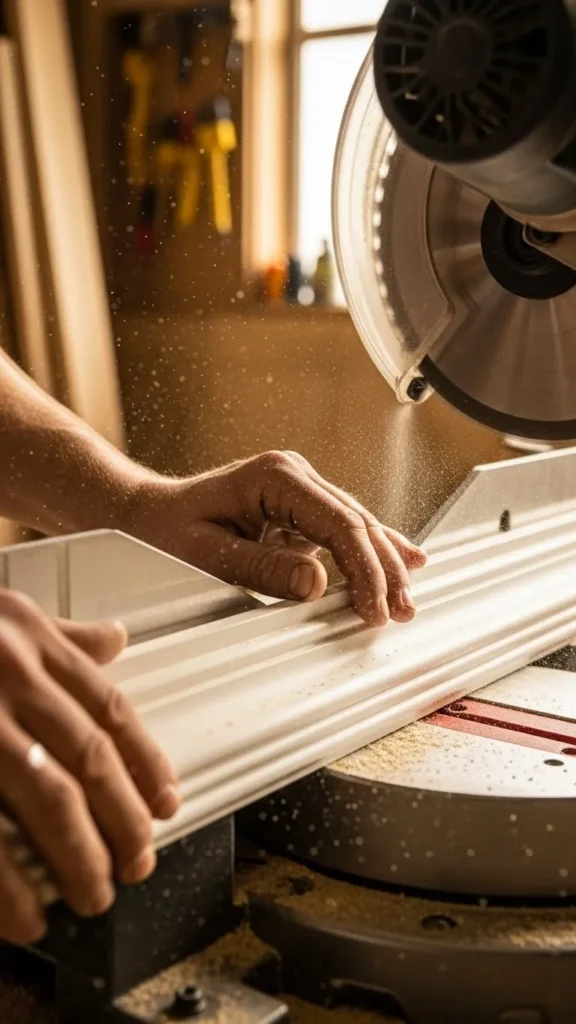
If angles feel intimidating, practice on scrap pieces first. Ten minutes of practice can save hours of rework.
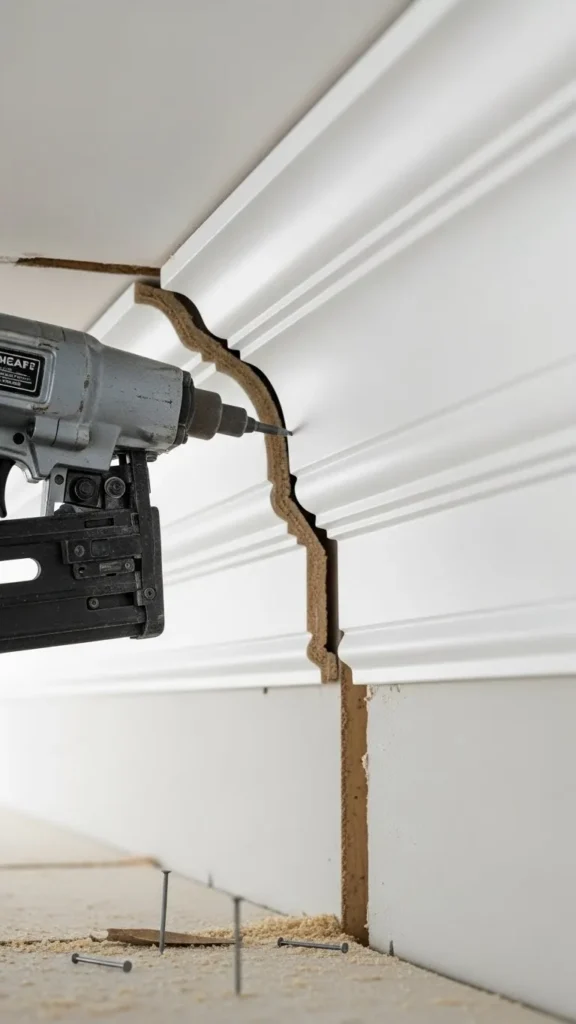
Installing the Molding Cleanly and Securely
Now comes the satisfying part.
- Start with the longest wall
- Nail into studs whenever possible
- Keep nails slightly angled for better hold
- Check alignment as you go
Work your way around the room, fitting each piece snugly before securing it fully.
If gaps appear:
- Adjust pressure before nailing
- Use painter’s tape to hold alignment temporarily
Caulking and Painting for a Seamless Finish
This step is what separates “DIY” from “custom.”
- Fill nail holes with wood filler
- Caulk along the top and bottom edges
- Smooth caulk with a damp finger or tool
Once dry:
- Lightly sand filled areas
- Apply paint with a small angled brush or roller
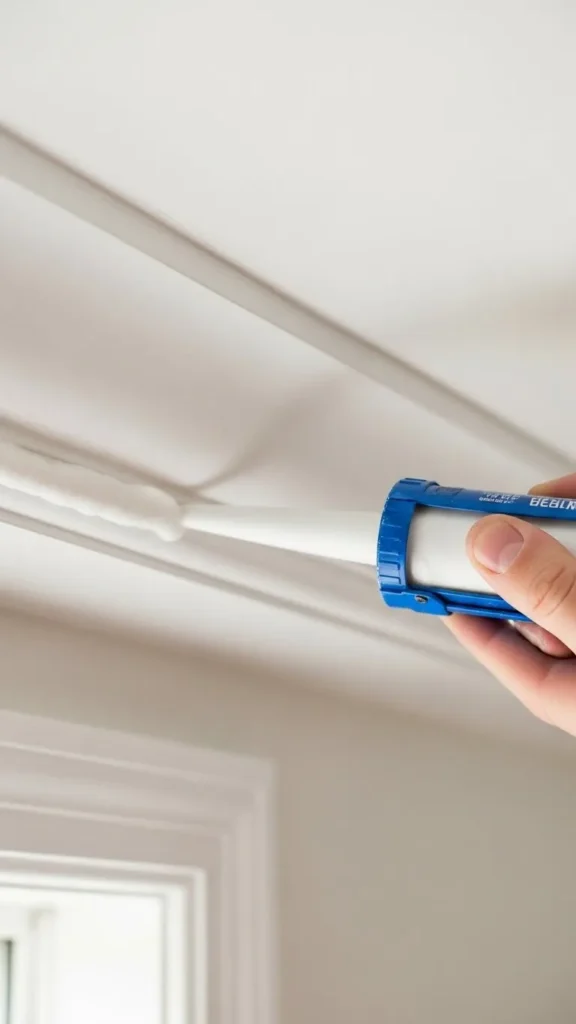
The goal is for the molding to look like it has always been part of the room.
Common Mistakes to Avoid
Save yourself stress by watching out for these:
- Rushing measurements
- Ignoring uneven ceilings
- Skipping caulk because gaps seem “small”
- Using molding that’s too large for the room
Remember, precision beats speed every time with crown molding.
Final Thoughts: Small Detail, Big Impact
Installing crown molding is one of those projects that gives way more visual payoff than expected. It frames the room, adds polish, and creates that high-end look designers love.
Take your time, measure carefully, and trust the process. Once you step back and see that finished edge, it’s worth every minute.
Save this guide for later and tackle crown molding when you’re ready to elevate your space!

Leave a Reply