There’s something special about giving a gift that feels personal. Not just picked off a shelf—but thoughtfully put together with him in mind. A DIY gift basket does exactly that. It’s creative, budget-friendly, and honestly… way more memorable than most store-bought presents.
Whether it’s for a birthday, anniversary, or “just because,” this guide will help you build a gift basket he’ll actually love and use.
Why a DIY Gift Basket Is the Perfect Choice
A gift basket gives you flexibility. You’re not stuck choosing one item—you’re creating an experience.
Here’s why it works so well:
- You can tailor it to his personality
- It fits any budget (seriously, even a small one)
- It feels thoughtful without being complicated
- You can mix practical and fun items
The best part? You don’t need to be “crafty” to make it look amazing.
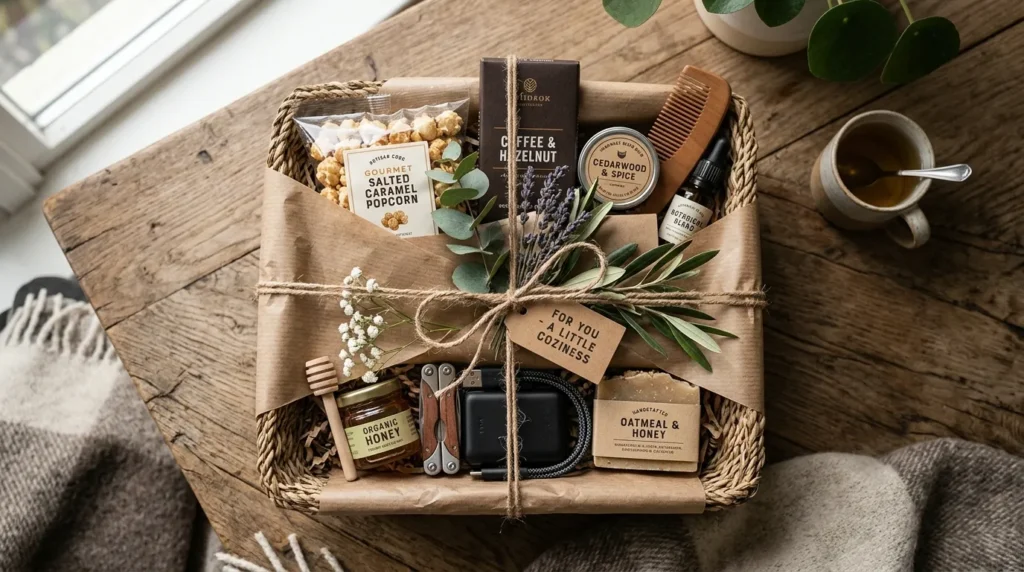
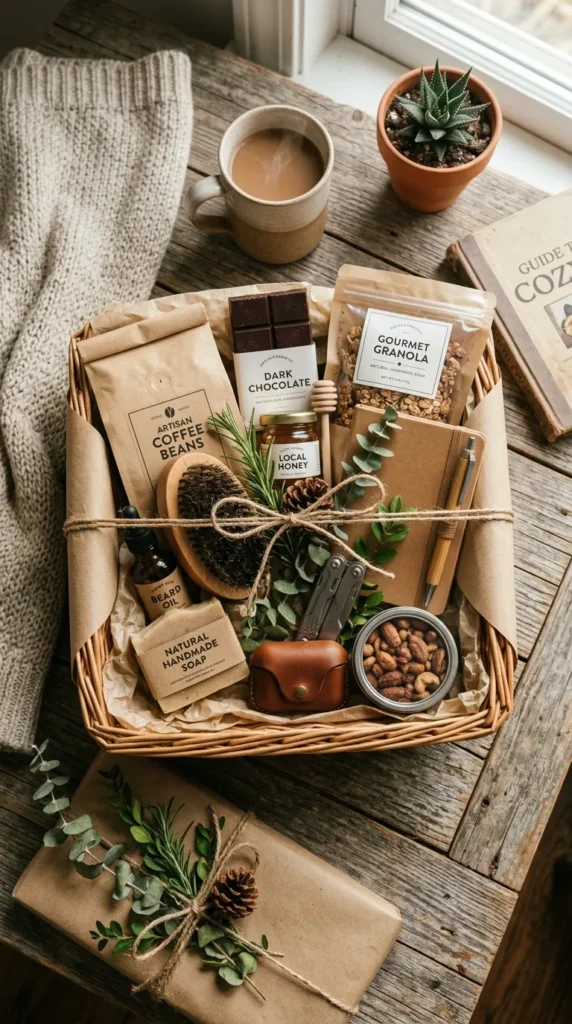
Step 1: Choose a Theme He’ll Love
Before buying anything, decide on a theme. This makes your basket feel cohesive instead of random.
Some easy ideas:
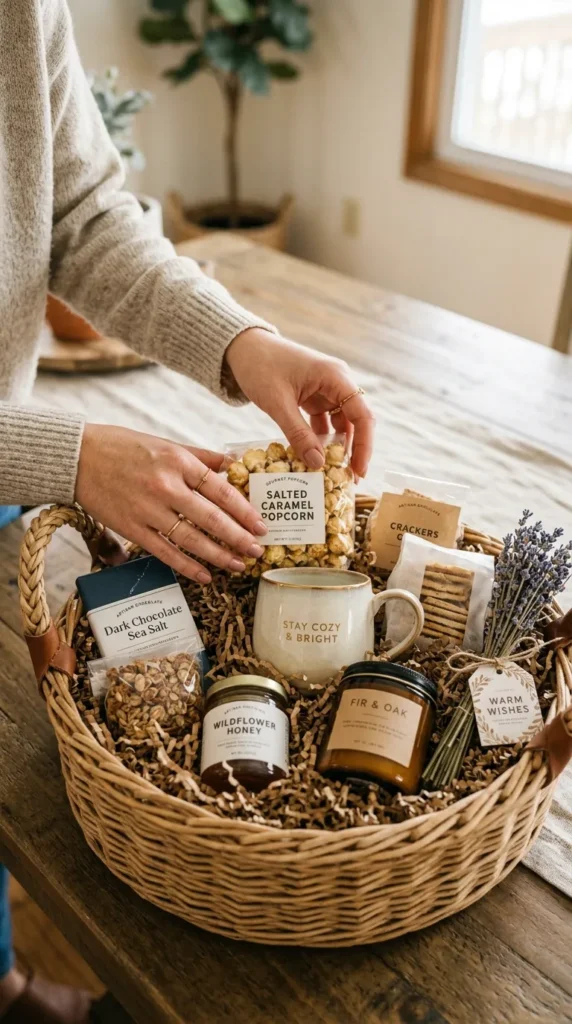
- Relaxation basket: skincare, comfy socks, tea or coffee
- Gaming basket: snacks, controller accessories, gift cards
- Fitness basket: protein snacks, water bottle, resistance bands
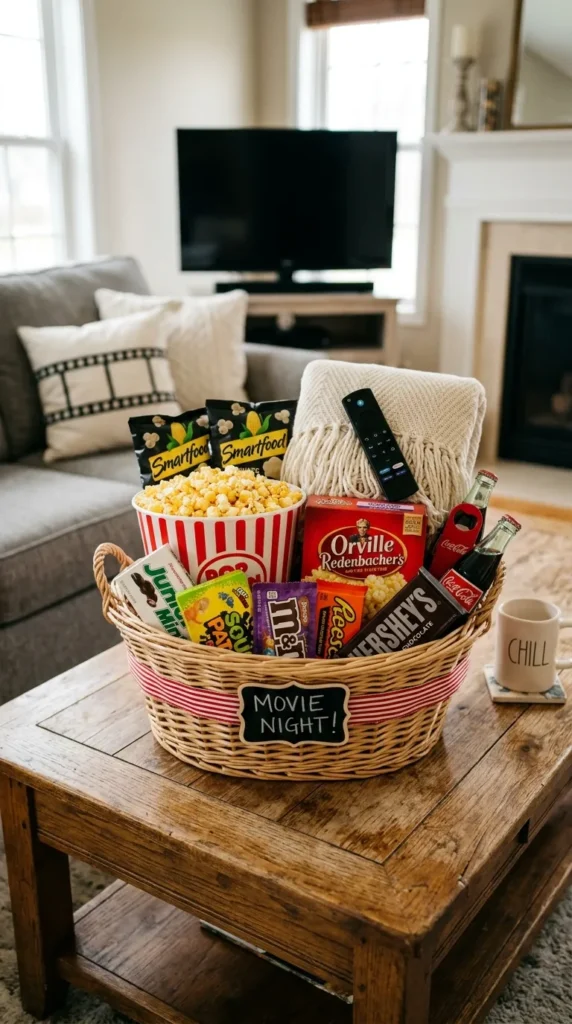
- Movie night basket: popcorn, chocolates, cozy blanket
- Work desk basket: notebook, pens, coffee mug
Think about what he enjoys daily—that’s your best inspiration.
Step 2: Pick the Right Basket (or Base)
You don’t actually need a traditional basket. Get creative with your base—it becomes part of the gift.
Great alternatives:
- A wooden crate
- A storage box
- A backpack
- A small laundry bin
- A reusable tote bag
Choose something he can reuse later. It makes the gift feel more practical and less wasteful.
Step 3: Select Your Items (Mix Useful + Fun)
Now comes the fun part—filling your basket.
Aim for 5–10 items depending on your budget. A good mix includes:
- Something he needs (like grooming essentials or socks)
- Something he enjoys (snacks, hobbies)
- Something personal (a handwritten note or inside joke item)
Example combo:
- Favorite chocolates or snacks
- A stylish mug
- A small gadget or accessory
- A scented candle or diffuser
- A handwritten note
Tip: Stick to a color palette (like black + brown or blue + white) to make everything look more put together.
Step 4: Add Filling for a Premium Look
Don’t just toss items in—presentation matters.
Use filler to elevate the look:
- Shredded kraft paper
- Tissue paper
- Fabric scraps
- Crinkle paper
Place heavier items at the back and smaller ones in front so everything is visible.
This simple step makes your basket look like something from a boutique store.
Step 5: Wrap It Up Beautifully
Wrapping transforms your basket from “nice” to “wow.”
You can:
- Leave it open for a casual look
- Wrap it in clear plastic for a polished finish
- Use cellophane with a ribbon on top
- Add a fabric wrap for a softer aesthetic
Finish with:
- Twine or ribbon
- A small tag
- A dried flower or greenery
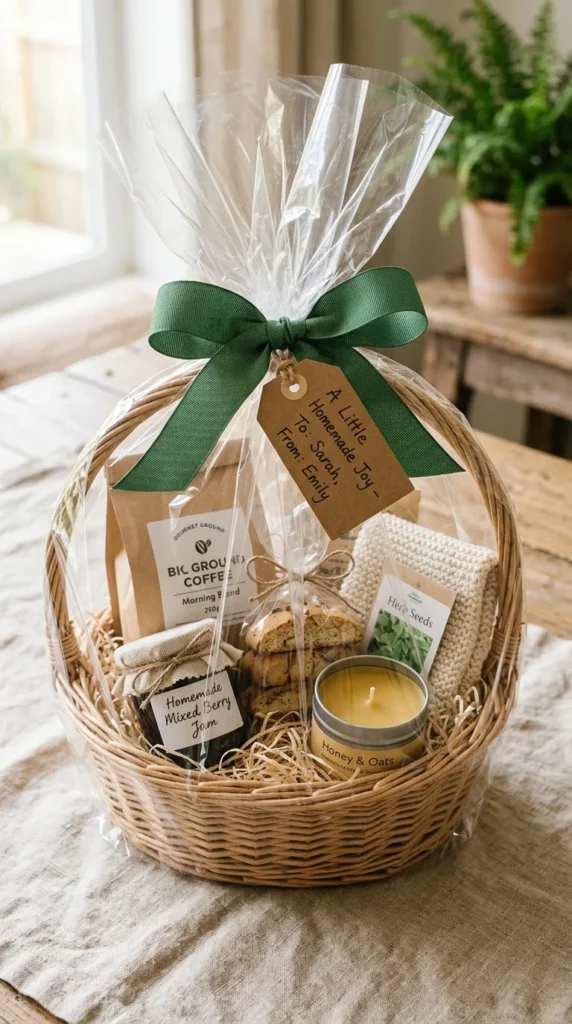
Step 6: Include a Personal Touch
This is what makes your gift unforgettable.
Add something meaningful:
- A handwritten letter
- A list of reasons you appreciate him
- A small photo memory
- A custom coupon (like “movie night” or “home-cooked dinner”)
It doesn’t need to be long—just sincere.
Budget-Friendly Tips (That Still Look Expensive)
You don’t need to spend a lot to make it look high-end.
Try this:
- Shop in bundles or discount stores
- DIY one or two items (like baked treats or a handwritten card)
- Stick to neutral packaging for a clean aesthetic
- Reuse materials you already have at home
A well-arranged $15 basket can look better than a rushed $50 one.
Common Mistakes to Avoid
A few things that can ruin the vibe:
- Overstuffing the basket
- Mixing too many random items
- Ignoring presentation
- Forgetting a personal touch
Keep it simple, thoughtful, and intentional.
Final Thoughts
A DIY gift basket isn’t just about the items—it’s about the effort behind them. When you take the time to customize something just for him, it shows in a way no generic gift ever could.
Start small, pick a theme, and have fun with it. You might be surprised how something so simple can feel so meaningful.
Save this idea for later and try it for your next special occasion—you’ve got this.


