There’s something incredibly satisfying about turning a plain, everyday item into a piece that feels completely you. A simple tote bag can go from basic to eye-catching with just a little paint and creativity—and the best part? No two designs will ever be the same.
Whether you love bold patterns, minimalist designs, or playful doodles, customizing your own tote bag is an easy DIY project that looks stylish and feels personal.
Why Customize Your Own Tote Bag?
Before diving into the process, let’s talk about why this DIY is worth your time.
- Affordable – A blank tote bag is inexpensive, and you likely already have some supplies at home.
- Creative freedom – You control the colors, design, and style.
- Eco-friendly – Reusable tote bags help reduce waste.
- Perfect gift idea – Handmade items always feel more meaningful.
Plus, it’s a relaxing activity that doesn’t require professional art skills.
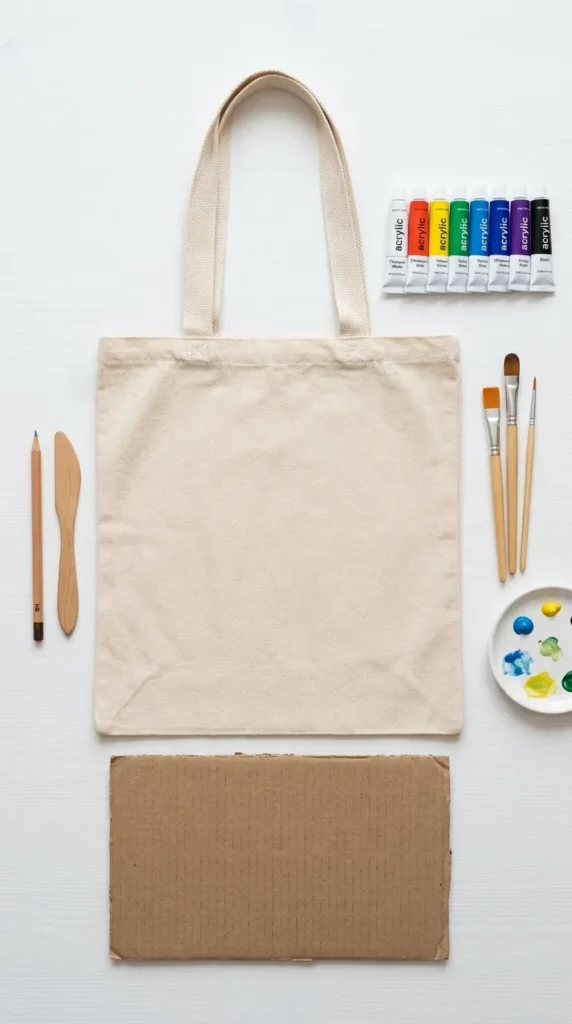
What You’ll Need
Gather your supplies before starting so everything flows smoothly.
- Plain canvas tote bag
- Fabric paints or acrylic paint (with fabric medium)
- Paintbrushes (various sizes)
- Pencil or chalk for sketching
- Cardboard (to place inside the bag)
- Palette or plate for mixing colors
- Cup of water and paper towels
Step 1: Prep Your Tote Bag
Preparation is key for a clean and long-lasting design.
- Wash and dry your tote bag to remove any dust or chemicals
- Iron it if it’s wrinkled (a smooth surface makes painting easier)
- Insert a piece of cardboard inside the bag to prevent paint from bleeding through
Take a moment here—it sets the foundation for everything else.
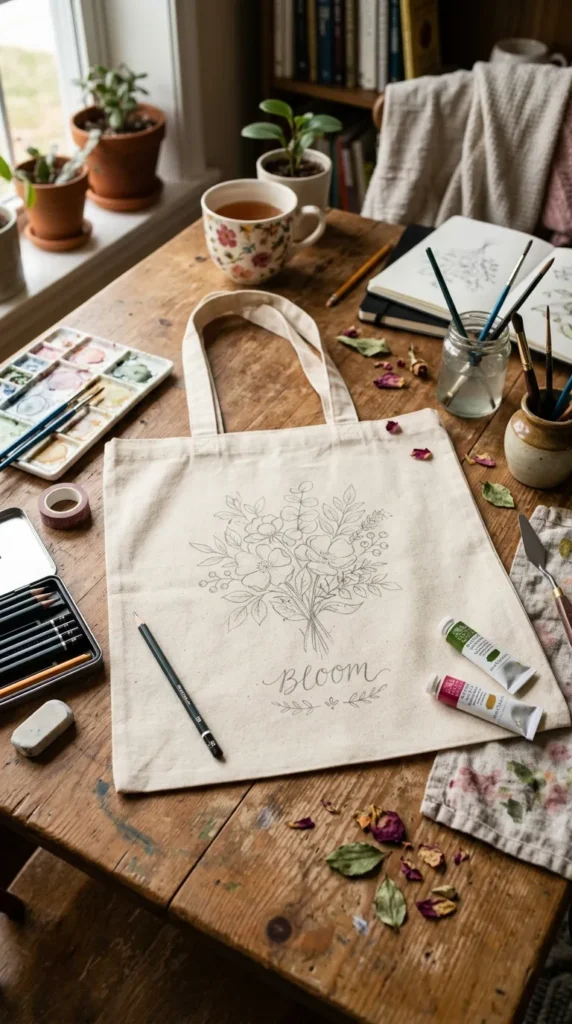
Step 2: Plan Your Design
You don’t need to be an artist to make something beautiful. Start simple and build confidence.
Ideas to try:
- Minimalist line art
- Floral patterns
- Abstract shapes
- Quotes or initials
- Cute icons like hearts, stars, or leaves
Sketch your design lightly using a pencil or chalk. This acts as your guide when painting.
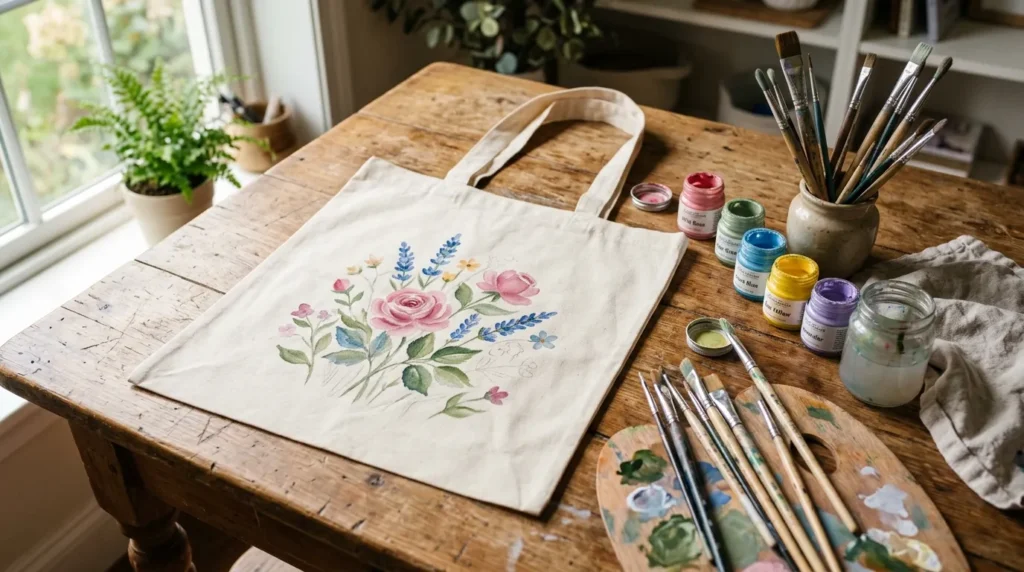
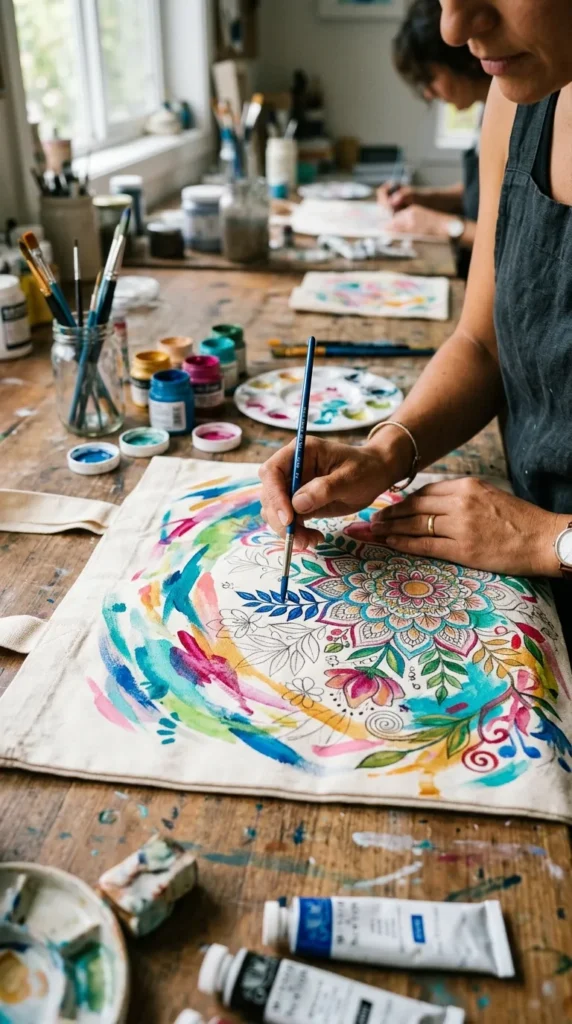
Step 3: Start Painting Your Design
Now comes the fun part—bringing your tote to life.
Tips for painting:
- Start with lighter colors first
- Use thin layers to avoid cracking
- Let each layer dry before adding details
- Use smaller brushes for outlines and details
Don’t worry about perfection. Slight imperfections often make handmade items feel more authentic and charming.
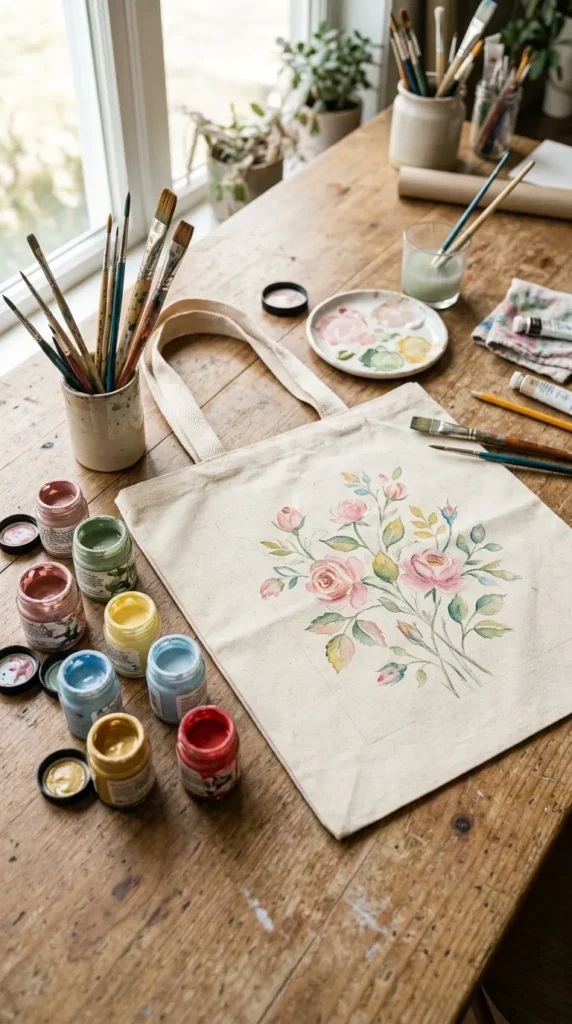
Step 4: Add Details and Personal Touches
This is where your tote bag really becomes unique.
- Outline shapes for a clean look
- Add shading or highlights for depth
- Mix colors to create custom tones
- Incorporate small patterns like dots or lines
Think of this step as adding personality. Whether it’s bold and vibrant or soft and subtle, make it reflect your style.
Step 5: Let It Dry and Set the Paint
Patience here pays off.
- Let the paint air dry completely (usually 12–24 hours)
- Heat-set the design if required (check your paint instructions)
- Typically done by ironing the reverse side of the fabric
This step ensures your design stays intact even after washing.
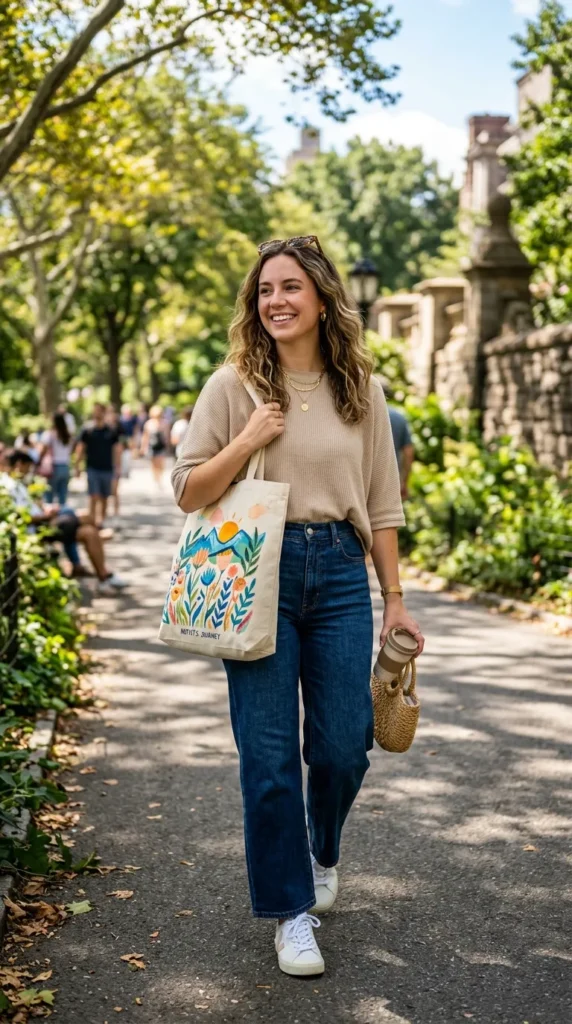
Step 6: Style and Use Your Tote Bag
Once your tote is ready, it’s time to show it off.
Use it for:
- Grocery shopping
- Carrying books or essentials
- Casual outings
- Gifting to someone special
Your customized tote isn’t just functional—it’s a wearable piece of art.
Extra Tips for a Professional Look
Want your tote to look extra polished? Keep these tips in mind:
- Use painter’s tape for clean edges and geometric designs
- Practice on scrap fabric before painting the actual bag
- Keep a steady hand by resting your wrist on the surface
- Limit your color palette for a cohesive look
Sometimes, less really is more.
Easy Design Ideas for Beginners
If you’re unsure where to start, try one of these beginner-friendly ideas:
- Polka dots – Simple and playful
- Leaf prints – Use real leaves as stamps
- Abstract brush strokes – No rules, just color
- Initial monogram – Clean and personalized
These designs are forgiving and still look stunning.
Final Thoughts
Customizing a tote bag with paint is one of those DIY projects that’s simple, affordable, and incredibly rewarding. You don’t need fancy tools or advanced skills—just a bit of creativity and a willingness to experiment.
The best part? Every time you carry your tote, you’ll be reminded that you made something truly unique.
Save this idea for later and create your own one-of-a-kind tote bag this weekend!


