A plain tote bag is basically a blank canvas waiting for your creativity to shine. With just a few supplies and a bit of imagination, you can turn an ordinary bag into something stylish, aesthetic, and totally “you.” The best part? You don’t need to be a professional artist to make it look amazing.
Whether you want soft floral patterns, minimalist line art, or bold cute graphics, painting a tote bag is one of the easiest DIY projects that instantly upgrades your everyday style.
Why Painted Tote Bags Are So Popular
Tote bags have become more than just reusable shopping bags—they’re now a fashion statement. A hand-painted tote gives you:
- A unique accessory no one else has
- A sustainable alternative to printed bags
- A fun, relaxing creative activity
- A personalized gift idea for friends or family
The charm lies in imperfections. Even simple designs can look incredibly aesthetic when done thoughtfully.
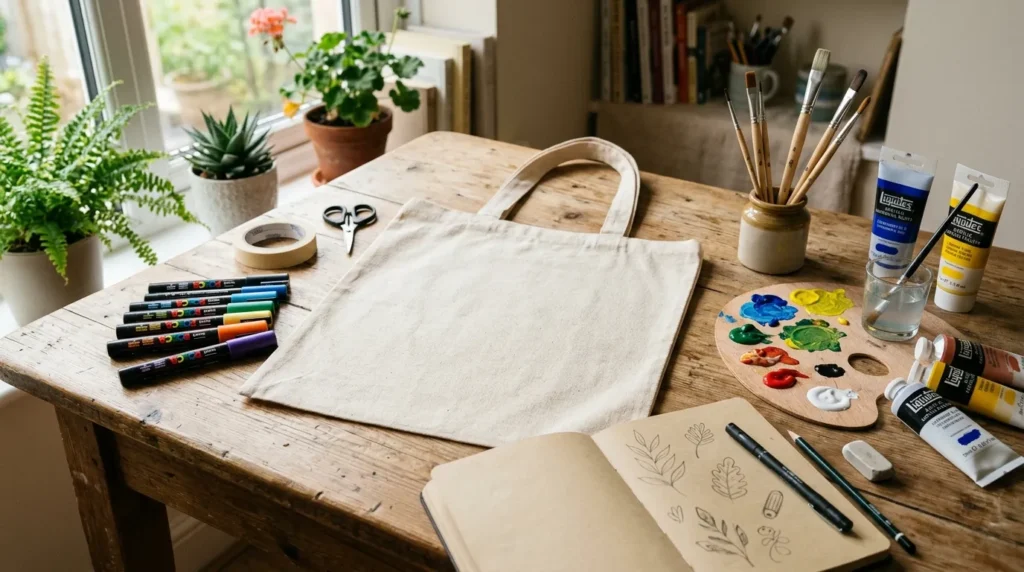
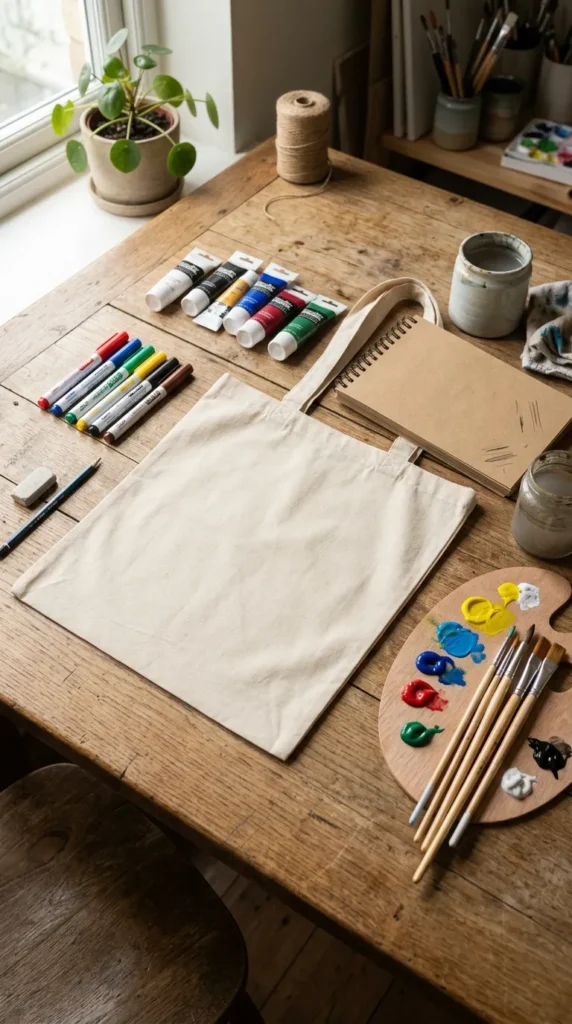
Materials You’ll Need Before You Start
Before jumping into painting, gather your essentials so your process feels smooth and stress-free.
- Plain cotton tote bag (light colors work best)
- Acrylic paints or fabric paints
- Thin and medium paintbrushes
- Pencil or chalk for sketching
- Cardboard (to place inside the bag)
- Fabric medium (optional but helps durability)
- Iron (for heat-setting paint later)

Step 1: Prepare Your Tote Bag the Right Way
Preparation is what makes your design last longer and look cleaner.
Start by washing your tote bag to remove any dust or coating. Let it dry completely. Then:
- Iron the bag to remove wrinkles
- Insert a piece of cardboard inside to prevent paint bleeding
- Lightly sketch your design using a pencil
This step ensures your painting surface is smooth and easy to work on.
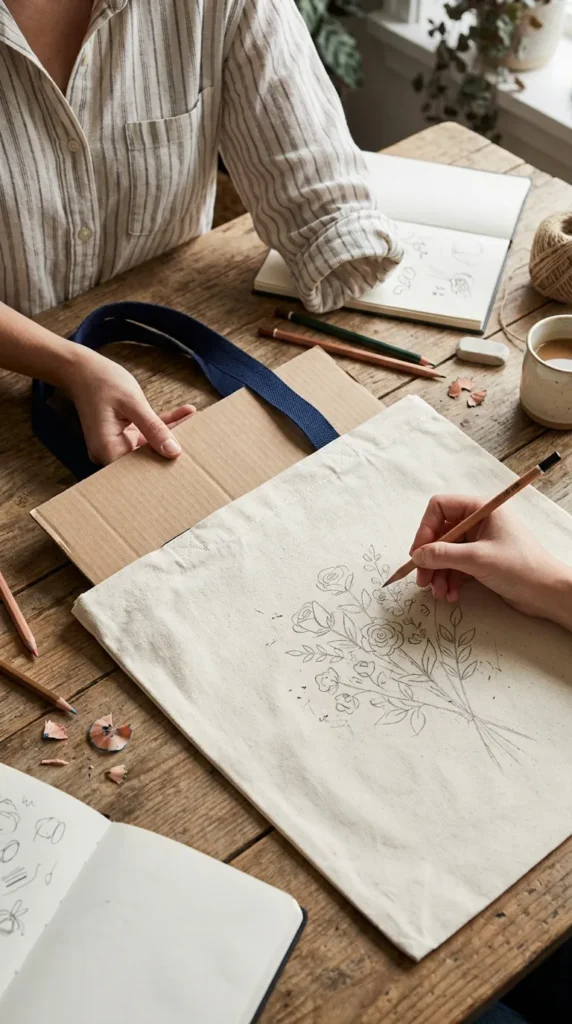
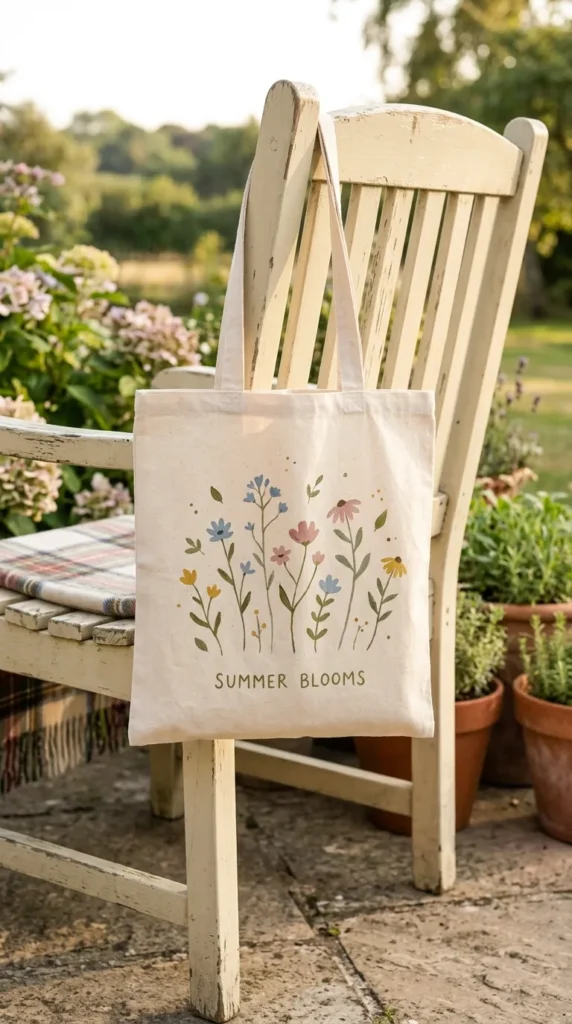
Step 2: Choose a Cute and Simple Design
If you’re aiming for a clean aesthetic look, simplicity is your best friend. Overly complicated designs can look messy on fabric.
Some easy ideas:
- Small flowers scattered across the bag
- Minimalist line drawings (faces, plants, stars)
- Cute quotes or single words
- Geometric shapes or abstract color blocks
Try to stick to 2–4 colors for a more cohesive look. Soft pastel tones often create the cutest result.
Step 3: Start Painting with Care and Confidence
Now comes the fun part—painting!
- Start with lighter colors first
- Use thin brushes for outlines and details
- Fill larger areas with medium brushes
- Let each layer dry before adding another
Avoid rushing. Fabric paint behaves differently from paper, so patience is key.
If you make a mistake, don’t panic—small imperfections often add charm to handmade designs.
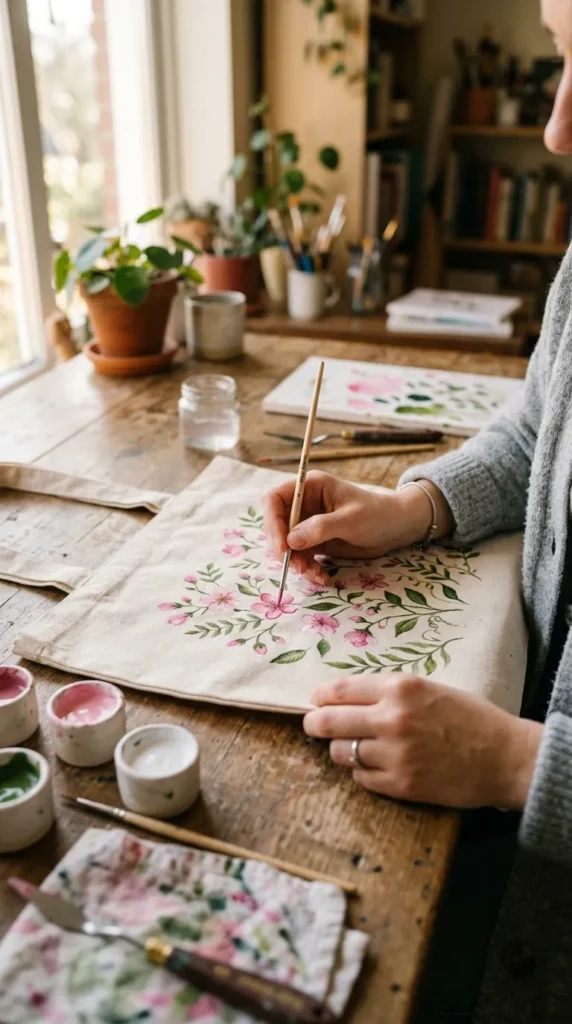
Step 4: Add Details That Make It Stand Out
Details are what transform a simple design into something eye-catching.
You can enhance your tote bag by adding:
- Tiny dots around your main design for texture
- Soft shading using watered-down paint
- Thin black outlines for definition
- Small highlights using white paint
These finishing touches help your design look more polished and professional.
Step 5: Let It Dry and Seal It Properly
Drying is just as important as painting. Place your tote bag in a clean, dust-free area and let it dry for at least 24 hours.
To make your design long-lasting:
- Iron the design on low heat (place a cloth over it)
- Avoid washing for at least 5–7 days after painting
- Wash gently by hand when needed
- Turn the bag inside out before cleaning
These small steps will help your artwork stay vibrant for a long time.
Bonus Tips for a Perfect Cute Aesthetic
If you want your tote bag to look Pinterest-worthy every time, keep these tips in mind:
- Stick to a theme (floral, pastel, minimal, etc.)
- Don’t overcrowd the design
- Practice your design on paper first
- Use soft, balanced color combinations
- Keep spacing intentional and neat
Less is often more when it comes to aesthetic DIY projects.
Final Thoughts
Painting a tote bag is more than just a craft—it’s a creative way to express your personality. Whether you keep it simple or go artistic, the result will always feel special because you made it yourself.
It’s affordable, relaxing, and endlessly customizable. Plus, every time you carry your painted tote, you’ll be showing off a little piece of your creativity to the world.
Save this idea for your next DIY day and start designing your own cute tote bag masterpiece!


